Make sure to start with a clean working area. It is not necessary to have a perfectly clean actuator, but dust and debris can damage the membrane, leading to a failed actuator.
Do not use gloves for this step. The VHB sticks to the glove material and makes working with it difficult.
 |
-
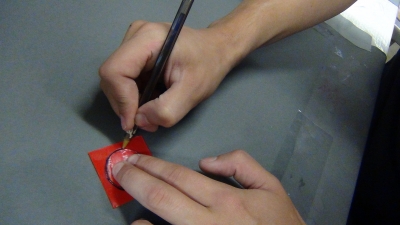
Cut a square of VHB slightly larger than the stencil area
-
Place the VHB with the red side facing down (sticky side up)
-
Draw the outline of the stencil onto the VHB 4910 in pen. Stray pen marks outside the circle are fine.
-
Some pens use an ink which dissolves VHB 4910 and leads to rupture during the prestretching process. The exact types of pens are not known, but generally low-end ball point pens should work.
|
 |
-
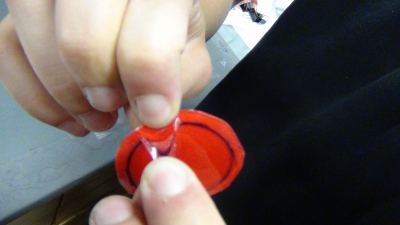
Cut out the stencil
-
This does not need to be perfectly cut out. A little area of tape outside the drawn circle makes attaching to the frame easier.
-
Pay careful attention to not notch the outer edge. This can cause the material to tear when it is actuated.
-
Remove the red backing material from the VHB tape.
-
A good way to remove the backing is to stretch the tape parallel to the surface to separate a small section and then pull perpendicularly (as seen in video below).
|
 |
|
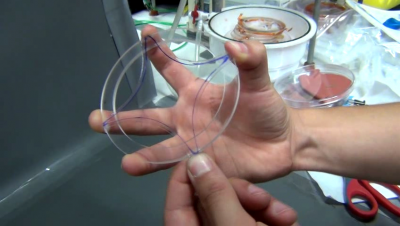 |
- Next, attach the membrane on four opposite points to the acrylic ring, such that the inside of the drawn line aligns with the outer edge of the ring.
- Attach the membrane in between each of the four attached points to the ring, such that there are eight equally spaced attachment points along the ring.
- Go Slow! Rushing the prestretching step can result in torn actuators, which will need to be redone.
|
 |
|
|
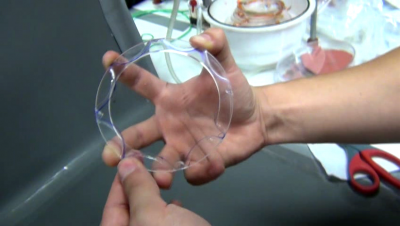
- Now, go along the ring and attach the whole membrane to the ring.
- Align the membrane such that the inside of the drawn line aligns with the outer edge of the acrylic frame.
- If the membrane was not perfectly aligned when first attached, gently remove the section and reattach in correct alignment (as seen in video on left).
|
|
|
