Fabrication: Cardboard Mold
Introduction
A 3D printer is an invaluable tool in the fabrication of soft robots. Unfortunately, these printers are expensive and not generally considered household objects. Those who do not have the luxury of a 3D printer are able to purchase printer time. However, both the cost and the time constraints required to ship 3D print jobs can deter new soft robotics hobbyists from entering the field. This mold is designed for those interested in entering soft robotics. It is used to produce fiber-reinforced actuators and is easily constructed using readily attainable, affordable and often household materials such as cardboard and hot glue.
Overall Design
This mold is perfect for beginners because of its simple geometry and low cost. The mold is constructed out of two distinct parts. The first part of the mold is made up of a central block and a surrounding wall. This produces the flexible top half of the robot. The second part of the mold is created by layering hot glue on a flat surface. It is used to fabricate the bottom inextensible half of the robot. To assemble the robot, both halves are bonded together and wrapped with ribbon.
 |
 |
This type of mold is not limited to individual actuators. The mold geometry can be modified to make more complex robots such as this soft robotic gripper.
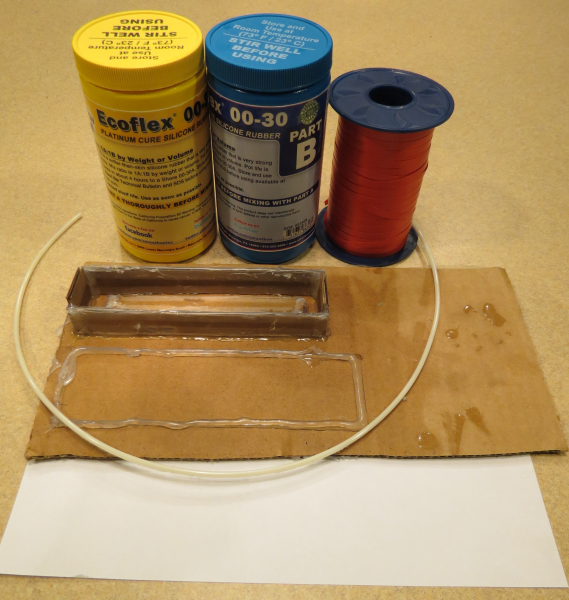
Bill of Materials
Materials and Equipment
 |
 |
 |
| Cardboard | Ecoflex 00-30 silicon rubber (datasheet) | Hot glue gun and hot glue sticks |
 |
 |
 |
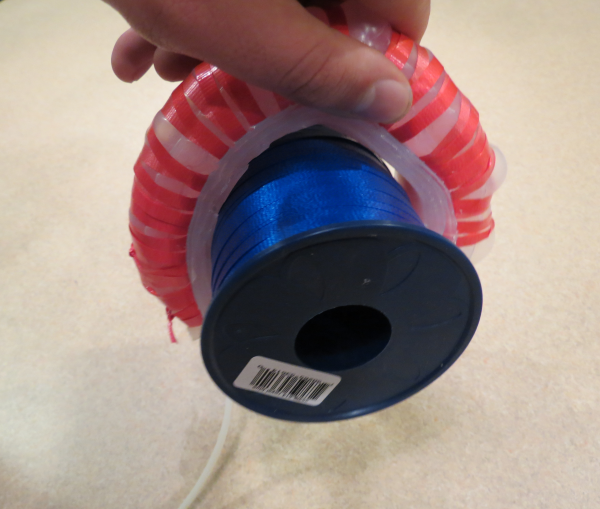
| Tape | 1/8" OD tubing | Curling ribbon |
 |
| Printer paper |
Step 1: Prepare Cardboard
Make Cardboard Mold Components
 |
To make this mold you will need to cut 7 rectangles out of cardboard. 2 - 5" x 0.5"
|
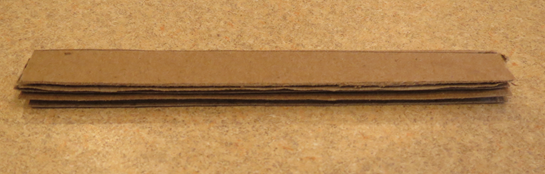 |
Glue the two 5” pieces together to form the central block. |
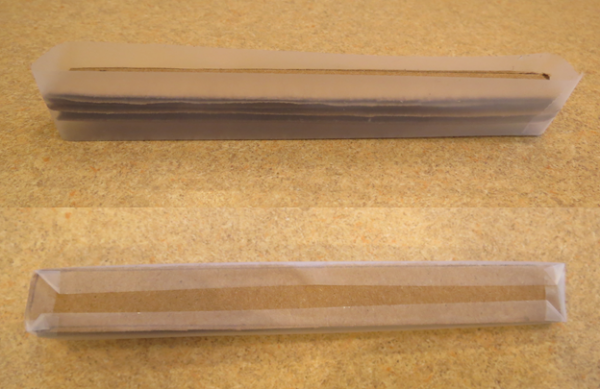 |
To prevent rubber from flowing inside the cardboard, seal the block with tape. Wrap the block with a strip of tape and fold down the edges. |
 |
Smear hot glue on the top and bottom to hold the tape down. Seal the individual 6” wall pieces the same way. |
Step 2: Assemble Mold
Assemble Top Mold
 |
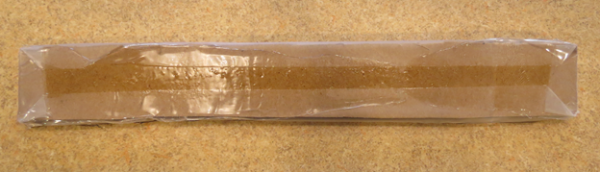
Glue the central block to a sheet of cardboard and trace the bottom with hot glue to prevent rubber from flowing underneath. |
 |
Build the surrounding wall around the central block, with a 0.25” gap between the block and the corresponding side walls and a 0.5” gap between the short sides of the block and the end walls. |
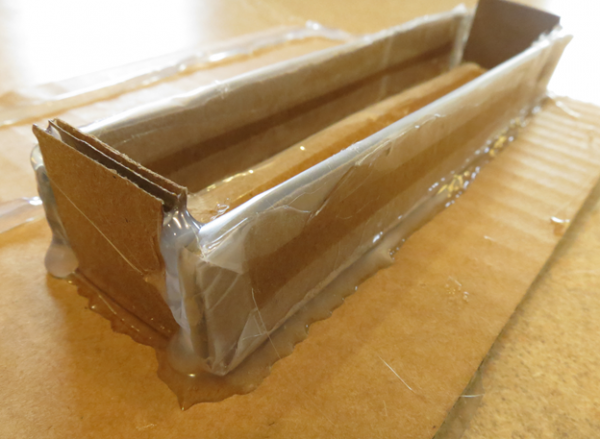 |
To prevent the mold from leaking, seal all joints with hot glue. This should be done at least twice to ensure there are no leaks. |
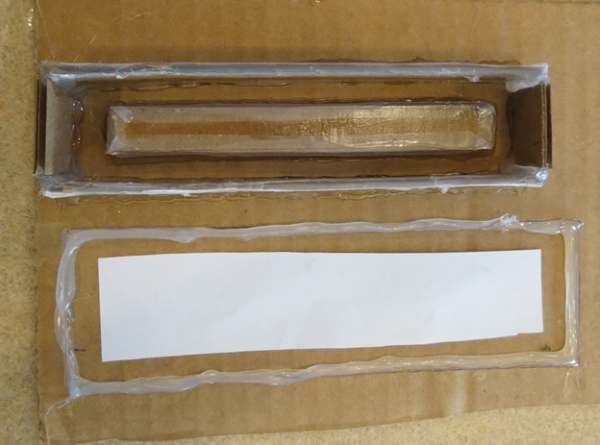
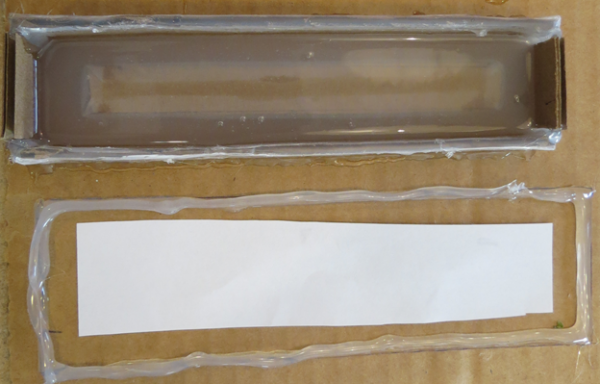
Assemble Bottom Mold
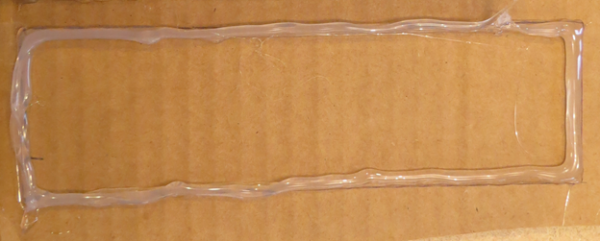 |
Make the bottom mold by tracing a 7” by 1.5” block with hot glue. After the glue cools trace the box again to add a second layer of hot glue. Repeat until the hot glue is stacked about a 0.25” high. |
|
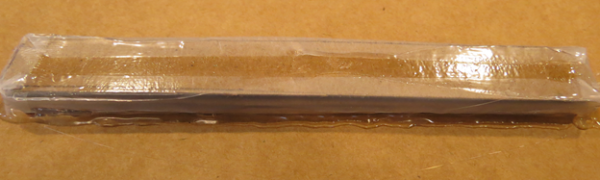
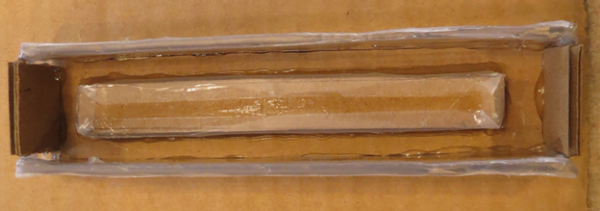
This is what the mold looks like when completed. (The paper is used in the fabrication of the actuator.) |
Step 3: Fabricate Actuator
Actuator Fabrication
 |
Materials: Prepared Cardboard Molds Ecoflex 00-30 Printer Paper 1/8" OD tubing Curling Ribbon |
Pour Elastomer Into Top Mold
 |
To make the flexible top portion of the robot, fill the top mold with prepared Ecoflex so that the center block is submerged beneath roughly an 1/8" of rubber. |
Fabricate Strain Limiting Layer
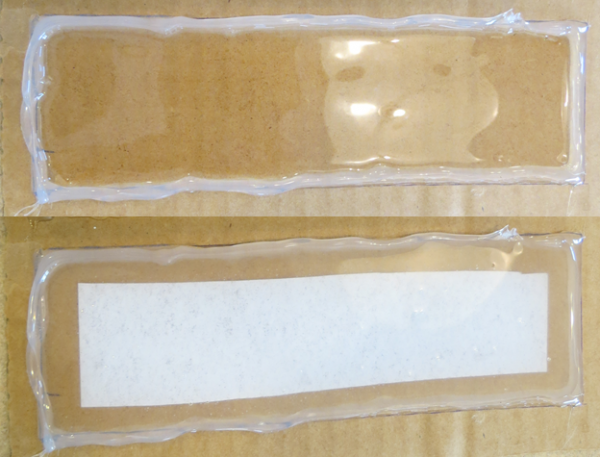 |
To make the bottom flat inextensible layer, cut a piece of office paper slightly larger than the top mold. Then spread a thin layer of Ecoflex across the inside of the bottom mold and place the paper inside. Flatten the paper and fill the mold with additional Ecoflex . Wait four hours for the Ecoflex to cure. |
|
Assemble Actuator
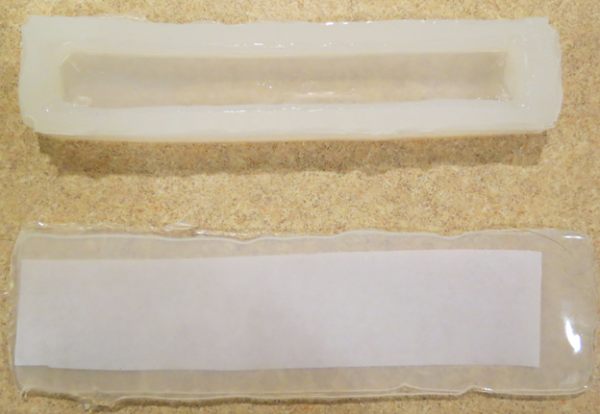 |
After the rubber has cured, remove both pieces from the molds. Inspect the inside of the top half for imperfections. If imperfections are found, paint the inside with Ecoflex to fill them. Allow the rubber to cure. |
|
|
Assemble the actuator by bonding the two halves together with a layer of Ecoflex. Make sure that Ecoflex is on both the outside walls of the actuator in addition to the bottom.
|

Wrap Actuator
 |
After the actuator has cured, wrap it in an inextencible ribbon such as curling ribbon. Wrap the actuator both clockwise and counterclockwise. Once the wrapping is complete, puncture one end of the actuator with the tubing. |
Inflate
 |
Connect the actuator to a pressure source and inflate. It is recommended to add another layer of rubber to the bottom of the robot to prevent the wrapping from moving during operation.
|
|