
Slide on braided mesh
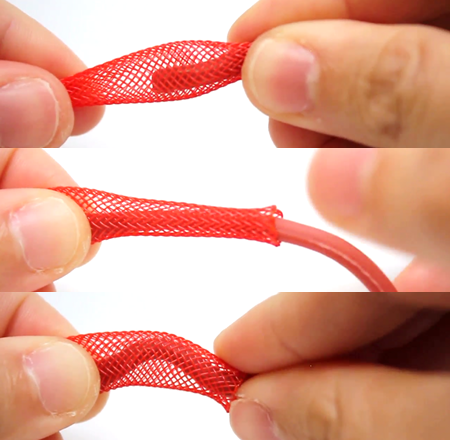 |
The next step is to insert the molded tube into the mesh. Because the tube can only move through the mesh when it is compressed/expanded, you need to use an “inchworming” process [Video: Insert Tube]:
|
 |
It takes some practice and a lot of repetition. Continue until the tube is almost at the closed end of the mesh. |
Insert air hose
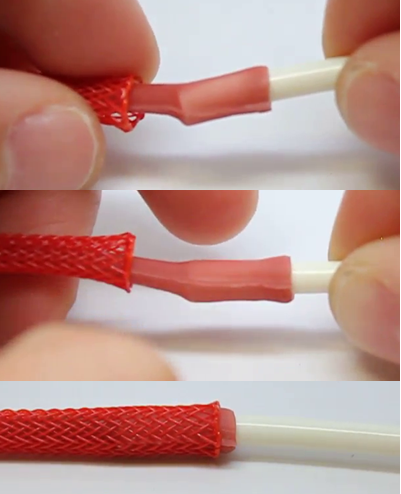 |
Insert the air hose into the molded tubing – there should be about 10mm of overlap. Make sure that it is centered and that the elastomer is not stretched unevenly on one side (like in the first image). Use the “inchworm” method again to insert the overlap region into the mesh. |
Secure hose and mesh
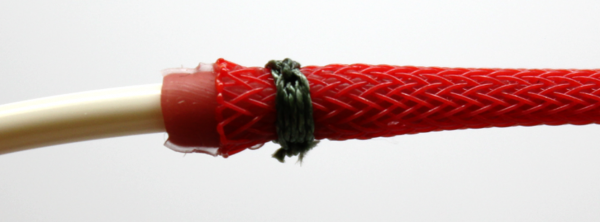 |
Tie the mesh and tube onto the air hose using nylon thread. Make 3-4 wraps around the center of the overlap, then secure with a knot (square knot works well). Tighten the knot with pliers. Trim off the excess thread. |
Coat
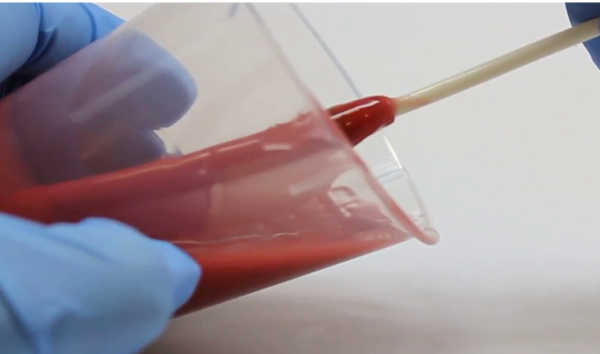 |
Coat the actuator with elastomer, either dipping it or coating it with a brush or gloved finger. Wipe off excess elastomer so that only a thin layer remains, and keep rotating the actuator to keep the coating even all around. Heatgun to cure. |
