Hot Glue Kit
| Hot-Glue-Kit is a soft robotics toolkit developed in the Biologically Inspired Robotics Laboratory which aims to enable the construction, actuation, control and simulation of functional soft robots easily in a very short time. Fast prototyping and easy actuation control helps the users to build their first soft robot designs, observe and analyze their behavior quickly so that they can understand and improve their robots. This kit speeds up the robot building, testing and analyzing process and enables a quick re-design phase for multiple iterations. These features also makes it a very suitable tool for education as by fast building, it lets students explore the opportunities and challenges of soft robotics (Yu et al., 2014) |

|
|
Hot Glue Kit allows 3 main functions: the robot construction, actuation and simulation. Each function can be used independently or together to have a complete soft robotic platform. |
Robot Construction
| The main innovation comes from the usage of hot melt adhesives (HMAs) for the construction of main robot structure. The thermoplastic and thermoadhesive properties of the HMA allow the fast and easy fabrication of soft robot prototypes with complex geometries, continuum limbs and joints by extruding and gluing custom continuum pieces together. HMA has adequate elasticity to sustain soft deformations and support structural weight. |

|
Soft Actuation
| Unlike rigid joints, soft joints have virtually infinite degrees of freedom. Therefore, they require a special actuator to capture most of the motion range. Tendons are intuitive solutions to soft actuation as they are soft continuum structures which can conform to soft joints. Hot Glue Kit provides a small (3x4x5 cm) wireless-controlled motor module that can pull up to 11N of tendon force and can easily be glued or attached on the robot. |

|
Simulation
| The Hot Glue Kit offers a simple simulation library which uses (2nd gen) Sim Mechanics tools from MATLAB to simulate the soft robots and tendon modules. The library allows the construction of soft robots by a combination of many small rigid cubes that are attached to each other with spring damper systems. Tendon and contact forces are also included to capture the interaction between the robot, tendon modules, and the ground. |

|
Video
|
|
This documentation set contains files and instructions to support the design, fabrication, modeling, and testing of a specific soft robot built with the Hot Glue Kit components. We also provide a case study where our kits are used as a part of hands on sessions during the Soft Robotics Week in Livorno, Italy in April 2015. The principles presented here can be used to build various robot designs.
| Some of the information contained in this web site includes intellectual property covered by both issued and pending patent applications. It is intended solely for research, educational and scholarly purposes by not-for-profit research organizations. If you have interest in specific technologies for commercial applications, please contact us here. |
Design
Building with Hot Melt Adhesives
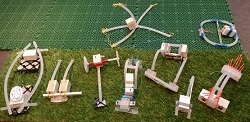
| The main factor for building these robots is the usage of a smart material called hot melt adhesive (HMA) for the overall robot structure. A complete functional soft robot with custom shaped limbs and joints can be built by using this material. Due to its adhesiveness, a mix of materials and items can be glued together to make a "hybrid" robot. Therefore instead of giving design outlines on how to build a single robot with HMA, we will provide the material properties and examples of HMA usage in various robot construction. In this approach, we aim to emphasize the limitless potential for building robots and expect the users to come up with their robot designs. | 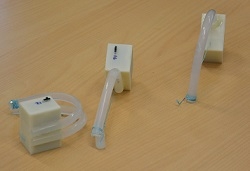 |
 |
Tendon Module Box
| We want users to build their robots in a short time and actuate them with a strong yet simple actuation system. Therefore we designed a small (3x4x5 cm) actuator module which can pull a tendon up to 11N load. This module box runs on a Li-Po battery and has a wireless unit that allows communication with a PC. The microcontroller inside the box can receive several commands to drive the DC gear motor which pulls the tendon that reaches out from the box. | 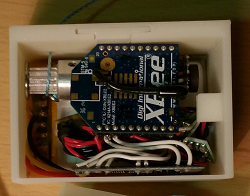 |
Material: HMA
Hot Melt Adhesives (HMA)
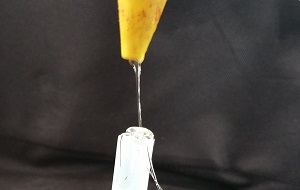
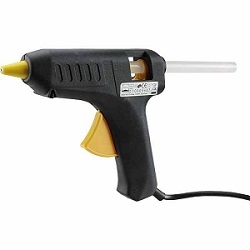
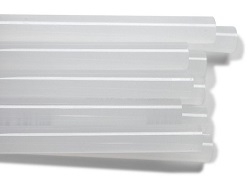
| HMAs, also known as hot glue, are (co)polymer-based thermoplastic adhesives. They form bonds between any solid surfaces by a thermally induced solidification process. Although this process can sound very technical, it is actually no more complicated than the usage of a glue gun to melt down the supplied HMA material into liquid, and wait for less than a minute in room temperature for the liquid HMA to cool down and become solid again. This simple phase transition process is bidirectional and highly repeatable. That is why we are exploiting this key feature of HMA to build soft robots and add and remove parts from them if necessary with just a couple of HMA sticks and a glue gun. In short, while hot liquid HMA glues parts together, the cold solid HMA becomes the soft elastic robot body. |
A hot glue gun can easily melt down the HMA by heating up the glue stick to 150◦C. HMA is adhesive in hot liquid phase and a strong elastic in cold phase. |
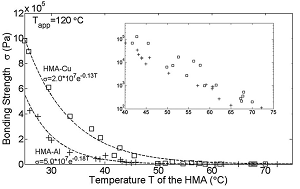
| Depending on the temperature, HMAs have three different phases: first, at room temperature (around 25◦C), the material is a viscoelastic solid and has no adhesiveness. That means HMAs cannot form a new bond between surfaces, while an existing connection can be maintained with a high bonding strength. Second, at a temperature around a softening point (around 82-92◦C) the material starts to become viscoplastic and adhesive. It is difficult to maintain an established connection since the bond is dramatically weakened by the low shear stress. And third, at a higher temperature than the melting point (generally 170◦C) the cohesive strength becomes so low that the material transforms into a low-viscosity fluid. |
Bonding strength of HMA to copper and aluminum with respect to temperature (adapted from Wang et al. 2012) |
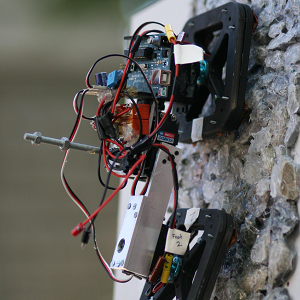
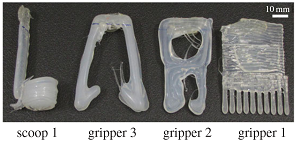
| In the Biologically Inspired Robotics Laboratory, we have been using HMA extensively in a very large range of robotic applications and projects. From a climbing robot which uses it as a bonding material to attach to different surfaces (Wang et al. 2013), to robots which uses it as a structure material to print tools to carry objects (Wang et al. 2014) and tools to sense different stimuli (Nurzaman et al. 2013). We also have showed that complex robots can be built with this material within the time limits of our previous university lectures (Yu et. al 2014). It is up to the imagination and creativity of the user what else can be done with HMAs! | |
|
Climbing robot which uses HMA to stick to rock walls (adapted from Wang et al. 2013) |
Tools made out of HMA to carry different objects such as water, wooden cubes and grains of rice (adapted from Wang et al. 2014) |
Tendon Module Box
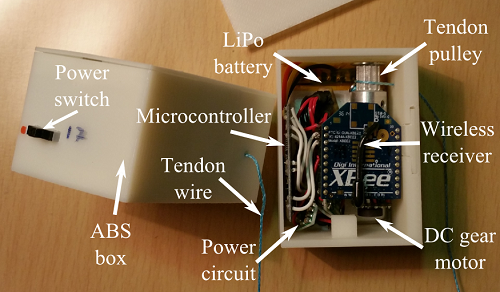 |
| In order to actuate your robots, the Hot Glue Kit provides a wireless actuator module which can be attached on the robot for tetherless applications. The module box can be classified into three main components: the main casing or the "box", the electronics, and the control protocol whose details can be found in the corresponding pages. All of these designs are tested and proved to be functional, and sufficient to actuate your robots with HMA material. However, users are free to change the shape of the box, the components of the electronics and the control protocol if they want to. In this documentation we are providing the design details of our tendon module box. |
Box CAD
Main Design
| The module box is designed to contain all the electronics and mechanical parts of the actuation system of the Hot Glue Kit. The box is composed of three parts: the container box, the motor holder and the lid. In order to increase the user friendliness, the module box is designed to be assembled and disassembled without any screws. This documentation provides the design of these parts which are developed in Autodesk Inventor and the necessary files can be found here. | 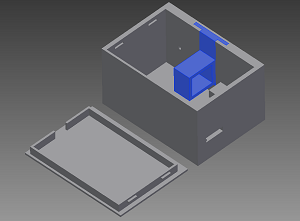 |
Container Box
| This box is a rectangular container which will define the main geometry of the tendon module. It has an approximate width of 4 cm, depth of 5 cm and height of 3cm. These values are mainly determined by the LiPo battery size and the stacking of electronic components. Considering the tendon pulley and the tendon wire will require enough space to avoid tangling, this size of the box can be considered small for its intended usage. | 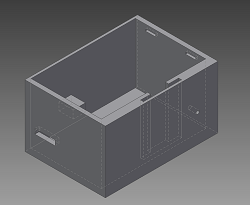 |
| The interior configuration aims to have the LiPo battery on the bottom, the electronic parts on its top, and the DC gear motor on the level with the highlighted wall section shown on the right. This section has indents so that the motor holder part can easily slide through while holding the motor hanging on the wall. The tendon cable, which is attached to the pulley at the end of the motor shaft, goes through the hole on the wall which is located next to the motor holder hole. | 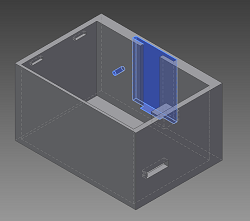 |
| The remaining important features of the container are the power switch outlet and the lid placing indents. The highlighted rectangular hole on the lower part of the front wall is designed to let the power switch go through while keeping the rest of the electronics hidden behind the container walls. In order to avoid using screws to close the lid, two indents which are placed on the opposite side of a support column are placed as highlighted on the picture. These allow the lid to slide through the indents and stand securely on the support column. | 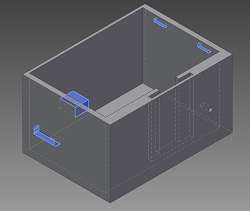 |
Motor Holder
| This part is designed to secure the selected DC gear motor (Pololu microgear motor) to the wall while holding it above the electronics and its pulley shaft in line with the tendon hole on the container box. The highlighted section is carved out so that the motor body can fit. As shown in the container box section, the vertical wall of the motor holder slides through its corresponding section and fixes the motor. The geometry of the motor holder is designed to eliminate the motor's unwanted motions in the box in cases of loads on its shaft. | 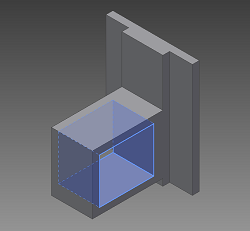 |
Lid
| The lid is a simple design which fits on the top of the container box. The most important feature of the lid is its extensions (highlighted on the image) on its lower front wall which allows it to slide into the necessary indents on the container box. With the spacing left on the opposite wall, these avoid the usage of screws while placing or removing the lid from the box. | 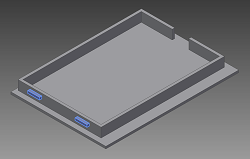 |
Electronics
Overview
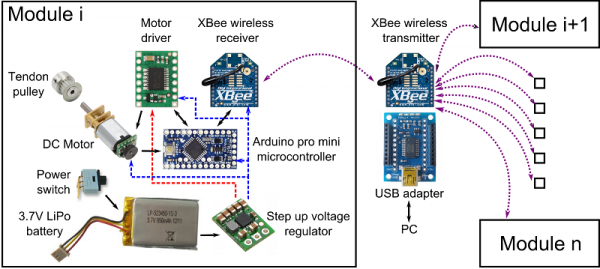 |
| We have come up with a functional set of electronic components for the Hot Glue Kit module box so that the users can perform untethered, long lasting, programmable, and strong actuation for their soft robots. The figure above shows the main overview of the electronics and control with the details of the box contents. A single module contains a 3.7V LiPo battery, a power switch, a 5V Step up regulator, a brushed DC gear motor, a pulley, a microcontroller, a motor driver and a wireless receiver unit. In addition to these, another wireless transmitter and a usb adapter are required to establish connection with a PC so that the user can send and receive messages to the actuation module. With such a setup, the user can control multiple actuation modules with a single transmitter. The details of how to control modules are given in the Control section. |
Battery and Power Distribution
We wanted our actuation module to be free of power cables so that the user can attach them on their robots and fully explore the interaction between the robot and the environment. Also long lasting operation was a necessity to get the best out of the robots. Therefore we have selected a 3.7V 980mAh rechargeable LiPo battery to power up the entire system. All the electronic components in the box require 3.7V to operate except for the DC motor which requires 5V for full speed operation. That is why 5V step up regulator is required to generate the necessary motor voltage. The figure above shows the logic circuit voltage line with blue and motor voltage line with red dashed lines. Within a continuous active motor operation a single battery can last up to 6 hours with this setup.
Motor and Motor Driver
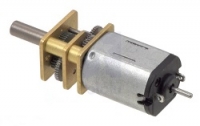
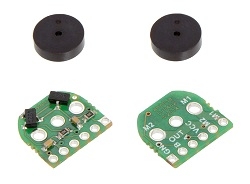
In order to pull the tendons, we use a brushed DC gear motor with an extended shaft. This motor can pull up to 11N of load without stalling and rotate 320RPM freely. A magnetic encoder is placed on the extended shaft to provide motor shaft position information in order to establish a feedback loop for a motor position control strategy. To control the DC motor within a feedback loop, we selected a sufficient motor driver unit which receives commands from the microcontroller. This design gives us the ability to control our motor like a servo motor, but with higher torque output and endless revolutions.
Wireless Communication
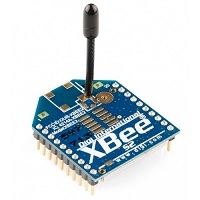
Another important design choice was to enable programmable actuation as users will need to change their actuation depending on their robot designs. That is why we used an XBee S2 modules for wireless communication between the actuation modules and the user. With a single XBee transmitter that is connected to a PC with a USB adapter, users can send commands to single or multiple modules which contain an XBee receiver each. This allows the instant control of multiple modules with a single command, however it should be noted that XBees can be interfered with all the radio signals which might slow down the communication speed. A deeper insight is given in the control section about wireless communication with XBees.
Microcontroller
In order to receive commands from the user, collect motor position from the encoders and drive the motors accordingly, we used a 3.3V 8MHz Arduino Pro Mini microcontroller.
Control
Mesh Network Setup
| The current selection of XBees allows the establishment of a mesh network which means a communication between multiple devices that are connected to an XBee. In XBee terms, this means that there is a single coordinator (transmitter) which can communicate with all the routers (receivers) within the same wireless network. In the Hot Glue Kit perspective, this means that the user can communicate with multiple actuation modules with a single XBee transmitter connected to a PC. The free software XCTU, allows users to configure their XBee components to define the network ID, router and coordinator roles and many other communication properties. | 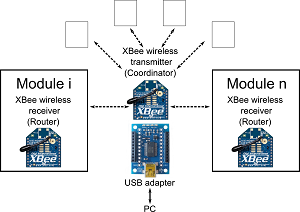 |
|
There are multiple points that require attention due to the design choice of mesh networks with XBees.
|
|
Actuation Command Protocol
When the transmitter (coordinator) XBee is connected to a PC via USB, a serial connection needs to be established. Details about this connection can be found in the XBee and Arduino subsection. The communication with the module is very simple: the user sends text commands from the PC, and the module executes and responds. In order to increase the strength of the communication, we established a handshake protocol. This means that for every command user sends from the PC, the module has to answer with a proper respond so that the user can be sure that the command is received.
There are two main types of actuation control for Hot Glue Kit modules: direct mode and alternate mode. In direct mode, the user specifies the amount of turns for the DC motor to turn. As there is a position control implemented, the module will rotate the motor to the desired number of turns and it will stop. The other mode is the alternate mode, where the user specifies to target turn amounts and the motor will continuously alternate between these target values, which generates a oscillatory pull-release behavior. In the current setup users can only define the amplitude of this motion, not the frequency as there is only a motor position control implemented.
Users can also set phase timers if they want to set a phase difference between their modules. They simply command one module to wait a certain time before it starts executing the motor rotation command.
All the necessary commands and the module responses can be found here.
Motor Position Control
We implemented a simple PD controller for the motor position control in the modules, where:
Motorout = Kp (Poscurrent - Postarget) + Kd (Motorvelocity)
The proportional (Kp) and derivative (Kd) gains are manually tuned. The current motor position (Poscurrent) is read from the optical encoders while the target position (Postarget) is defined by the user as the target turn amount. The motor velocity (Motorvelocity) is calculated as the average of position change in the last 10 steps of the microcontroller loop. The output (Motorout ) is mapped to a proper PWM signal to be sent to the motor driver.
Load Control
Currently there are no additional sensors in the circuitry to detect the load on the tendon cable and the motor shaft. As an extensive load might damage the power circuitry, the motor driver and the battery, we implemented a coded load detection mechanism to release the motor when an overload is detected.
The optical encoders provide 12 counts per motor shaft revolution, and as the motor gear reduction rate is 100:1, this means that a complete motor turn should yield 1200 counts. When there is an overload, the motor stalls which means that it will not be able to rotate any more. By looking at the counts, we decide that there is an overload if (1) there is more than half a turn left until the target turn position and (2) the motor velocity is zero.
Fabrication
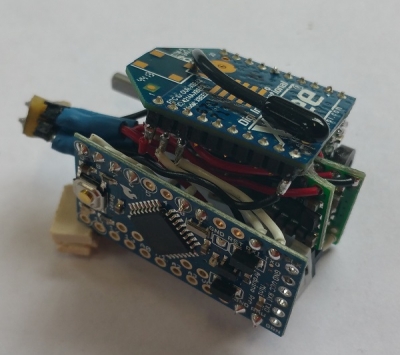
In this section, we will present the fabrication of a single actuation module. The actuation module is composed of four main components: the source code of the running mechanism, the main electronics circuitry, the tendon and pulley mechanism, and the covering container box. Follow the steps in this section to learn how to build all of these components.
 |
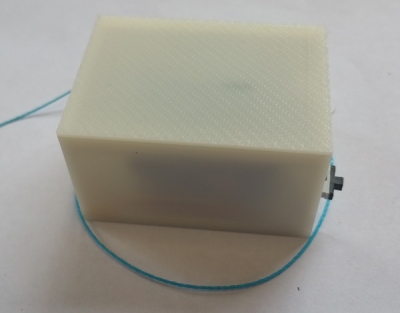 |
| The main circuitry inside the actuation module | The complete box with the electronics and tendon mechanism inside. |
Bill of Materials
This section provides you information about the materials used in the project with links to the suppliers. Please note that most of the suppliers listed here are from UK, but the materials can be found globally. You can find the complete bill of materials here.
Robot Construction
|
|
|
|
Pattex Glue Gun |
Glue Sticks |
Please note that a glue gun and glue sticks are already enough to build a soft robot. But feel free to use any other supporting material to make your funkier!
Actuation Module
|
|
|
|
|
Pololu 100:1 HP Micro Gear Extended Shaft Motor |
Pololu Magnetic Encoders |
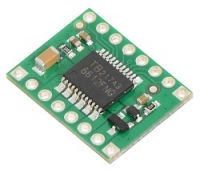
Toshiba TB6612FNG Motor Driver Carrier |
|
|
|
|
|
3.7V 980mAh Rechargeable LiPo Battery |
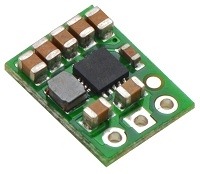
5V Step-up Voltage Regulator |
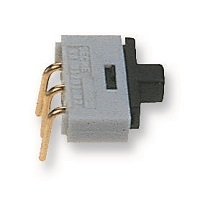
Power Switch |
|
|
|
|
|
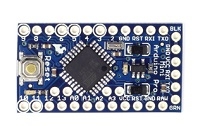
3.3V 8 MHz Arduino Pro Mini |
XBee (Zigbee) S2 |
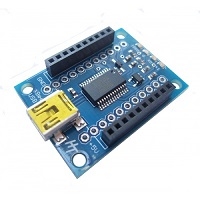
XBee USB Adapter |
 |
 |
 |
|
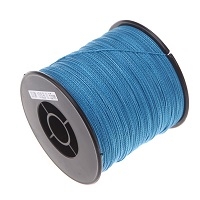
0.55mm Dyneema Fishing Line |
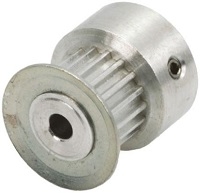
3mm Shaft Belt Pulley |
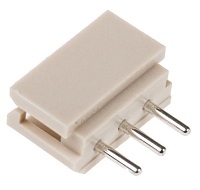
Molex SPOX 5267 Housing |
|
|
|
|
|
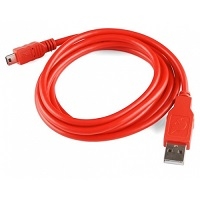
Mini USB Cable |
26AWG Black, Red, White Wire |
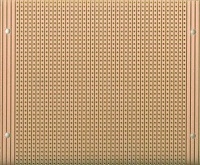
Prototyping Board |
|
|
||
|
Breakaway Pins |
Tools
 |
 |
 |
|
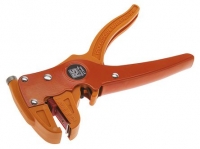
Wire Stripper |
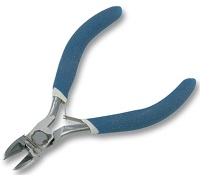
Wire Cutter |
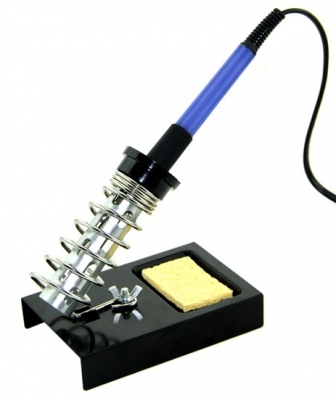
Soldering Iron |
|
|
||
|
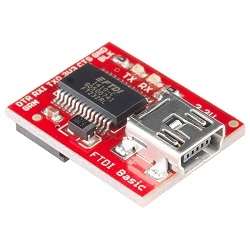
FTDI 3.3V Programmer |
Equipment
 |
 |
 |
|
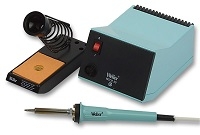
Soldering Station |
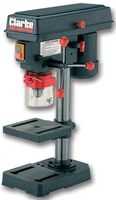
Bench Drill |
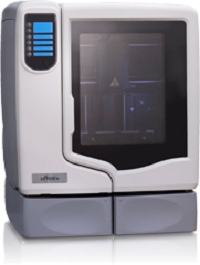
Stratasys uPrint 3D Printer |
Step 1 - XBee and Arduino
XBee Setup
In this step we will configure one receiver (router) and one transmitter (coordinator) XBee. We will use free software XCTU for this configuration. Users can find more information about XBee programming in this software's website.
|
1. Plug in the XBee to the USB adapter and plug it to your PC. After your computer finishes downloading the necessary drivers run XCTU. 2. When purchased, all XBee S2 comes with Baud rate 9600 and router as default. Add the radio module by searching the COM ports with 9600 baud rate devices. 3. When you add the radio module, it will appear on the left part of the XCTU screen. Click on the radio module and software will display all the details about the device on the right. |
 |
 |
|
4. As the first XBee device will be the router (this will be the one we will put in the module box), we will leave it as a Router AT and continue configuring other necessary details. 5. We need to change four important parameters for this Router XBee: PAN ID, DL (Destination Address Low), BD (Baud Rate) and RO (Packetization Timeout). Find these parameters and change them to values in order: 3039, 0, 115200 and 0. 6. After changing these values click the write button and finish programing this XBee. Unplug this router XBee from the adapter. |
 |
|
7. Plug the other XBee which will become the coordinator or the transmitter that will stay attached to your PC to send commands to the module. 8. Add the radio device like the previous one and click on it to display its settings. 9. As by default each XBee is set to be Router AT, we will change this one to a Coordinator AT. Click the update firmware button to see the list of possible firmwares. Find ZigBee Coordinator AT from that list and click finish to update the device. |
 |
|
10. When you click to update the firmware, the device will be re-programmed to be a Coordinator AT. You can see that the symbol of the device on the left will be changed. 11. Similar to the previous case, we will update some values of this coordinator device: PAN ID, DL (Destination Address Low), BD (Baud Rate) and RO (Packetization Timeout). Find these parameters and change them to values in order: 3039, FFFF (default value), 115200 and 0. 12. Click on write settings button and finish the update. You can leave this XBee connected to your PC |
 |
| Note: Notice that we have selected the PAN ID and Baud Rate same for both devices. PAN ID is the network ID, this should be the same for all the other modules you want to command with your coordinator. Baud Rate should also be the same so that data transfer can be done with same transmit settings. | |
Arduino Programming
In order to program our Arduino Pro Mini, we will use the free software from Arduino. The source code that will upload to our arduino can be found here.
|
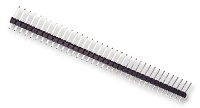
1. Plug your FTDI programmer with the mini USB cable to your PC. Your operating system will download the necessary drivers for the FTDI chip. 2. Solder 5 pin headers to your Arduino's programming pins. 3. Connect the FTDI chip to the Arduino's soldered pins and wait for your operating system to download the necessary drivers. 4. Run the Arduino software. |
 |
|
5. Open the Arduino source code we provide. 6. Select the "Arduino Pro or Pro Mini (3.3V, 8MHz) w/ ATmega328" board from Tools-> Board 7. Select the COM port where the FTDI is attached from Tools->Board 8. You can find the unit ID of your module in the code line 65 as "myID" and line 66 team ID as "allID". By default we set myID to M1 and teamID to MA1. If you want to build more modules, change myID to M2, M3 and so on. 9. Upload the code by clicking the upload button. 10. After the successful upload, unplug the Arduino from the FTDI board. |
 |
| 11. IMPORTANT: As we are going to use XBee with the Arduino, we will have to solder it to the TX and RX pins of the Arduino board. If you will need to re-upload a code to your Arduino, you have to make sure that the TX and RX pins are desoldered from the XBee device. Otherwise your code will not upload properly as FTDI board is also using these pins to upload data to Arduino. | |
Serial Communication
| When the coordinator XBee is connected to the PC, any serial communication software which can send and receive data from the serial (COM) ports of the PC can be used to communicate with the modules. XCTU software allows the bi-directional serial communication. Users are also free to use serial communication in MATLAB and can start with this sample code. |  |
Step 2 - Soldering - Part 1
Circuit Pinout
|
|
| The figure above shows the pinout of the circuitry in the actuation module box. A protoboard is distributing the power to the logic circuits. All the Vin and GND of the logic circuits are connected to the corresponding pins on the protoboard. As the motor can drive high current, its power route is separated from the logic circuit. Motor gets the positive voltage from the step up regulator and its negative voltage (GNDM) is connected to GNDM on the protoboard. M1 and M2 pins are directly soldered to the motor's own positive and negative pins when the encoder is placed on the extended shaft behind the motor. |
Step 1
|
1. Make sure that Arduino's programming pins are desoldered after uploading the code. 2. Solder Tx0 pin of Arduino to Din pin of XBee ( wire length: 3cm ) 3. Solder RXI pin of Arduino to DOut pin of XBee ( wire length: 3cm ) |
 |
|
4. Make sure that the unused pins of XBee is either insulated or cut off. In our implementation we cut the unused pins to avoid unwanted shorts between open pins. 5. Place a plastic tape on the metal surface behind the XBee to avoid short circuits. |
 |
Step 2
|
1. Solder PWMA pin of motor driver to Pin 6 of Arduino (wire length: 4 cm) 2. Solder AIN2 pin of motor driver to Pin 7 of Arduino (wire length: 4 cm) 3. Solder AIN1 pin of motor driver to Pin 8 of Arduino (wire length: 4 cm) 4. Solder STBY pin of motor driver to Pin 9 of Arduino (wire length: 4 cm) 5. Solder AO1 pin of motor driver to a 3cm length cable 6. Solder AO2 pin of motor driver to a 3cm length cable |
 |
Step 3
|
1. Carefully place the encoder to extended shaft of the motor. 2. Solder M1 and M2 pins of the encoder to the motor pin headers. 3. Place the magnetic disk on the extended shaft until a small gap between the sensors on the encoder. 4. Solder Out B of encoder to Pin 2 of Arduino (wire length: 5 cm) 5. Solder Out A of encoder to Pin 3 of Arduino (wire length: 5 cm) |
 |
Step 4
|
1. Cut a 4x2 slot from the prototyping board. 2. Make a triple branch with wire lengths 3,4.5 and 4.5 cm for logic Vin. Solder it to a breakaway pin and to (1,1) of proto-board. 3. Make a double branch with wire lengths 4 and 4.5 cm for logic Vin. Solder it to a breakaway pin and to (2,1) of proto-board. 4. Make a triple branch with wire lengths 4, 4.5 and 4.5 cm for logic GND. Solder it to a breakaway pin and to (1,2) of proto-board. 5. Make a double branch with wire lengths 4 and 4.5 cm for logic GND. Solder it to a breakaway pin and to (2,2) of proto-board. |
 |
Step 5
|
1. Cut out the middle pin of the molex connector and the leftmost pin of the switch. 2. Solder the pin on the flat edge of molex to rightmost pin of the switch (wire length: 3cm) 3. Solder a 5cm length wire to the pin on slope edge of molex. 4. Solder a 5 cm length wire to the middle pin of the switch. |
 |
Step 2 - Soldering - Part 2
Circuit Pinout
|
|
| The figure above shows the pinout of the circuitry in the actuation module box. A protoboard is distributing the power to the logic circuits. All the Vin and GND of the logic circuits are connected to the corresponding pins on the protoboard. As the motor can drive high current, its power route is separated from the logic circuit. Motor gets the positive voltage from the step up regulator and its negative voltage (GNDM) is connected to GNDM on the protoboard. M1 and M2 pins are directly soldered to the motor's own positive and negative pins when the encoder is placed on the extended shaft behind the motor. |
Step 6
|
1. Solder the 4.5cm long Vin wire from the triplet to the Vin pin of Arduino. 2. Solder the 4.5cm long GND wire from the triplet to the GND pin of Arduino. 3. Solder the 4.5cm long Vin wire from the triplet to the Vin pin of motor driver. 4. Solder the 4.5cm long GND wire from the triplet to the GND pin of motor driver. |
 |
Step 7
|
1. Solder the 4.5cm long Vin wire from the couple to the Vin pin of step up regulator. 2. Solder the 4.5cm long GND wire from the couple to the GND pin of step up regulator. 3. Solder VOut pin of step up regulator to VMOT pin of the motor driver (wire length: 3cm) |
 |
Step 8
|
1. Solder the 4cm long Vin wire from the couple to the Vin pin of encoder. 2. Solder the 4cm long GND wire from the couple to the GND pin of encoder. 3. Solder the 3cm long wire from the AO1 pin of motor driver to the M1in pin of encoder. 3. Solder the 3cm long wire from the AO2 pin of motor driver to the M2in pin of encoder. |
 |
Step 9
|
1. Solder the 5cm V+ wire from the power switch to (4,1) pin on the proto-board. 2. Solder the 5cm V- wire from the power switch to (4,2) pin on the proto-board. 3. Solder GNDM pin of motor driver to (3,2) pin on the proto-board (wire length: 3.5cm) |
|
Step 10
|
1. Solder the 3cm long Vin wire from the triplet to the Vin pin of XBee. 2. Solder the 4cm long GND wire from the triplet to the GND pin of XBee. |
 |
Final

Your circuit should look like this if this tutorial was clear enough !
Step 3 - Pulley and Tendon
Step 1
| 1. Drill a 1.5mm radius hole on the beginning of the belt space of the pulley. | 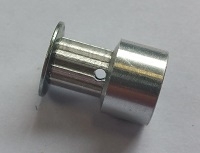 |
Step 2
|
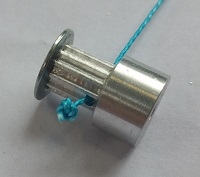
1. Cut a piece of wire from the Dyneema tendon line whose length depends on your preference. 2. Put the tendon through the hole you opened on the pulley. 3. Make a knot large enough to block the hole and avoid the tendon to go loose when its pulled. |
 |
Step 4 - Fitting in the Box
Step 1
|
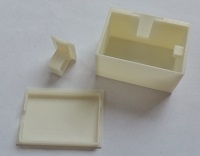
1. Use the STL files we provide to 3D print the three main components of the module box. 2. Depending on the resolution of your 3D printer, you might need to file the sides of the motor holder piece if it does not slide easily through its section on the container box wall. |
 |
Step 2
|
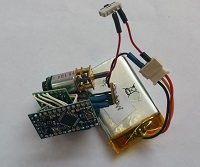
1. Connect the LiPo battery to the molex connector in your circuit. 2. Switch on the power switch to make sure the circuit is working. Note: If you see a smoke or a smell burning, take the battery out immediately and check if your circuit is correctly done. |
 |
Step 3
|
1. Slide the motor through the motor holder component. Make sure the motor cannot move freely within its hole. If necessary stick pieces of paper to hold the motor in place. 2. Use a 1mm Allen Key to screw the pulley on to the motor shaft. |
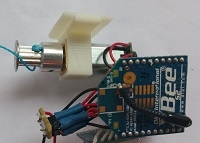 |
Step 4
|
1. Place the battery into the container box. 2. Slide the power switch through its dedicated hole on the back side of the container box. |
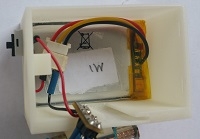 |
Step 5
|
1. Place the tendon wire through the hole on the side of the container box. Avoid tangling. 2. Make sure the wires connecting to the battery are flat on the battery surface to make space. |
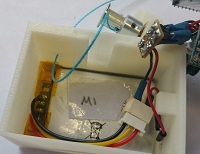 |
Step 6
|
1. Place the motor holder on the designated slides on the container box. 2. Make sure the tendon wire, circuitry and the wires can be pushed into the box without any tangling. |
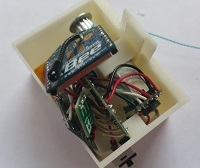 |
Step 7
| 1. Push the whole circuit along with the motor holder into the container box. The container box is large enough to contain all of these components without them poking out from the top of the box. | 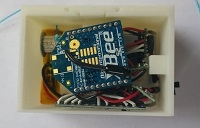 |
Step 8
|
1. Place the lid on the container box making sure that the extensions on the lower surface of the lid are facing the inlets on the front wall of the container box. 2. Slide the lid forward and then and push it downwards to shut the container box. |
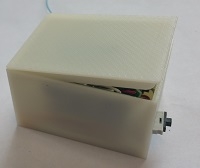 |
Final
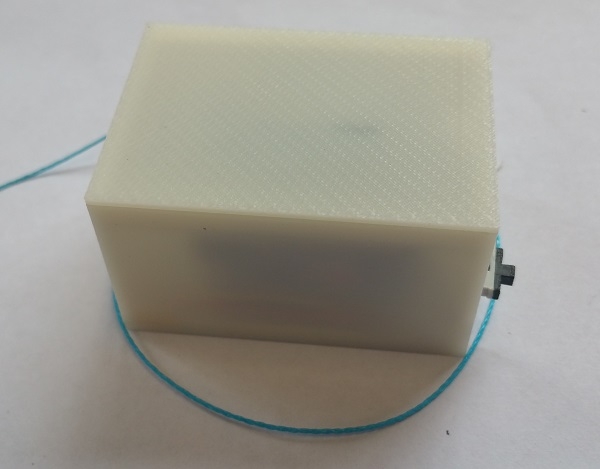
Your actuation module should look like this at the end of this tutorial !
Modeling
Simulation
| We introduce a simple simulation tool to model the dynamics of soft bodies with impacts and friction. A mass-spring method is implemented in Mathworks rigid multibody simulation environment SimMechanics. The “SoftRobot.slx” library available on this page helps to model hybrid systems of soft and rigid bodies to create virtual robots within minutes. The intuitive flowchart like structure of SimMechanics helps to easily build and extend models without prior knowledge of soft body dynamics, while keeping the ability to implement further system properties or more complex physical laws. We suggest users to go through the tutorial presented on this page. It will only take a couple of minutes and will clarify the basic functions of the “SoftRobot.slx” library. |
 |
Tutorial
This tutorial gives users a quickstart to the “SoftRobot.slx” library. Download the library in the subsequent link. Please note that your version of Matlab must be more recent than R2012a. You can find useful simulation examples in the “Soft Robot Library/Examples” folder. Click here to download the library.
|
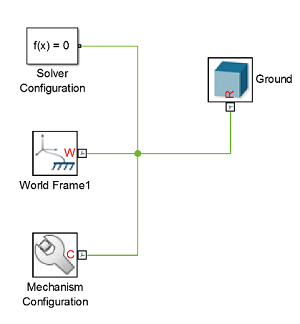
1. Extract the files in the downloaded “Soft Robot Library” folder and double click on the “SoftRobot.slx” file. It may take a while to start Simmechanics. 2. Now open the “NewModel.slx” file, located in the “Soft Robot Library” folder. This will automatically initialise the parameters in the “SoftParameters.m” file. If you wish to create a new model yourself, make sure to run this file before running the simulations. 3. Every simulation starts with the three main blocks “Solver Configuration”, “World Frame”, and “Mechanism”. They are already located in the “NewModel.slx” file. |
|
|
|
|
|
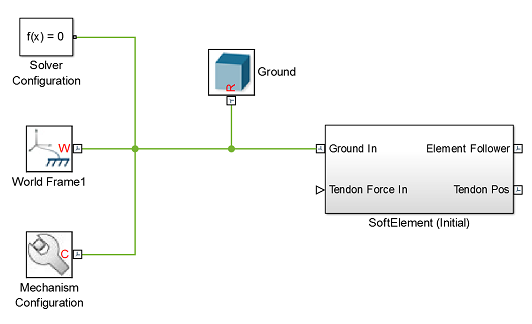
4. Drag and drop a ground block from the “SoftRobotics.slx” library to the “NewModel.slx” and connect as shown in the figure above. 5. The first element that is attached to the ground must be labelled with the appendix “(initial)”. Add and connect a “SoftElement (Initial)” element as depicted in the figure below. |
|
|
|
|
|
6. Any element which is connected to another element must be labelled with the appendix “(Follower)”, i.e. “SoftElement (Follower)”. Add three follower elements to the system according to the figure below. |
|
|
|
|
|
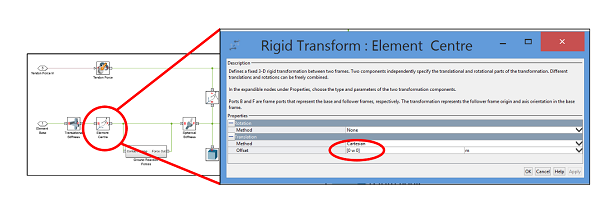
7. Start the simulation by clicking the Run button. 8. Change the relative position of the second element to the third element by double clicking on the third element and then double clicking the “Element Centre” block. Change the values in the translation offset according to the figure below. Run the simulation again and observe the result. |
|
|
|
|
|
9. Add a tendon force between the initial and the last follower element as shown in the figure below. To do this, drag and drop the “TendonForce Direction” to the current file and connect accordingly |
|
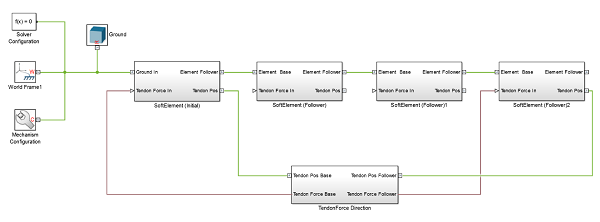 |
|
|
10. Tendon forces can be applied to arbitrary positions on the element relative to the centre of mass. To change the position open the according element by double clicking on it and change the value of the translation offset in the force attachment point block (similar procedure to step 8). 11. Change geometrical and physical parameters like e.g. tendon forces for the simulation in the “SoftParameter.m” file in the “Soft Robot Library” folder and observe how they influence the simulation. |
Testing
Robot Construction Test
In order to see if the Hot Glue Kit can actually be used to build robots within minutes, we decided to roll the camera and put ourselves and the Hot Glue Kit to a test. Below is the video that shows the recording of this test.
We used 2 actuation modules, a glue gun, 5 glue sticks and a scalpel to build our robot. The robot is inspired from a caterpillar with both actuation modules are placed at the head and tail of the robot. The idea is that both of these modules are pulling their tendons which are attached to the opposite side of the body, therefore bending the soft robot like a caterpillar to move forward.
Following this idea, we managed to build the 1st robot prototype within 6 minutes. When we commanded the actuators to pull the tendons, we noticed that the body was bending as desired however there was not forward motion. After investigating the behavior of the robot with the table surface, we noticed that a "directional friction" is required to move forward.
Therefore we decided to add a glue stick piece at the tail of the robot hoping that it would stop the robot body going backward when it is fully bent. The second part of the video shows that this improvement to the 2nd prototype took 2 more minutes.
When we actuated the modules again with the 2nd prototype, we noticed that the robot was steering to the right, which was improvement compared to the previous case. In order to see what would happen when the modules are commanded to pull with a less amplitude, we changed the target turn for the motors and commanded from the PC. With this, we managed to get a forward motion. All of this process was recorded live and it is shown that a functional soft robot can be built, improved and actuated within 15 minutes.
Recalibration
After the tendon wire is attached to the robot, it is possible for it to get loose. This is not due the tendon wire as the chosen Dyneema line is a non-stretchable strong braided wire. It is mostly due to the plasticity of the robot structure. In such cases, the actuation module needs to be commanded with the direct pose command to turn small steps until the wire is tight again. After that module should be switched off and switched on again to reset the resting position of the motor. As there are no non-volatile memory to store the initial motor position right after the fabrication, switching off and on the system resets the resting motor position.
Maximum Load
The current and voltage limitations in the system allow the motor to pull up to 11N of load. Considering the module is only 60g, the weight-to-power ratio of the module is more than sufficient to actuate robots that can be built with hot glue. However, if there is a heavier load on the tendon or the motion is being stopped with a strong interrupt, the module will stop pulling, reset its behavior parameters and send the overload response “L!”. In this case, reconfigure the module from the start and run it again.
Battery Life
When the module is commanded to actuate in an alternate mode with no load, a full battery lasts approximately 8 hours. If there is a load smaller than the maximum value, the battery lasts around 5 hours. When the battery runs out, take out the battery and use a 1S LiPo charger to recharge.
Case Study
Soft Robotics Week - April 13-17, 2015 Livorno-Italy
In order to show that Hot Glue Kit also works out of our lab, we have built 30 modules and attended to the organization of the Soft Robotics Week (aka School on "Applications and Frontiers of Soft Robotics") by the RoboSoft and SMART-E, which took place at the The BioRobotics Institute, Scuola Superiore Sant'Anna in April 13-17,2015 Livorno-Italy.

The school was attended by up to 100 international leaders and talented students from 15 countries and 46 institutions worldwide, 16 speakers, 4 working groups of experts. It presented a series of plenary and parallel brainstorming sessions, a PhD School with hands-on tutorials and robots exhibition.
Hands - on Sessions
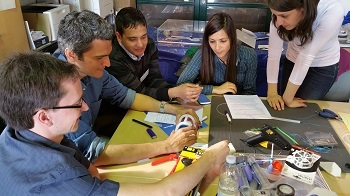
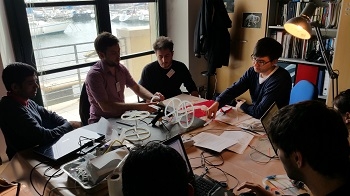
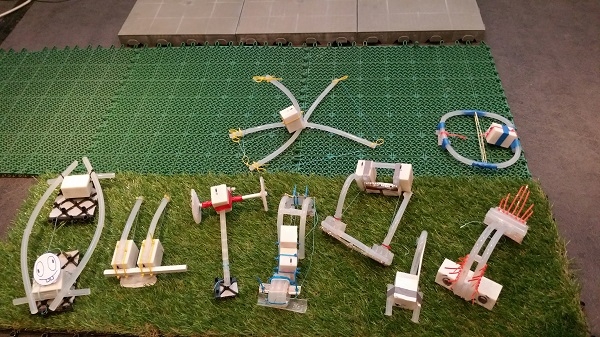
In the soft robotics week, we organized two hands on sessions to encourage participants to build, actuate and control soft robots with the Hot Glue Kit. During the sessions which took over 12 hours in total, participants are grouped into six teams composed of 6-7 members. We gave each team the kit with 2 actuation modules and asked them to build robots which can walk, run or crawl on different floor surfaces.
The sessions are planned in two days, while in the first day participants are asked to build their robots and on the second day model and simulate these designs. However, teams decided to keep on upgrading their robots on the second day while working on their simulations at the same time. In order to motivate the teams, the school organization committee decided to make a competition on the last day of the school, where the robot of each team is put to test to locomote on three different terrains to find the fastest robot. The members of the winning team were awarded with a 3D pen.
Below are some pictures and videos from the hands on sessions and the robots built with the Hot Glue Kit.
Teams:
 |
 |
 |
 |
Robots:
Downloads
Files for Fabrication
- CAD (Autodesk Inventor) models of the module box (.zip)
- STL files for 3-D printing of the module box (.zip)
- Detailed bill of materials (.xlsx)
Source Codes
Simulation
Others
Hot Glue Kit is a joint research project with ETH Zurich and University of Cambridge. It is intended solely for research, educational and scholarly purposes by not-for-profit research organizations. If you have interest in specific technologies for commercial applications, please contact us here.
| Some of the information contained in this web site includes intellectual property covered by both issued and pending patent applications. It is intended solely for research, educational and scholarly purposes by not-for-profit research organizations. If you have interest in specific technologies for commercial applications, please contact us here. |
| modulecontrol.zip | 623 bytes | |
| modulerunner.zip | 3 KB |
