Knit Textile Bending Actuators
Knit textile bending actuators are a class of soft actuator that is being developed by the Biodesign lab at Harvard University. The basis of the design utilizes layers of fabric with different stretch properties to achieve complex motions such as bending, twisting, extending, or any combination of the three. A single actuator with multiple motions can be made by adding multiple layers and creating multiple pockets to put additional balloons into.
|
|
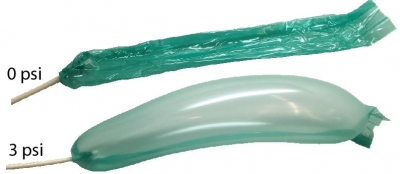
| With any balloon, an increase in air mass leads to an increase in balloon volume. |
|
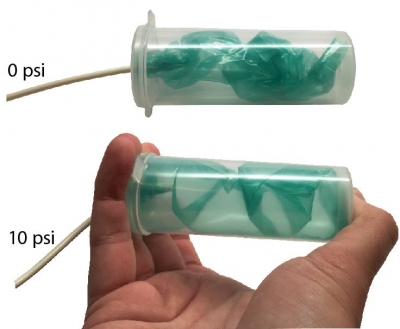
| However, when a balloon is constrained to a maximum volume, an increase in air mass leads to an increase in balloon pressure. The energy that would have strained the balloon instead gets transmitted to all surfaces that the balloon touches. This example constrains a balloon with a rigid container. |
|
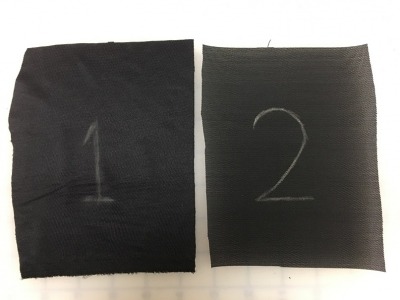
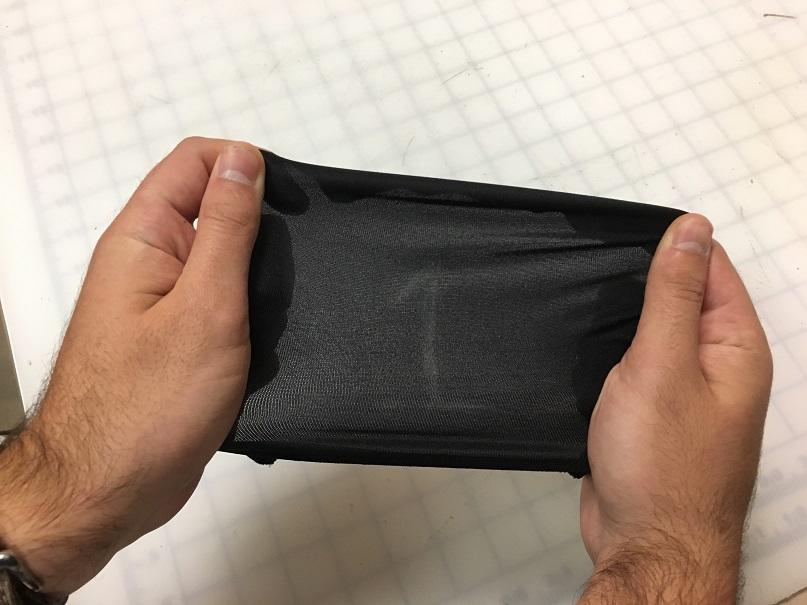
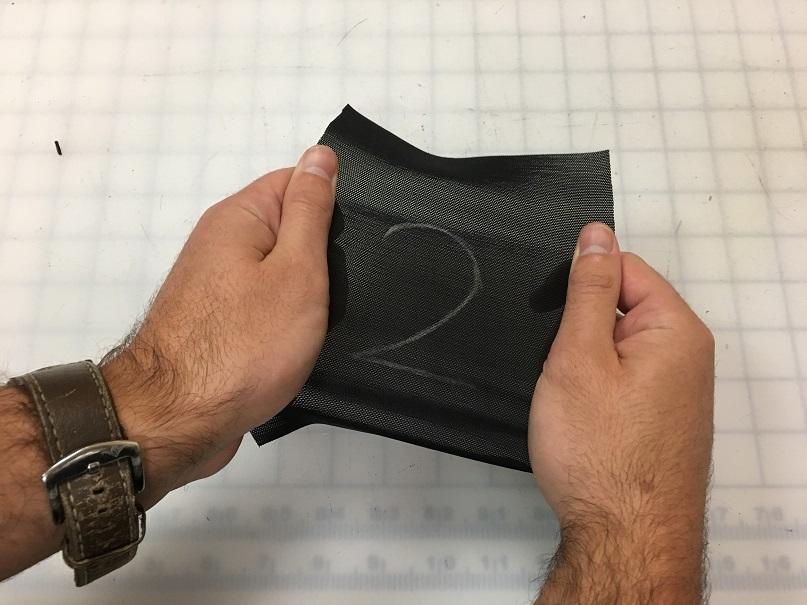
| Now consider what happens when a balloon's volume is constrained by soft materials that can stretch, such as fabric. Just like with a rigid container, the balloon's air pressure transmits its strain to all surfaces that it touches. In this case, the transmitted strain causes the fabric to stretch. How much the fabric stretches is based on the type of material as well as how much air pressure is in the balloon. Take for example two different fabrics of the same geometry, one (1) which is quite stretchy, and another which is woven (2). Below, the same tension is applied to both materials, and fabric 1 stretches more than fabric 2. While this may seem obvious, it's a very important concept for this technology. In a textile actuator, the air pressure applies the same tension to all materials it touches. Therefore, interesting motions can be created by sewing different combinations of fabric together and putting a balloon inside. |
|
| If we sew fabric 1 on top of fabric 2 and put a balloon inside, we can create a bending actuator similar to the video above. As the balloon inflates, the air pressure causes fabric 1 to stretch more than fabric 2. In order to maintain equilibrium, the actuator must take on an arc shape. Any combination of bending, twisting, and extending can be achieved by selecting specific materials for the top and bottom of the actuator. More on this in the design section. |

|
Compared to Fiber-Reinforced actuators, textile actuators have some advantages and disadvantages. Textile actuators are much lighter than fiber-reinforced actuators as well as operate at about half the pressure to produce a similar stiffness. Actuators operating at a lower operating pressure can run off of a smaller pump which requires a smaller power supply. This makes textile actuators much better suited for wearable applications as these components can be compacted to attach to a person's belt or wheelchair. Additionally, textile actuators are better suited for wearable applications because they are made using commercially available materials and tools that are already used in clothing manufacturing such as a sewing machine and impulse sealer.
Fiber-reinforced actuators have a much more complicated fabrication process, but this allows the designer to make surface features on the actuator. As mentioned previously, fiber-reinforced actuators require more pressure to achieve similar stiffness. This is mainly due to energy lost in straining the elastomer. However, the energy that goes into straining the elastomer will help the actuator return to its neutral position when deflated. Depending on the application, this can be beneficial. Textile actuators are completely compliant when not actuated, and in turn they do not return to their original state when depressurized.
This documentation set contains files and instructions to support the design, fabrication, and testing of a textile actuator. Additionally, there is a case study of how multiple textile actuators can be combined to create a soft assistive glove.
Some of the information contained in this web site includes intellectual property covered by both issued and pending patent applications. It is intended solely for research, educational and scholarly purposes by not-for-profit research organizations. If you have interest in specific technologies for commercial applications, please contact us here.
Design
The knit textile bending actuators documented here consist of two layers of fabric sewn around a balloon. This section describes the primitive motions of a textile actuator, and discusses some of the design considerations involved in making your own actuator. Textile actuators can also be designed to produce multiple motions by adding additional layers and balloons. The adding a motion section describes this in more detail.
As described in the title page, textile actuators produce motion when a balloon constrained by fabric is inflated. The air pressure from the balloon transmits its strain directly into all surfaces in contact with the balloon. In order to control and utilize this strain, the right materials need to be selected.
| In many cases, radial expansion is not desired beyond a certain diameter. In order to constrain the radial expansion without inhibiting the actuator's capabilities, a fabric with anisotropic stretch properties, such as one-way stretch, must be used. One-way stretch fabrics stretch significantly more in one direction than the other. Much like the fibers wound around the fiber-reinforced actuators, one-way stretch fabrics constrains the actuator's radial expansion while allowing it to stretch axially. Shown to the right is a one-way stretch fabric with arrows drawn to demonstrate the anisotropic stretch properties. Shown below to the left is the fabric stretched in its most stretchy direction, and to the right is the fabric stretched in its least stretchy direction. Approximately the same tension is applied in both cases. |
|


An extending actuator can be made by putting a one-way stretch fabric on top of another piece of one-way stretch fabric. See the motion primitives videos below to see an extending actuator in action.
In order to create a bending motion, a significant difference in axial stretch properties between the top and bottom layers is necessary. These materials are described in more detail in the fabric section. An woven fabric is shown below to the left and the same fabric has tension applied to the right. Notice that this fabric does not stretch.


| Another way to utilize one-way stretch fabrics is to cut it at an angle. For example, cutting a fabric layer on the bias at an angle of 45° allows the stretchiest direction to twist the actuator when pressurized. See a twisting actuator below in the motion primitives videos. |

|
Motion primitives:
|
Bending Top material: one-way stretch Bottom material: woven |
|
|
Extending Top material: one-way stretch Bottom material: one-way stretch |
|
|
Twist-extend Top material: one-way stretch cut at 45° Bottom material: one-way stretch cut at 45° |
|
Fabric
This section describes the different types of fabric used to make textile actuators; knits and wovens. For the purposes of textile actuators, knit fabrics are used for their anisotropic stretch properties while woven fabrics are used because they are effectively inextensible. Common examples of knit fabrics are t-shirts and socks; garments that stretch under tension. Common examples of woven fabrics are button down shirts or blouses, or any garment that does not stretch under tension.
| A woven fabric is characterized by the perpendicular crossing of two systems of threads (warp and weft yarn). The way in which warp and weft yarn is crossed is called the woven structure or weave pattern. Due to this structure, any tension applied in either direction will be transmitted directly to the yarn. The material will only stretch as much as the fibers themselves stretch under loading. In a textile actuator, the strain induced by air pressure will stretch the yarn of a woven material a small amount, but relative to a knit fabric this stretch is considered negligible. |

|
| Knit fabrics contain a structure made up of interlocking loops of yarn known as courses and wales. Applying tension to a knit fabric stretches the material because the knit structure has room to open up before the yarn takes the load. The vertical direction in this example is the least stretchy direction of the knit and the horizontal direction is the most stretchy direction. |

|
| Shown to the right is a magnified picture of a one-way stretch warp knit fabric at rest. The letters "a" and "b" represent the courses and wales respectively. Shown below to the left is the same fabric stretched in the horizontal direction. Note the elongation in wale spacing as well as how densely packed the courses become. Below to the right is the same fabric stretched in the vertical direction. Note the increase in course spacing and how tight the fibers look. Approximately the same tension was applied in both cases. The elongation of the wales, "b," in the horizontal stretch example is much larger than the elongation of the courses, "a," in the vertical stretch example. The predominant yarn direction is along the wales, therefore the portion of structural stretch in this direction is lower than along the courses. |

|


|
A stress-strain plot of a knit fabric is shown below. There are three zones of stretch based on how much force is applied: structural stretch, material-stretch, and the non-linear transition between them. The structural stretch discussed above is based on the direction in which the fabric is under loading and has an effective linear stress-strain relationship. If the fabric is a one-way stretch knit, the structural stretch zone will be shorter if it is being pulled in the direction of the wales, and it will be longer if it is being pulled in the direction of the courses. Once the fabric reaches the material-stretch zone, it behaves effectively the same as a woven material with a linear stress-strain relationship.
|

Adding a Motion
One of the many benefits of textile actuators is the ability to easily incorporate multiple motions into a single actuator. By simply adding a fabric layer and a balloon to a single motion actuator, another motion can be achieved. For example, a single actuator can produce separate bending and extending motions by making a 3-layer, 2 balloon structure. Shown in the figure below, inflating balloon 1 activates the bending motion by straining the high stretch fabric above more than the woven fabric below. Inflating balloon 2 strains the woven fabric above and below the same amount which produces an extending motion.


|
|
Fabrication
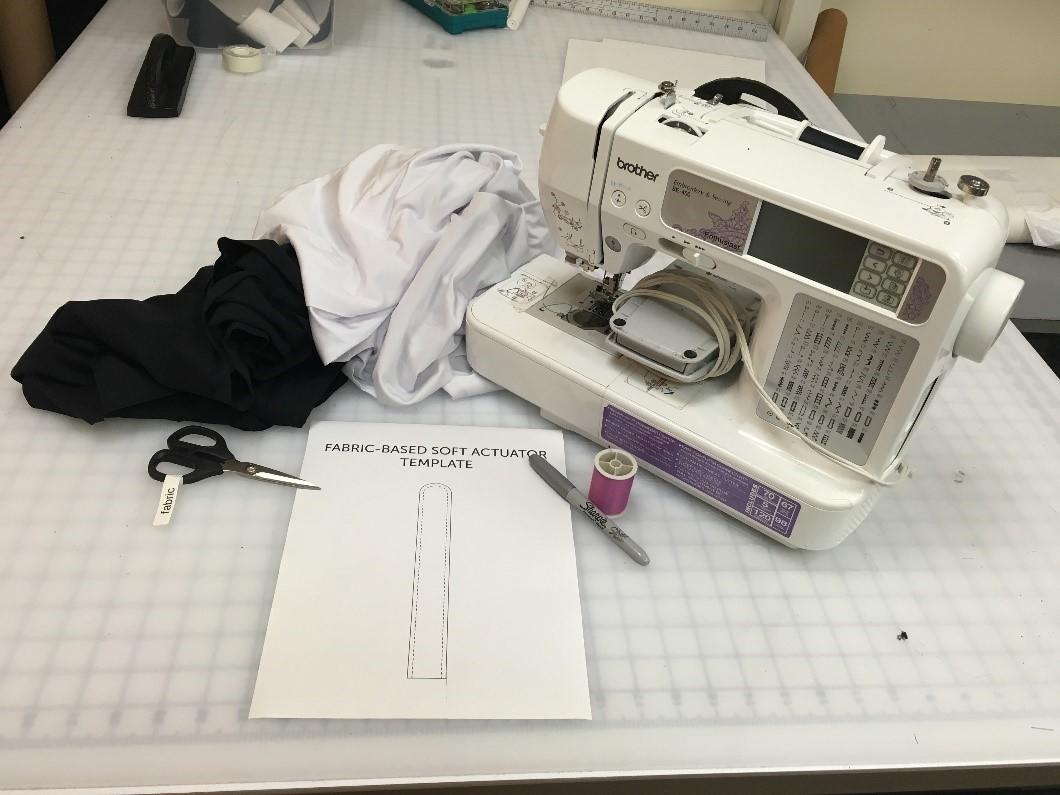
A key feature of textile actuators is the low cost and ease of fabrication. Using inexpensive tools, such as a sewing machine and an impulse sealer, functional actuators can be realized. The fabrication process is absent of complex 3D molding and casting processes that are required to build elastomeric fiber-reinforced actuators. Two simple, but separate fabrication processes are needed to make a fabric pocket and a balloon. The following sections detail how to make each component and assemble the two once they are made.


Bill of Materials
|
For fabric pocket:
|
|
|
|

|
| knit_textile_bending_actuators_bill_of_materials.xlsx | 18 KB |
Fabric Pocket
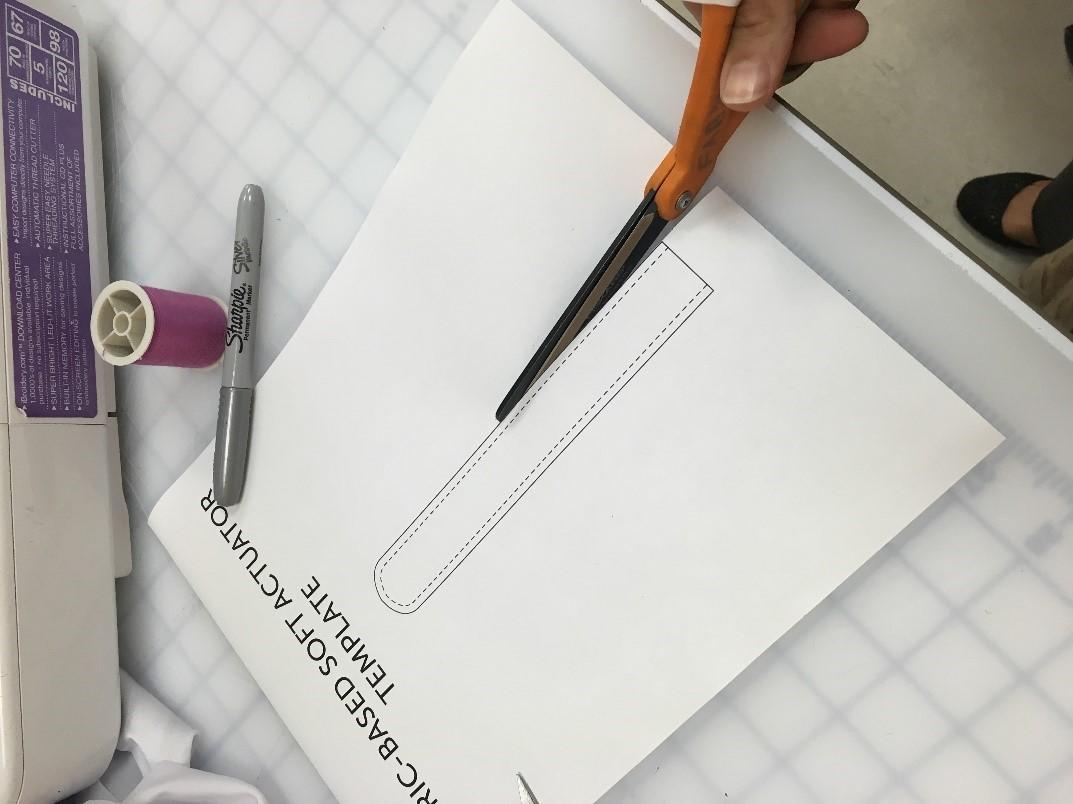
| 1. Cut out actuator from template. |
|
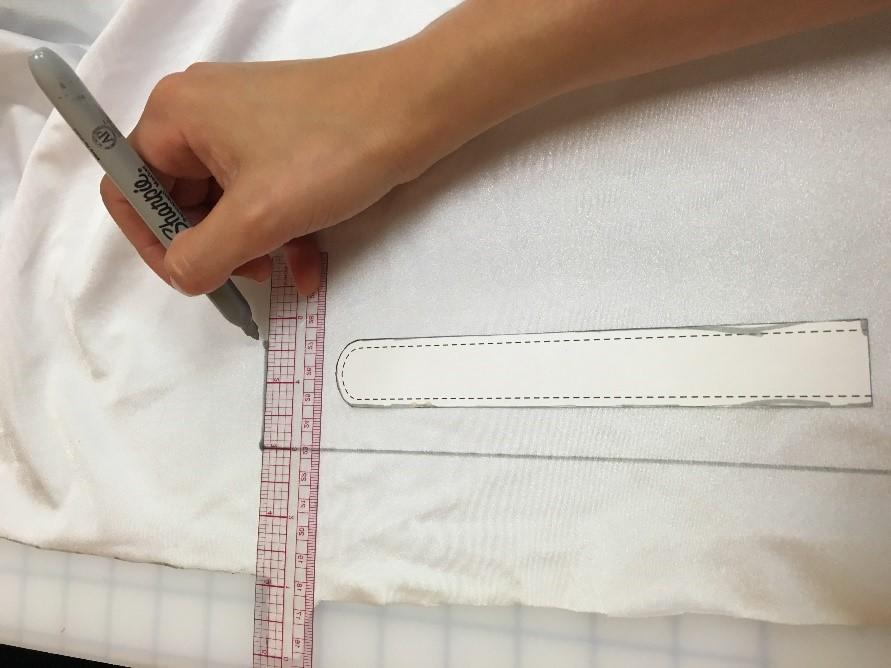
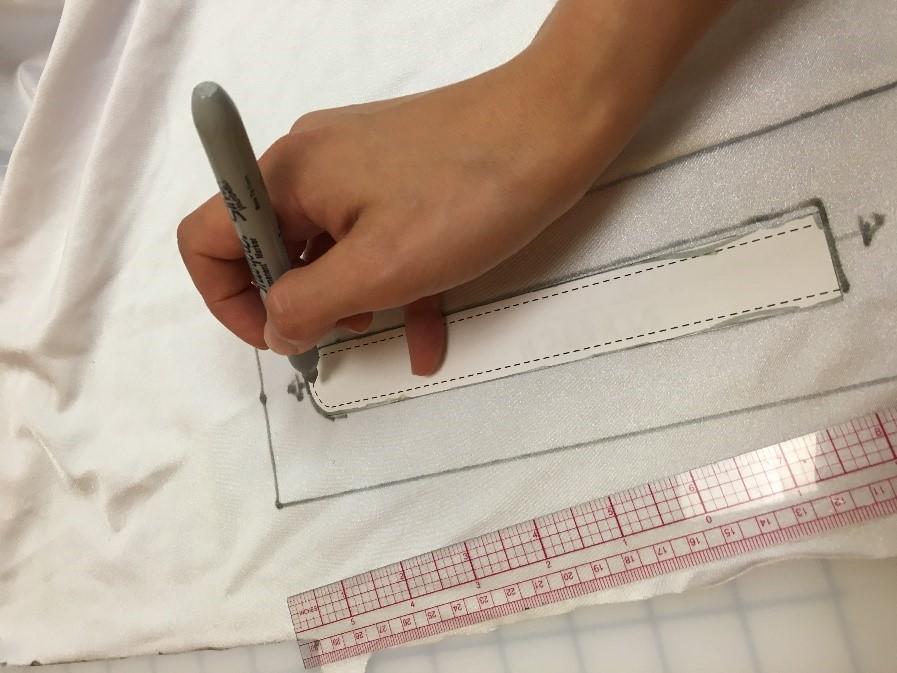
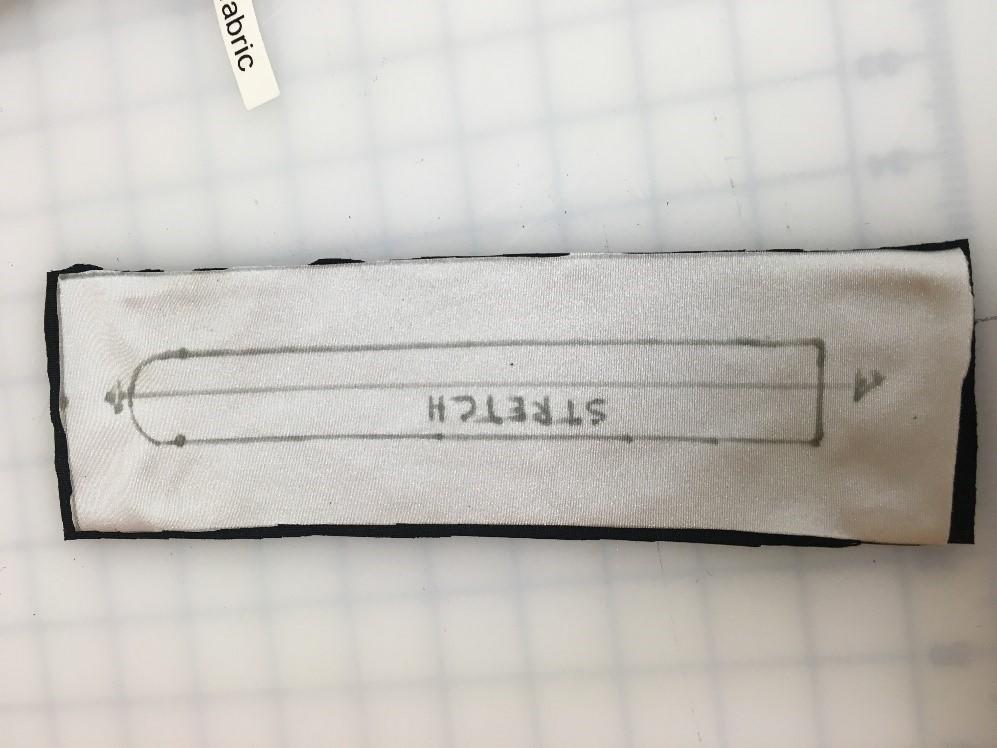
| 2. On stretchy spandex, trace out a 9" x 3" rectangle with the most stretchy orientation of the fabric in the length direction. |
|
| 3. Trace actuator inside the rectangle |
|
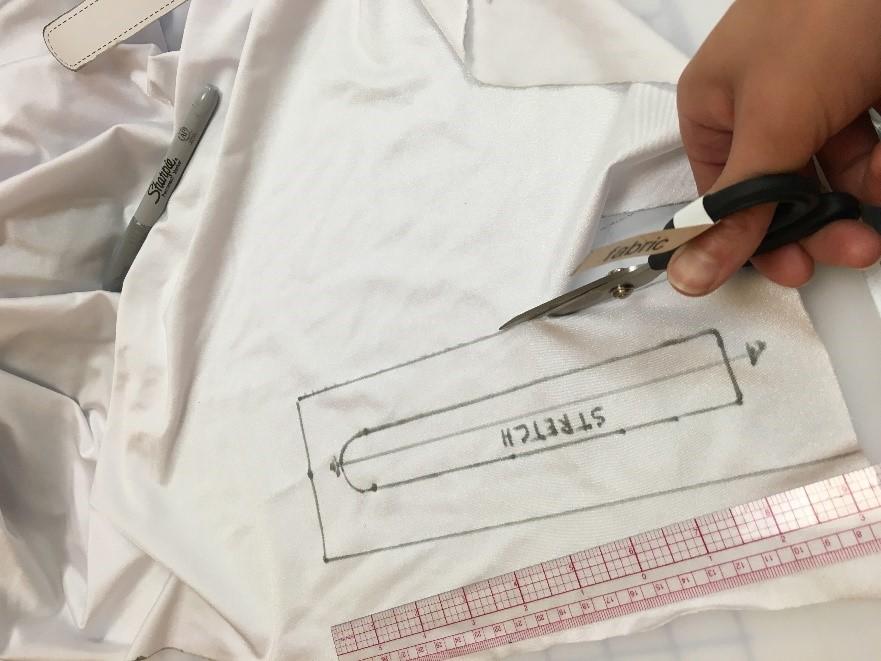
| 4. Cut out rectangle. |
|
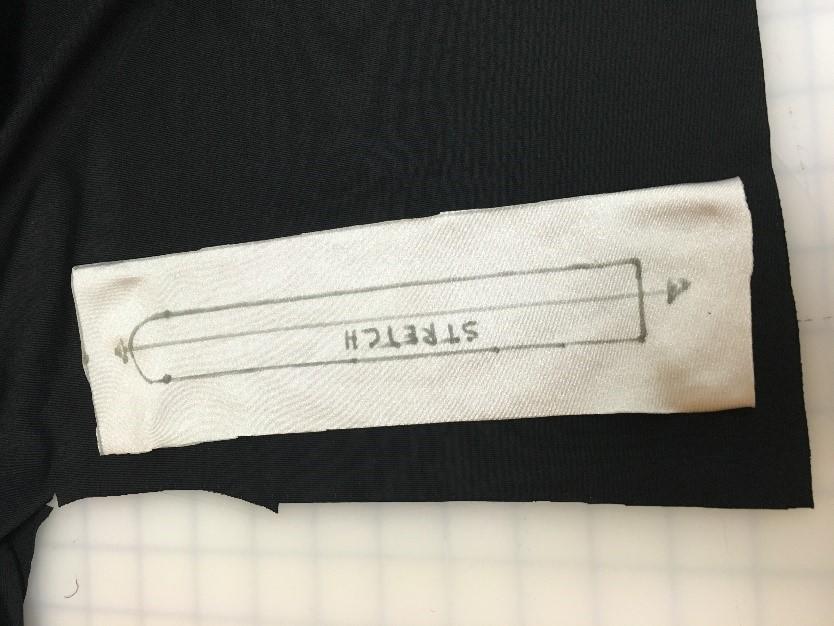
| 5. Place stretchy spandex rectangle on woven fabric. Make sure that the template is either in the production direction (parallel to fibers) or perpendicular to it. |
|
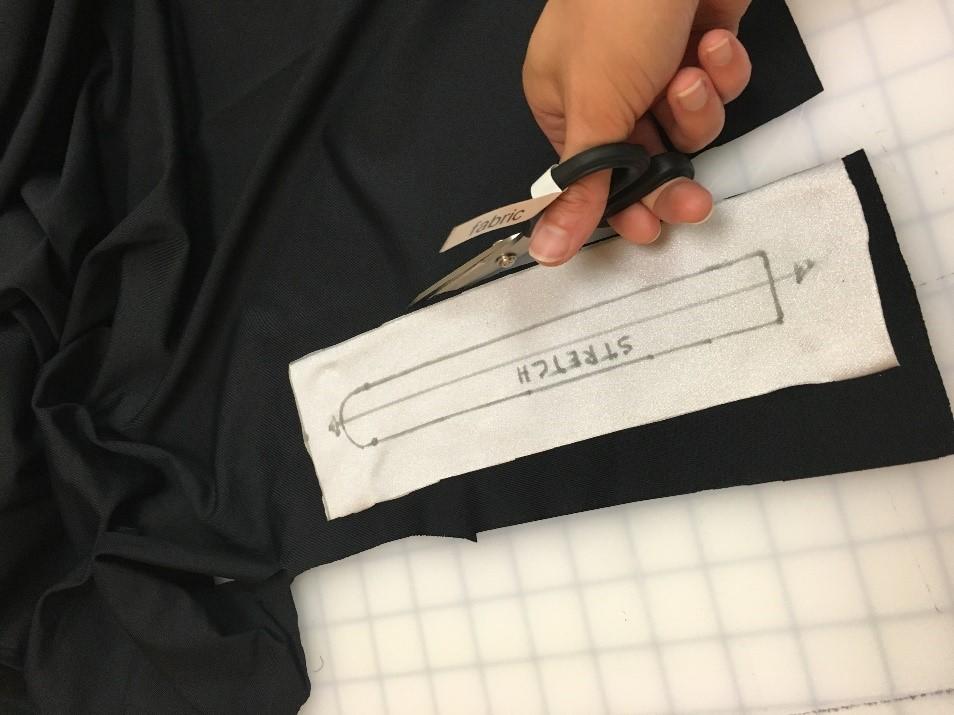
| 6. Cut around the perimeter to make two woven fabric rectangles |
|
| 7. Two cut out rectangles |
|
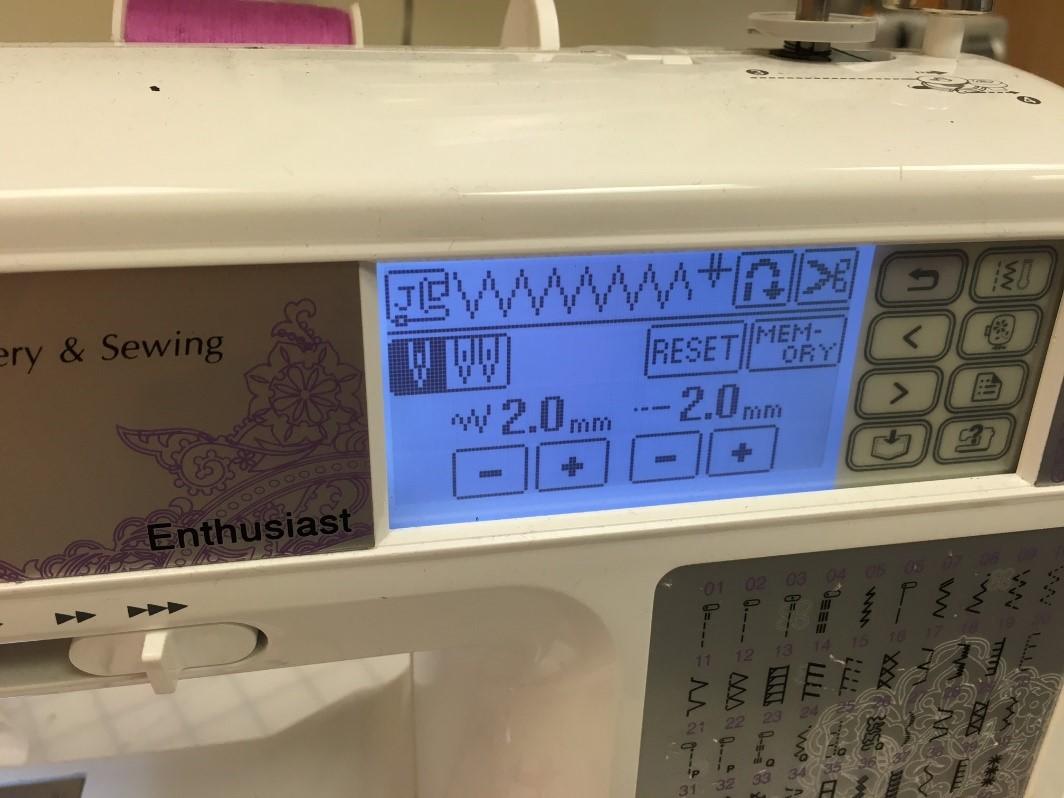
| 8. Set sewing machine to zig zag mode. Adjust the settings so that the stitch length is 2.0 and the pitch is 2.0 |
|
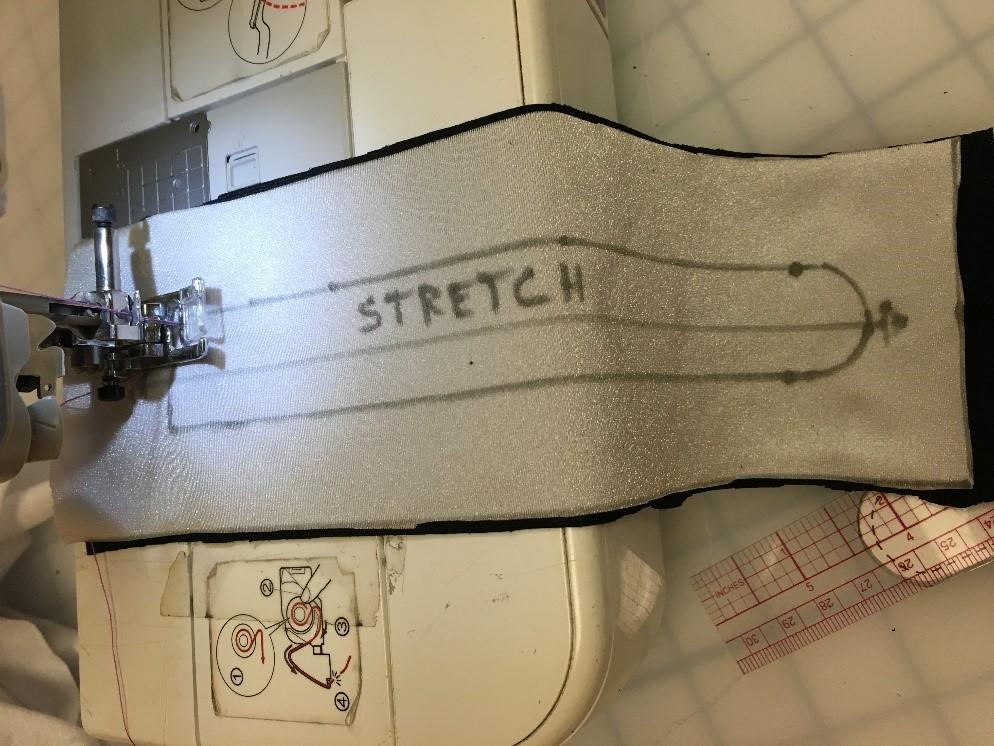
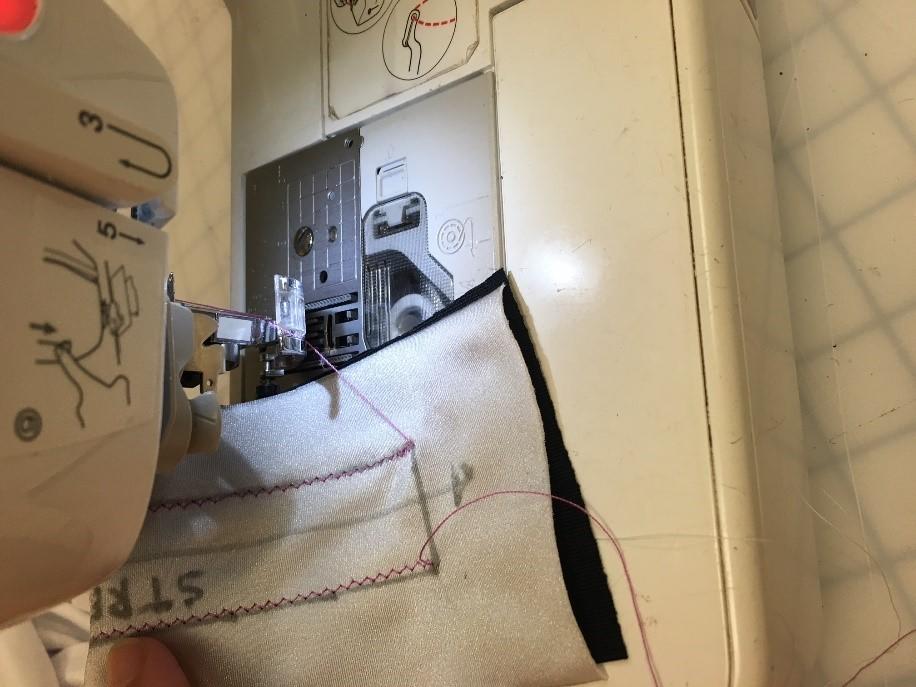
| 9. Hold the two fabric layers together and place them under the foot so the blunt end of the traced actuator shape is under the foot and the needle touches down slightly in from the perimeter. Back stitch for 2-3 stitches to lock thread in place. |
|
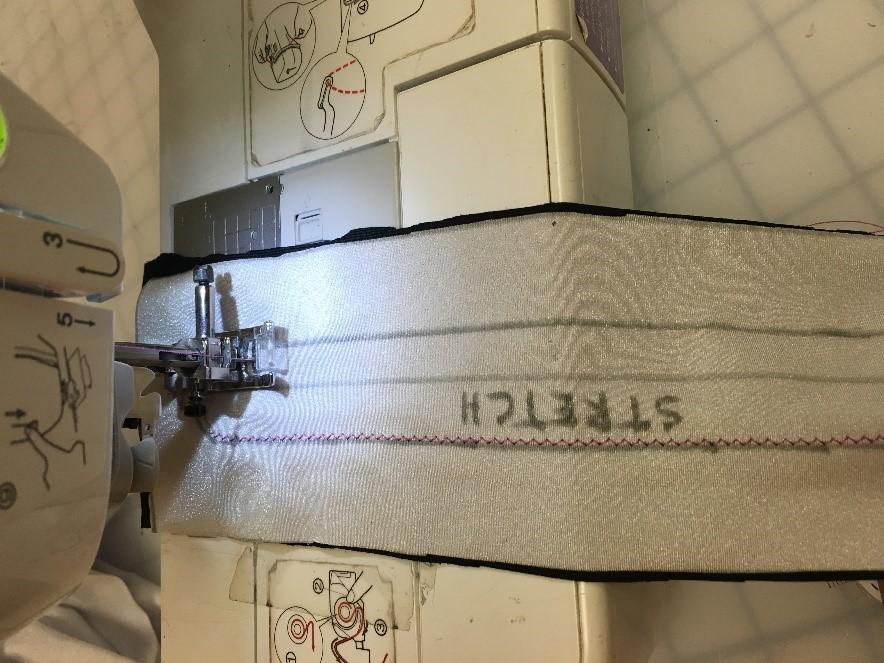
| 10. Run the outline of the actuator through the machine with the zigzag stitch, keeping inside the actuator outline |
|
| 11. Stop sewing when the machine gets back to the blunt edge of the actuator outline. Back stitch for 2-3 stitches to lock thread in place. Keep this end open and remove fabric from the machine. |
|
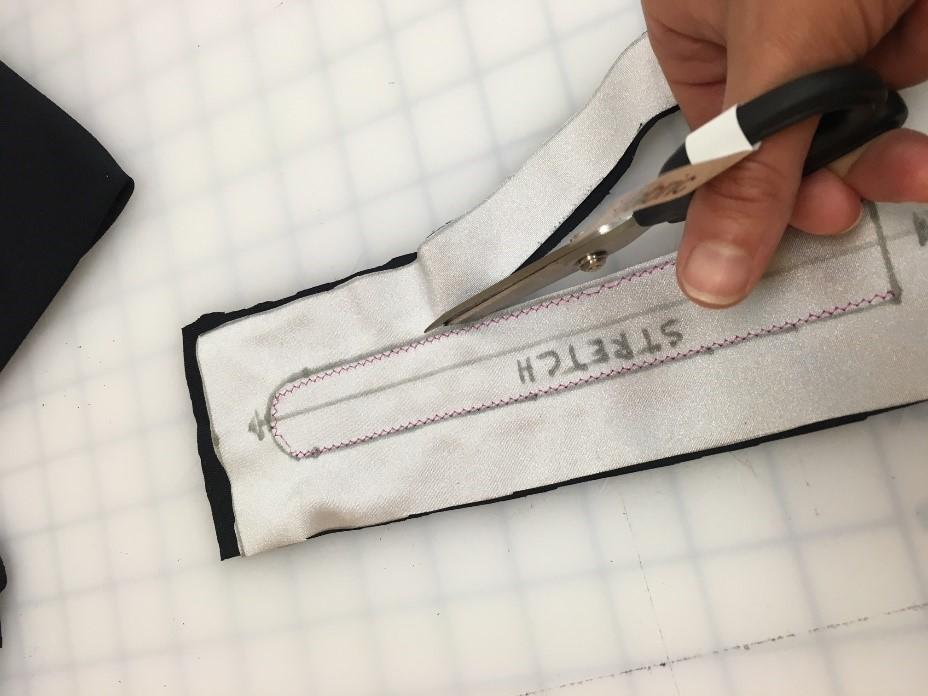
| 12. Cut out the textile pocket, making sure not to get too close to the zigzag stitch. |
|
| Finished textile pocket |
|
| srt_actuator_template.pdf | 51 KB |
Balloon
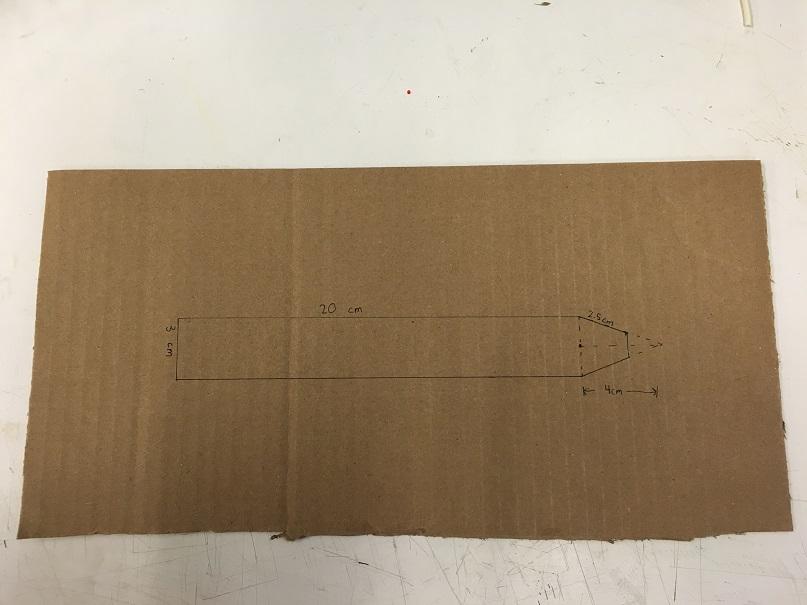
| 1. Draw a template on a piece of cardboard or download the tpe balloon template and cut it out. Note, this step can be performed on any material with enough thickness to be able to feel when it is pressed up against the impulse sealer. |
|
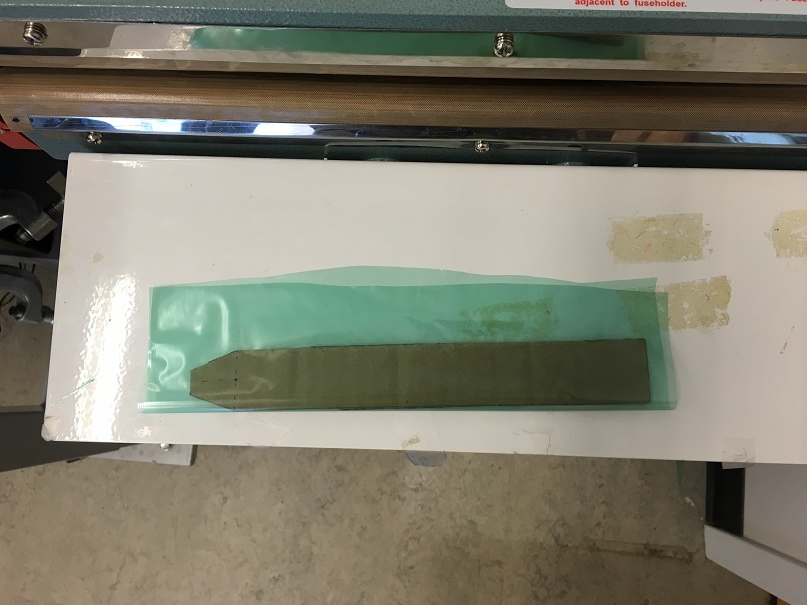
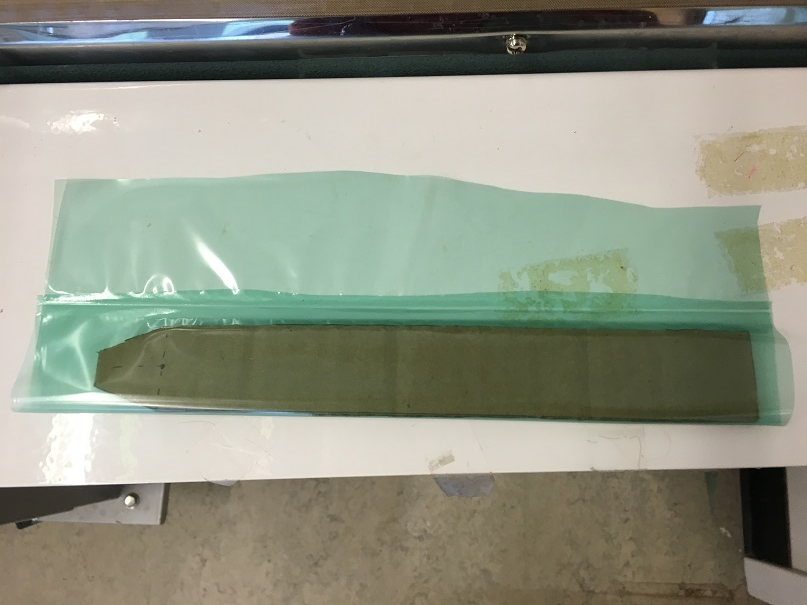
| 2. Take piece of thermoplastic elastomer (TPE) and fold it around template. |
|
| 3. Impulse seal the exposed edge. |

|
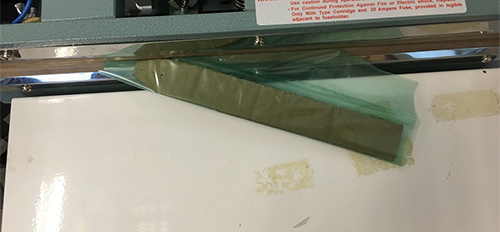
| 4. After impulse sealing, the exposed edge should look like this. |
|
| 5. Impulse seal both angles at the tip of the template. |
|
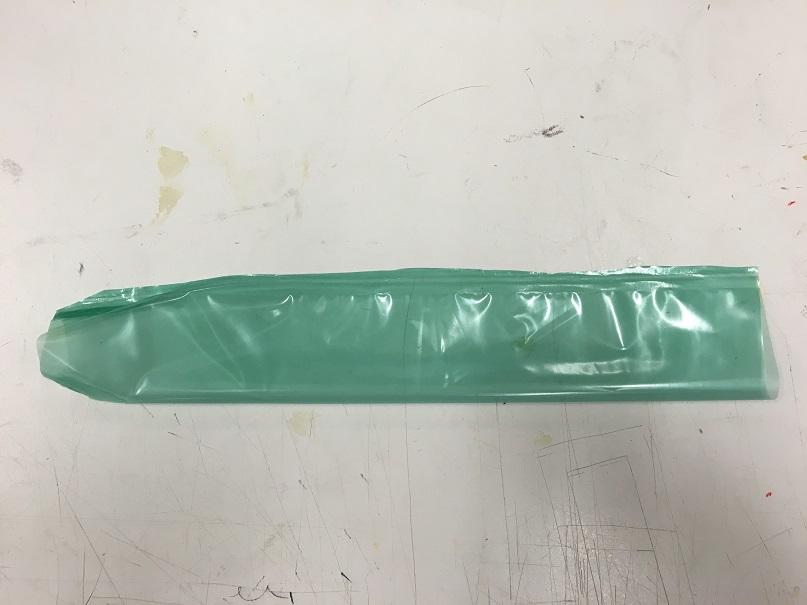
| 6. After impulse sealing, the tip should look like this. |

|
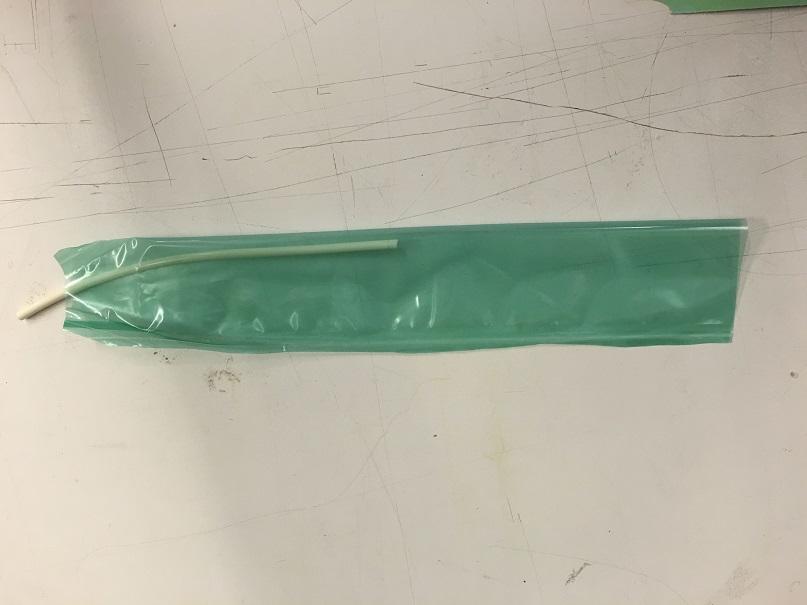
| 7. Remove cardboard template and cut away excess material. Cut open the tip such that a tube can fit in the opening. |
|
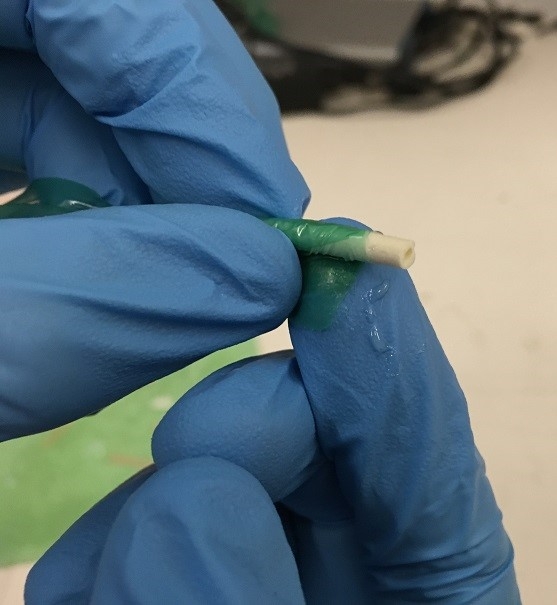
| 8. Insert tubing into opening at the tip such that 1-2cm of tubing is sticking out. |
|
9. Apply glue to exposed tube, push tube into the TPE opening and roll the plastic around the tube until it is sealed on all sides.

| 10. Invert balloon. |
|
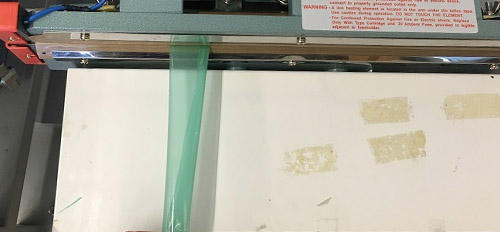
| 11. Impulse seal the open end. |
|
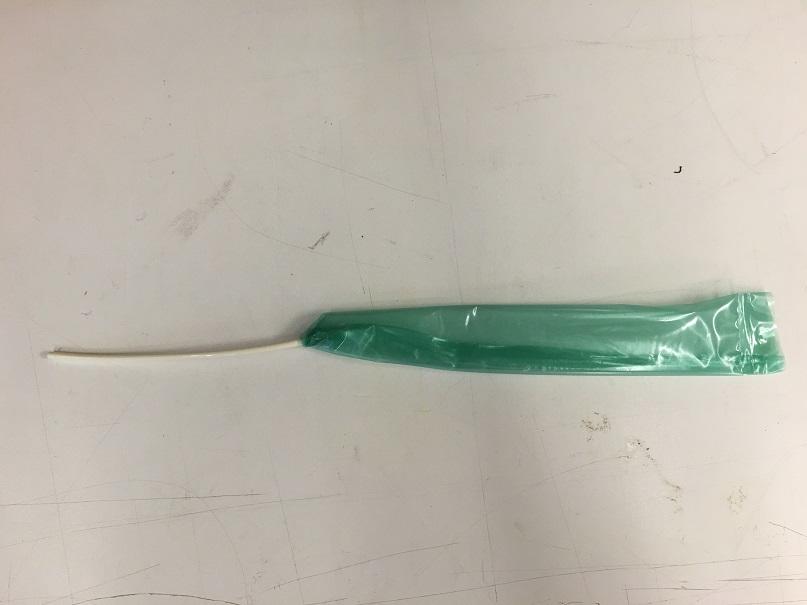
12. Finished balloon.
| srt_tpeballoon_template.pdf | 51 KB |
Assembly
After fabricating the balloon and fabric pocket separately, it is time to assemble the textile actuator. This is a simple two-step process, and you will need a thin rigid tool that does not have any sharp points such as a popsicle stick as well as a needle and thread.
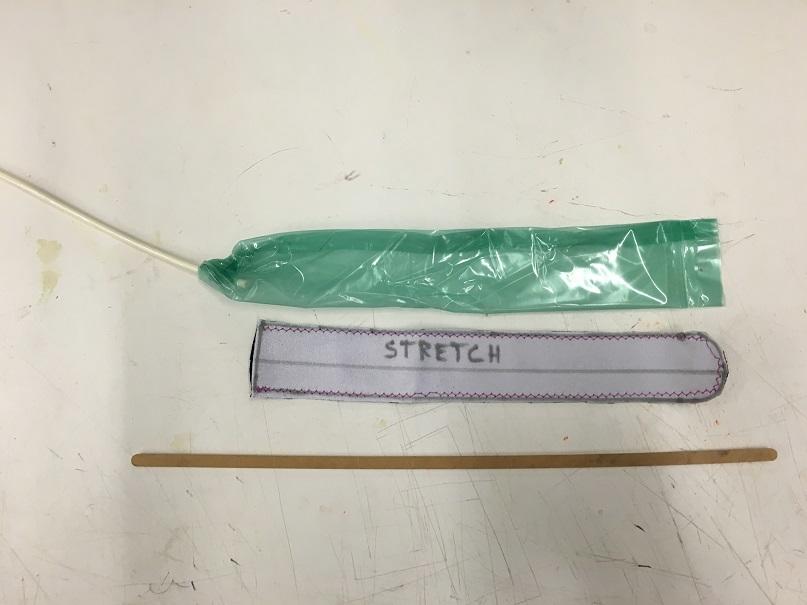
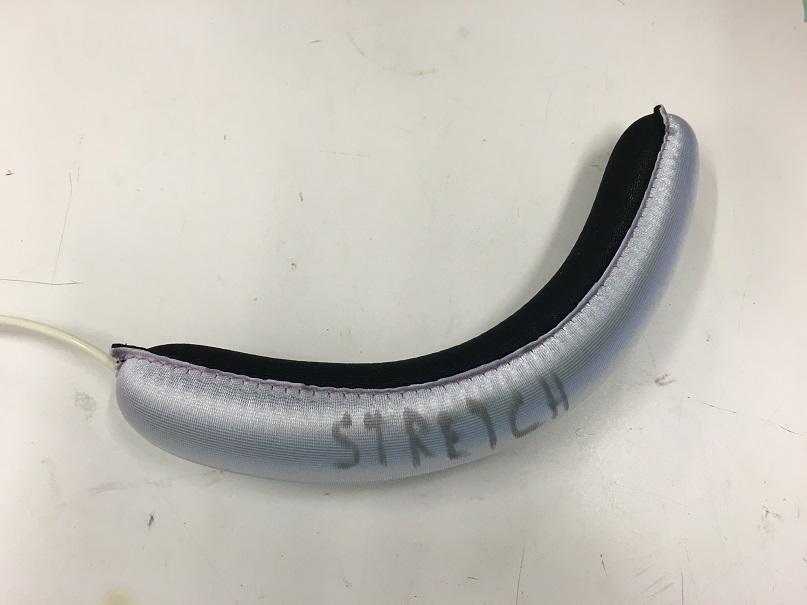
1. Place the stick over the balloon and wrap the tip of the balloon around the stick. Insert the balloon using the stick into the fabric pocket. Once inserted, remove the stick without pulling the balloon out.
|
|
2. Sew the open end of the fabric pocket shut. Be careful not to puncture the balloon!
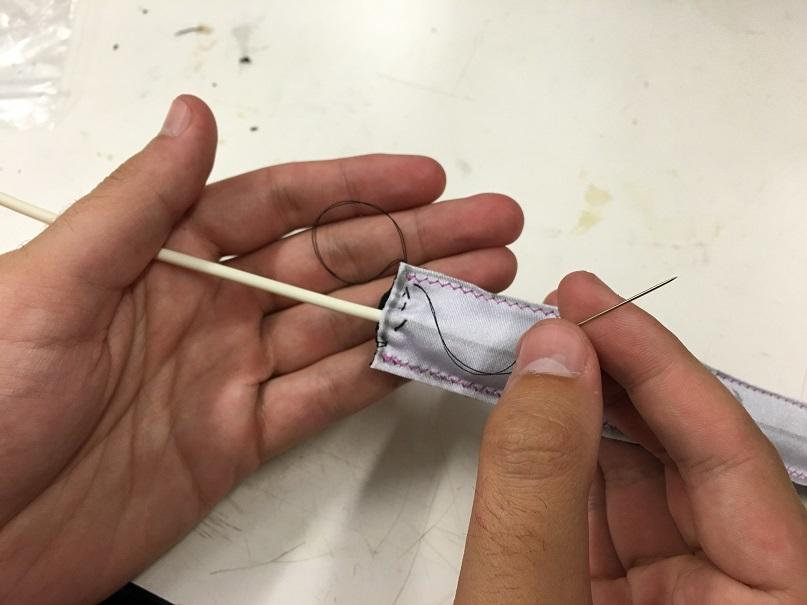
3. Inflate your newly constructed actuator!
Testing
The two most important aspects of a textile actuator's performance are its range of motion and its torque. It is important to characterize these two aspects of an actuator to get an idea of how much force is being applied for the specific application. When an actuator is inflated, the energy from the air pressure will move the actuator until it is either fully actuated or stopped in its path due to an external constraint. If an actuator is constrained from completing its full range of motion, the actuator will apply torque to the constraint.
Torque can be measured by constraining one section of the actuator to a static cradle and the other section to an arm connected to an assembly that can rotate freely until it is pinned to a static angle for each measurement. A 6 axis force/torque sensor is sandwiched between the arm and the rotating base to measure torque. In this case, both flexion and extension torque in a dual-acting actuator were measured at 25 psi. Measurements were taken at angles ranging from 0 to 120 degrees of rotation; the resultant plot can be seen below, right.


Notice that the flexion torque decreases with an increase in angle while extension torque increases with an increase in angle. This means that the maximum flexion torque is achieved when the actuator is straight (lowest angle) and the maximum extension torque is achieved when the actuator is bent to its highest angle.
Once the actuator is characterized with the method described above, the torque can be determined using an image and a known pressure in the actuator. This can be done by photographing the actuator at various pressures and using image processing techniques to track the angle of the actuator tip relative to the base.


This testing method allows the actuator to have unconstrained motion during inflation. By using this technique of characterizing and visually measuring torque, an actuator's performance can be better understood and tailor made to a specific application. Note that there is often a trade-off between torque and range of motion in textile actuators. Based on the application, it is important to design an actuator to not only produce the desired motion, but also produce desirable torque at intermediate and final states.
Case Study: Grip Glove
| This case study describes the design of a soft robotic device for grasping assistance and is based on work carried out by Cappello et al. (2018). |

|
Clinical Need
As discussed in the PneuNets glove case study, loss of grasping ability is a significant problem which negatively impacts quality of life in patients. The aim of the project described here is to provide a device that can be worn comfortably all day and assist the user in activities of daily living.
Solution
The proposed solution is a glove that consists of 5 dual-action textile actuators to assist in closing and opening the hand. The resulting device weighs less than 100g and can be worn for long periods of time without bothering the user. Each actuator has two tubes, one for the flexion balloon and one for the extension balloon. These tubes run to a control box that has nearly the same components as the fluidic control board reconfigured compactly into a portable box.


Shown below is a clinical trial where EMG sensing electrodes were placed on the muscles that close (flexor digitorium superficialis) and open (extensor digitorium communis) the hand. The subject goes through the same motions with and without the glove on. The following figure displays muscle activity during these exercises. Notice that there is a significant decrease in muscle activity to produce the same closing and opening motions when the subject is wearing the glove as opposed to when the subject is not wearing the glove.

|
| See the Grip Glove in action here! |
|
|
Downloads
| knit_textile_bending_actuators_bill_of_materials.xlsx | 18 KB | |
| srt_tpeballoon_template.pdf | 51 KB | |
| srt_actuator_template.pdf | 51 KB |