Design
After we identified the problem, we decide on constraints. We decided to not use any electrical components because of cost and complexity.
We came up with many different concepts and eventually narrowed them down to this general design.
Then the grabber reacher was divided into three sub components: the arm, the handle, and the gripper.
The gripper went through an iterative design. Initially a lot of effort was spend fixing the schools 3d printer.
Arm and Handle Design
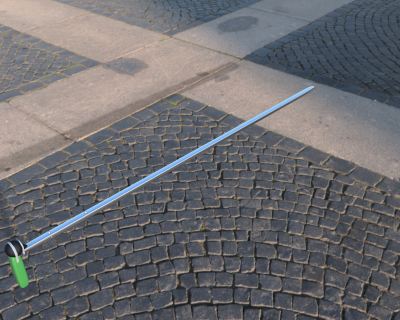
The structure of the Grabber Reacher is made from PVC pipe. We choose 1/2 inch PVC for the arm after simulating many different options of extruded materials for the arm under a 2lb (8.9N) load.
We simulated 3/4" PVC, 1" PVC, Extruded Aluminum, and 1/2" PVC Pipe. The 1/2"PVC was strong enough and much lighter than the 3/4" PVC and 1" PVC though very flexible. The extruded aluminum was much less flexible but would have been harder to machine, and harder to assemble with the PVC handle.
The bulb pump on the handle has two check valves on it to pump air from the outside into the soft robotics gripper.An additional magnet was added to the gripper to allow it to pick up metal items. The air bulb in the handle has only one moving part. This makes it simpler to manufacture than a mechanical trigger linked to a piston such as a bike inflater. In addition, the air bulb with check valves requires multiple squeezes to grab something so the gripper can have a large volume difference and relatively high force.
There is a hole in the tube connecting the bulb to the gripper to let air out to release the gripped object. The hole can be sealed with a thumb to keep grabbing something. This is much lighter and simpler than a push button release.
The 1/4" inner diameter tubing was chosen because it could fit on the air bulb and was relatively inexpensive. The tube could only be ordered in bulk so we had extra to use even if the inner diameter was larger than necessary to transfer the air.
Gripper Design
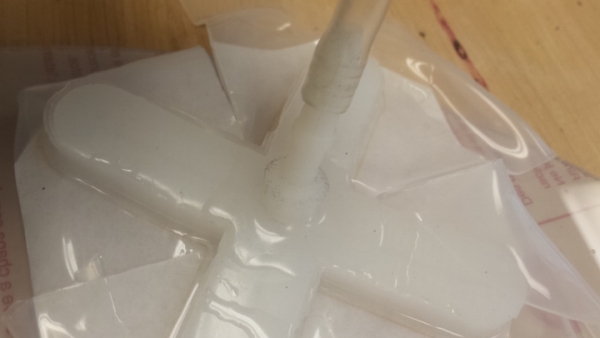
First, we used an Instructable by Ben Finio for a PneuNet gripper. We made a mold made of ecoflex 30 (combo of components A and B) with an air cavity inside it. The mold itself had the shape of a square cross with semi-circular tips. We made 3-5 of these molds but eventually, all failed or malfunctioned because of one or more of the following reasons: Only one of the grabber’s arms inflated, air bubbles formed in the mold, and/or the appearance of rips and tears on the edges and corners of the mold. Eventually, we decided to take on a new design from Harrison_89 from Instructables for a Fiber Reinforced design. We opted to make a grabber with only 3 arms but slightly larger and stronger. Previously, we made the mold cast using a 3D printer but this time, we made it out of cardboard. Then, we made a second, thinner mold which would serve as the base of the grabber. Once we attached the two molds and covered it with curling ribbon, it worked but not as effectively as we would have liked. In addition, a single leak appeared which complicated things. Eventually, we used our final batches of ecoflex and with all our care and passion, created the perfect 4-arm gripper which worked repeatedly. Although all the arms still did not inflate at the same time, the gripper was successful in lifting objects less than 3/2 pounds. The addition of sticky tape and magnets further amplified our successes.
We also needed to find a way to attach the gripper to the PVC pipe arm. Most glues and tapes do not stick to ecoflex, so we needed a mechanical fastening. We decided to strap down the gripper with tape attached to the PVC arm, and this worked reasonable well and gave us a mounting point for the magnets.
However, we also wanted some more support laterally, so we wanted to attach an ecoflex plug to the end of the gripper that would snugly fit inside the PVC arm. This also helped hold the barbed connector to supply air to the gripper.
 |
We found that we could push the barbed connectors though a pinhole in the ecoflex to make a secure barbed connection to ecoflex with our 1/4 inch barbs. This would cause the ecoflex to expand.
To design our connecting plugs, first we assumed that ecoflex was incomprehensible and kept constant volume. Then we took the total volume of the plug and subtracted out the volume of the barb. Finally, we used this volume to find the radius of a cylinder with that volume and the correct height of the plug. We 3d printed a mold for this and it worked out well.
Strengths and Weaknesses, and Improvements
In conclusion, we would call our project a general success since we accomplished our initial goal while discovering some new methods along the way. Although we did endure quite a few setbacks and made some changes to the original design, we were successful. Some of the improvements we added to our original design were: sticky tape (originally intended to secure the arms but was also good at picking up light objects), magnets underneath the tape (for picking up metallic objects) and moving them from the edges to the middle, and using paper towels instead of regular paper for the non-stretchable layer of the gripper (much better for absorbing the ecoflex). We also found out that leftover ecoflex made for very useful can-openers. If a hole is poked into the gripper, then you can use barbed connectors to hold it more securely than just using the tube. Our gripper was generally better than the store-bought one because it could pick up metallic objects with ease.
One Improvement would be durability of the gripper. While the rest of the grabber reacher was durable, the final pneunet gripper we used only lasted a month before popping. Using another gripper design such as a fiber reinforced gripper could help this problem as well as finding a more durable material.