
Cap other end
Follow the exact same capping procedure as before to cap the remaining open end of the actuator:
- Wrap Teflon tape around 1” of the actuator’s end.
- Mix 20g of Elastosil (9:1 ratio) and leave it in the cup.
- Dip the Teflon-wrapped end of the actuator into the cup, brace it so that it stays upright, and leave it to cure overnight at room temperature.
Paint the newly capped end with silicone glue to reinforce it. Let it cure.
Attach air source and actuate
The attachment method depends on the air source you use. If the air source has a threaded output, simply use threaded adapters to connect it to the #10-32 threaded vented screw. Depending on the air source's thread size and type (female/male), you can use female x male pipe adapters or coupling nuts. If the air source's thread is male and also #10-32, you can use female threaded standoffs, which are generally cheaper than coupling nuts and have more options available - just make sure the standoffs you select are fully threaded.
If the air source output is tubing, use threaded barbed connectors. Insert a tubing-to-male threaded pipe adapter into the air source, and connect it to the vented screw using a coupling nut/standoff.
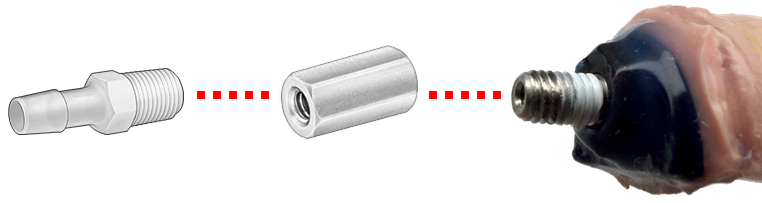
A simpler but more expensive option is a tube-to-female threaded pipe adapter, attached to the vented screw and the barbed end inserted into the air source's tubing.
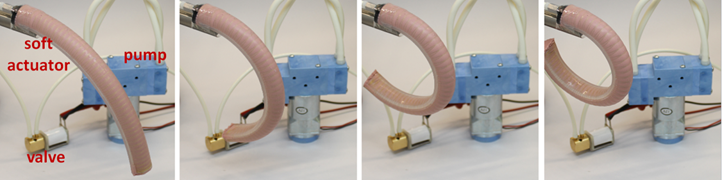
Be careful not to over-inflate the actuator, as it may spring a leak or burst. These actuators can typically be pressurized up to 40-50 psi.
If the connection to the air source is leaking, you can wrap the threaded sections of the connector components 1-2 times with PTFE (Teflon) thread sealing tape before screwing them together. If the leak is in the actuator body itself, patch the leaking area with silicone adhesive.