Troubleshooting
There were many troubleshooting processes while deciding on the final design. This section will introduce major design issues and overall strength and weakness of the final version.
1. Two layers of conductive material
In the initial design, the hand robot had two thin layers for the conductive material, instead of one. Each layer consisted two different parts of the circuit, one that will be connected to the positive terminal and another that will be connected to the negative terminal of LEDs.
Below images show how the two thin layers are combined.
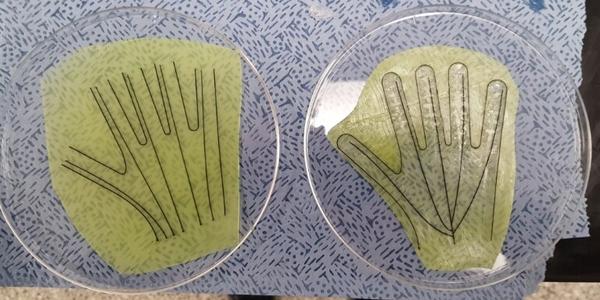
We made two thin layers, each with conductive material of different layouts embedded into it.
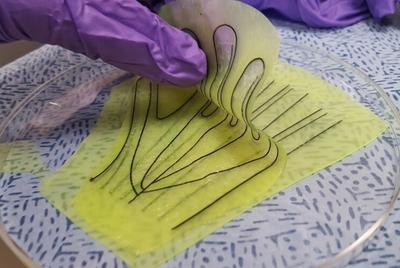
The two layers are integrated into one layer by pasting one to another using adhesive material made using DOW CORNING® SE 1700.
The final shape of the two layers integrated into one layer.
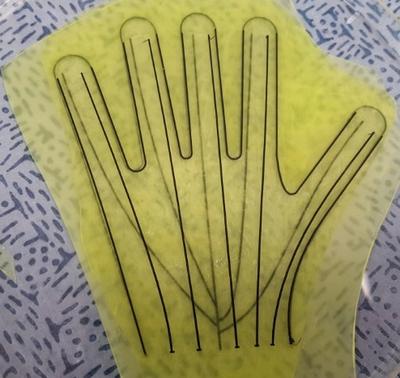
However, we soon figured out that we needed only one layer if we changed the circuit. Having only just one layer for the conductive material saved time because it meant we only needed one 3D printing process, and did not have to make an adhesive material to combine the two layers into one. Therefore, in the final version we only made one layer for the conductive material which is shown as following.
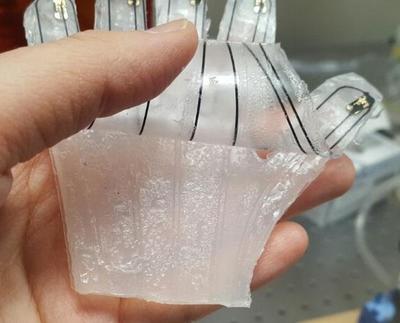
Final one layer with different circuit.
2. Integration of layers
A tricky problem our team had to overcome was integrating the two layers described in section 2)Design - 1.Overall Layers, which are 1. main thick body and 2. thin layer containing 3D printed conductive material and LEDs.
We first tried pasting the thin layer onto the thick body by using DOW CORNING® SE 1700.
Below are images showing the process.
Process of pasting the adhesive material made from DOW CORNING® SE 1700 onto the thin layer.
Process of pasting the thin layers onto the main body.
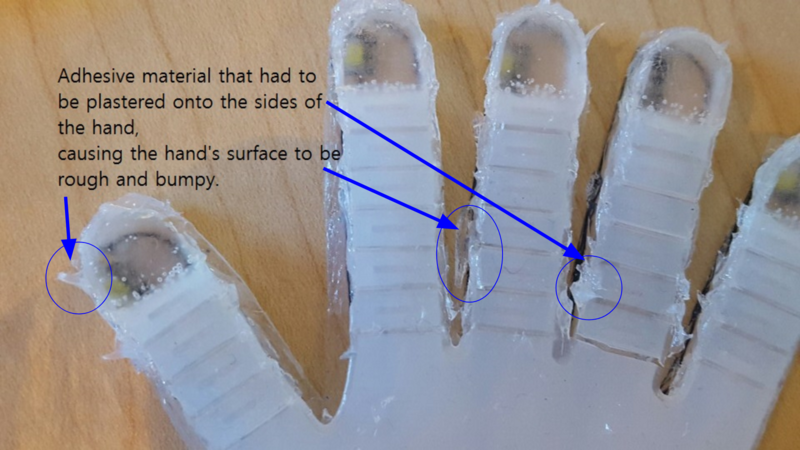
Adhesive material mainly being plastered in the sides, in order to prevent air escaping from channels.
However, it was soon found out that while pasting the sticky material onto the base, some air channels would get blocked easily. This was mainly due to the size of the hand. Due to the hand being very small like a child's hand, some adhesive material inevitably got smudged onto the air channel during the process.
Tearing the thin layer revealed that the adhesive material are also smudged onto the air channel.
Another problem was that the adhesive material had to be pasted all over the sides of the hand in order to firmly combine the layers, causing the hand's surface to be rough and bumpy due to remains of the adhesive material. Although this was not a major problem, it certainly was undesirable from the perspective of user interface.
To solve this problem, we decided not to paste the layers together but cured the thin layer while the main body was on top of it. The process will be described in 3) Fabrication - Step 5.
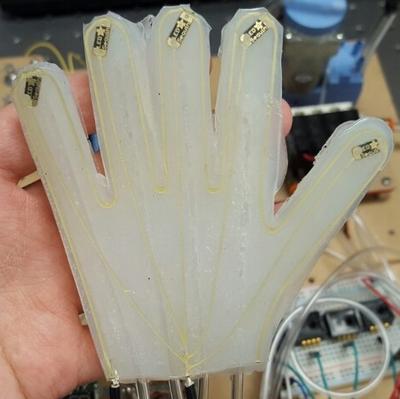
Final Version
Strength
The main strength of the soft hand robot is structural integrity and stability. Mechanical property mismatch between soft body and rigid electronic components often causes stress and strain concentration, but since the soft hand robot contains a 3D printed circuit instead of electronic wires these problems are prevented.
Another major strength of the hand robot is the interface. Due to no electric wires surrounding the robot's external surface, the overall interface also is more close to resembling a child's hand. Overcoming the issue of integrating two layers (Major Troubleshooting - 2. Integration of layers) also contributed to making a more sleek looking human's hand, because it meant no adhesive material has to be plastered onto it, which previously caused the surface to become bumpy.
Weakness
One major weakness of the soft hand robot is that the design does not support intricate movements, such as playing the piano or writing words using a pencil. In the final version, the hand robot was maximally tested whether it could grab an object and move it around.
Another major weakness is that the lighting of LEDs is not synchronized with the fingers' motion, which was another goal of this project. If we were to do another iteration, our team would have added the function of lighting up the LEDs based on fingers' movements.