The general fabrication process for SDM parts is as follows:
- Make a mold defining geometry of a subsection of your
- Position components in the mold
- Pour/inject material into mold and cure
- Repeat steps 1-3 as necessary. the subsections that have previously been cast now become components embedded in a new larger mold.
- Remove part from mold
The specifics of the process depend on the complexity of the desired final SDM part. There are 2 general methods: open-top molding and closed-top molding.
Open-top molding works for simpler geometries. Molds are made by milling pockets into wax blocks, so the part shape is limited by the fact that the inverse shape for the mold is millable. For example, the left-most shape in the below image is simple to make, the center one would require 3D CNC milling but is still possible, while the last shape cannot be made.

In addition, since the casting material is liquid and poured into the mold, the top of the part will be flat, as that is how the liquid material settles.
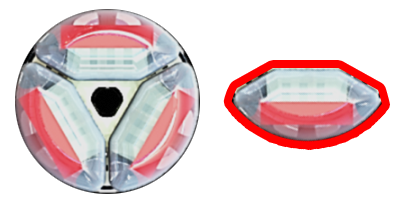
Closed-top molding allows for more complex part geometries. For example, the fingers used in this case study needed to be compact and fit within a cylindrical delivery tube. This meant that the fingers had a cross-section with undercuts on both sides, highlighted in red below, which was not achievable with open-top molding. However, a 2-part closed-top mold was able to make this geometry.

Mold design for closed-top molding is more complicated -- molds have to be 2-part so that the final result can be removed, and additional features such as injection ports and sprue holes have to be included. The molds also need to be 3-D printed as they are impossible to machine.
