Open-top molding
The open-top molding process is used to create monolithic multi-segment fingers with simple morphologies. The following is an illustrated step-by-step tutorial on using SDM to manufacture a simple 3-jointed finger using an open-top wax mold. In the diagrams below:
- RED indicates a milling/machining step,
- GREEN indicates a component placement step, and
- BLUE indicates a filling step.
Personal protective equipment (lab coat, safety glasses and latex or nitrile gloves) should be worn at all times. Filling and mixing should be performed inside a fume hood.
Download a .zip file containing the Solidworks part file as well as g-code for the 2 machining steps HERE
MINIMUM Materials
- Wax blank (for example, MSC.com)
- High-modulus plastic for stiff segment. Here we will use Task-9, a 2-part urethane plastic from Smooth-On.
- Low-modulus elastomer for soft segment. Here we will use PMC-780, a 2-part urethane rubber from Smooth-On.
- Tubing for cable routing. For example: High-Pressure PEEK Tubing, .020" ID, 1/16" OD, .021" Wall Thickness, Orange (McMaster P/N: 51085K45)
- Cable for actuating finger (several material options here, such as steel wire, Nitinol wire, or Kevlar thread)
- Any fastening materials (application-dependent). Here we will use a 10-32, 3/4" screw and a 10-32 hex nut.
- Modeling clay/crafter's clay
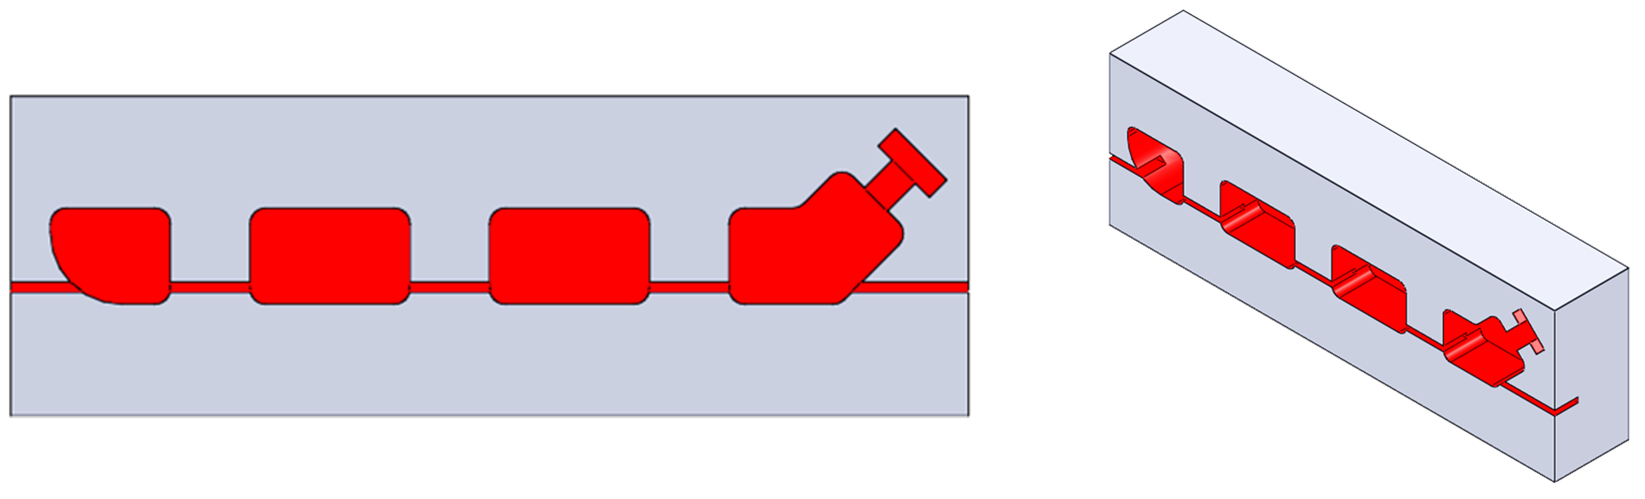
STEP 1: Milling
Starting with a wax blank, mill pockets for the stiff segments, as well as any pockets/channels to hold components that will be embedded within the stiff elastomer. Invariably this will include a cable sheath (plastic tubing), and it could also include any embedded fasteners (screws, nuts) or sensors. You should select an endmill with a diameter equal to the smallest feature you need to cut. In this case the smallest feature is the pocket for the cable-routing tubing which is 1/16" wide, so we will use a 1/16" endmill.
Recommended cutting speeds for machinable wax are (from http://www.machinablewax.com/technical.php):
- Roughing: Spindle speed 3,000 rpm at ~ 100 inches per minute
- Finishing: Spindle speed 8,000 to 10,000 rpm at ~ 40-100 inches per minute
- Depth of cut: roughly 1/2 Tool Diameter
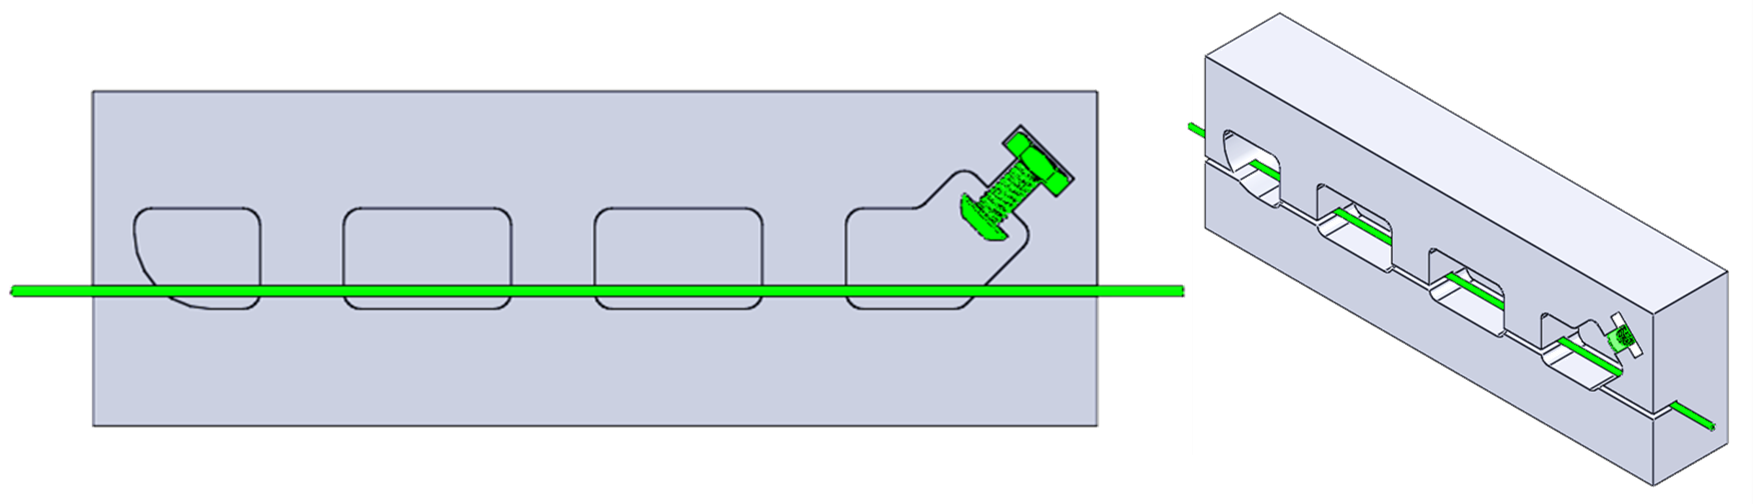
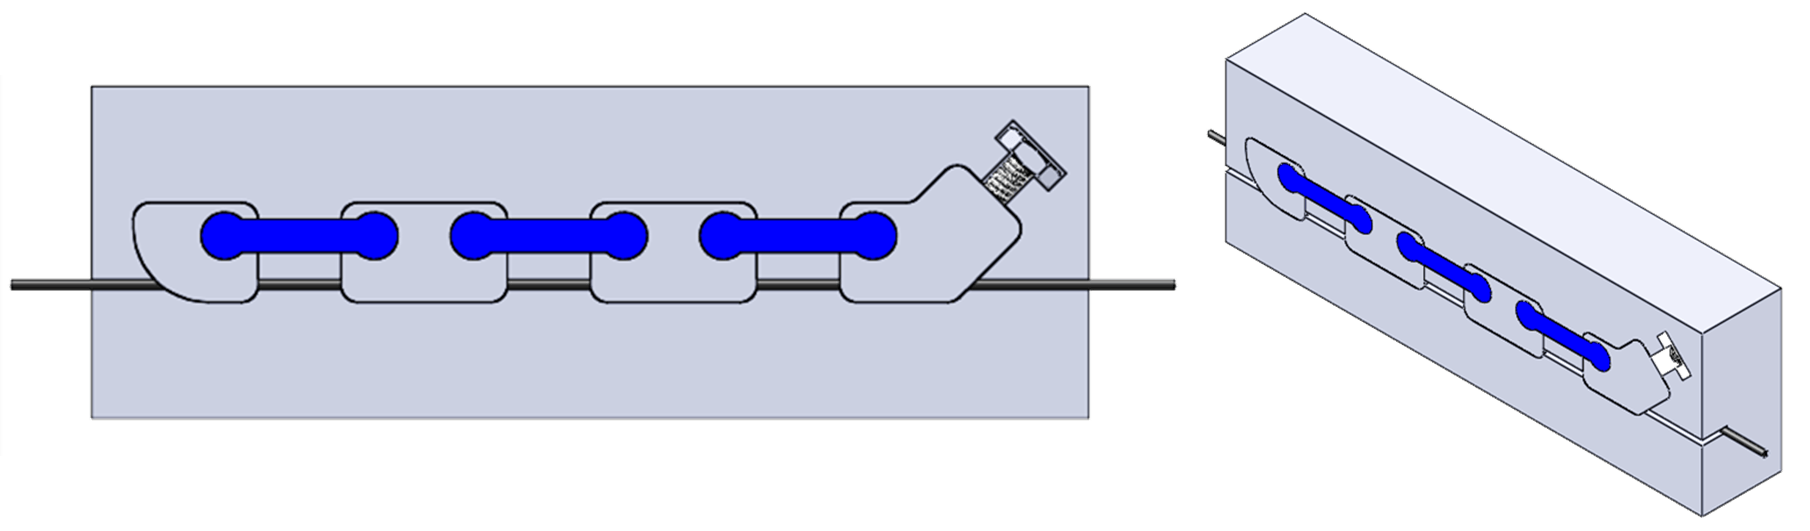
STEP 2: Placement
Place components that you wish to embed in the finger inside the mold. In the figure below, these components include 1 cable sheath, one flathead screw and 1 nut to locate the screw within the proximal-most segment. These components will be embedded within the stiff elastomer. Place crafter’s clay into any small areas where you don’t want the elastomer to fill (for example, on the portion of the screw threads that will be outside the finger, over the cable tubing in between each finger segment).
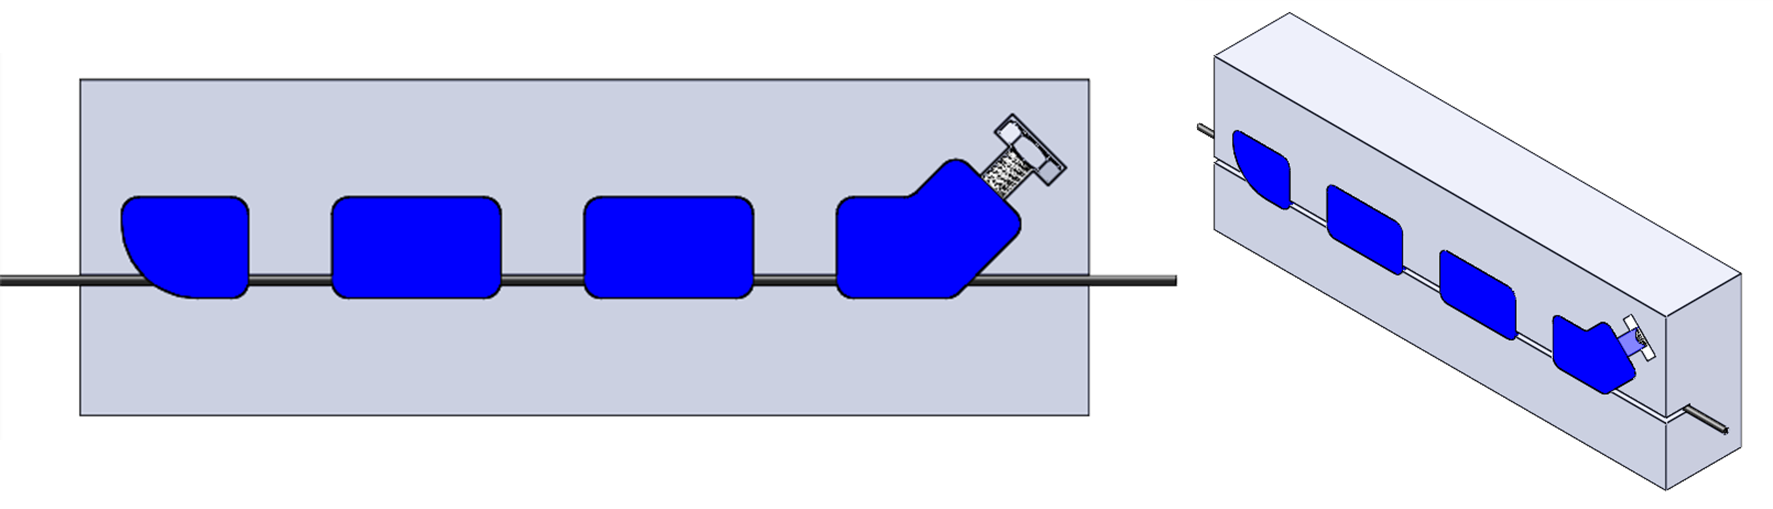
STEP 3: Filling
Thoroughly mix Task-9 parts A and B (in a 1A:1B ratio by volume). Be wary of the 'pot life' (i.e. working life) of the plastic; for Task-9 this is about 7 minutes. Slowly pour the mixture into the pockets until the mixture is flush with the surface of the mold. Place mold inside a vacuum chamber to degas the elastomer and wipe away any bubbles from the surface. Try to ensure that no elastomer ‘bleeds’ over on the top surface of the wax mold. Once sufficiently de-gassed, place entire mold in a safe place and let it cure for a couple of hours at room temperature.
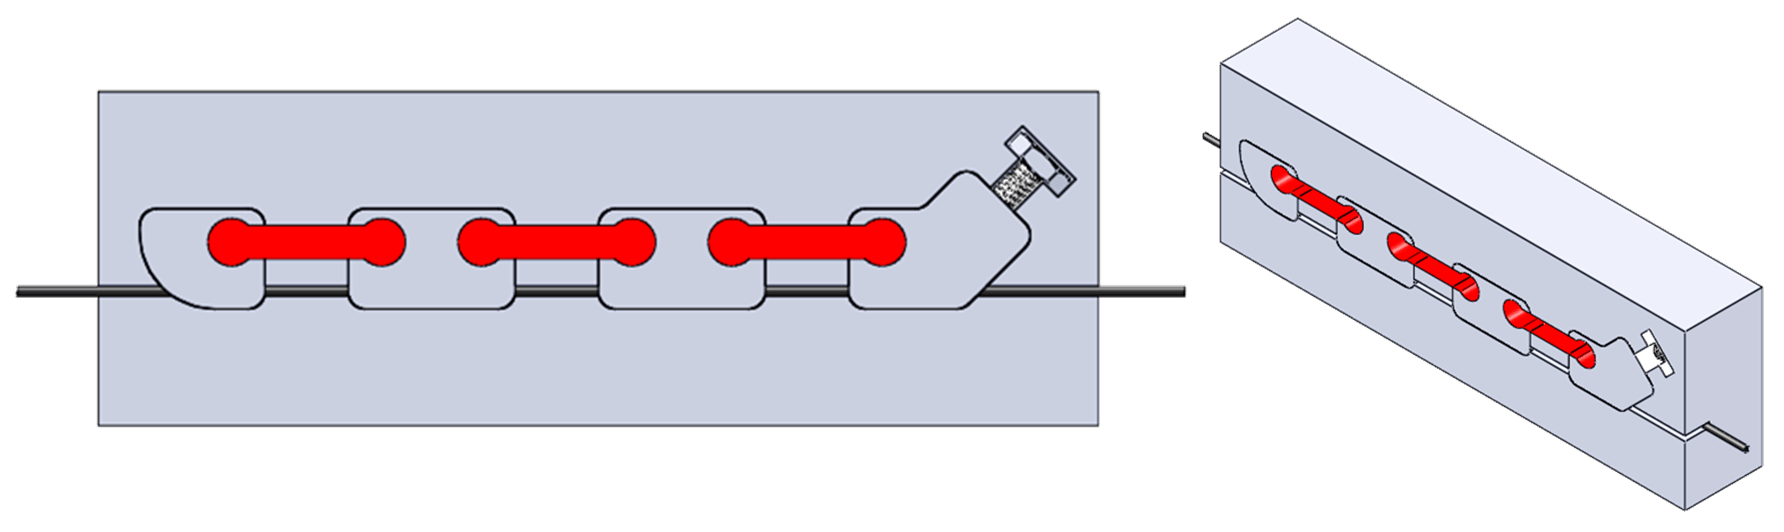
STEP 4: Milling
Machine pockets for the flexible segments. The profile shown below is a ‘dogbone’ profile to ensure positive engagement between the flexible and stiff segments (although other profiles are possible). This time, we want to use speeds and feeds appropriate for the stiffest material which is the Task-9 polymer, not the machinable wax. Recommended speeds/feeds for Shore D 85 polyurethane:
- Roughing: Spindle speed 1600 RPM at 40-60 inches per minute
- Finishing: Spindle speed 5000-10000 RPM at 100 inches per minute
- Depth of cut: roughly 1/2 Tool Diameter
STEP 5: Filling
Mix PMC-780 parts A and B (in a 2A:1B ratio by weight or by volume). Fill pockets with the mixture and follow the same procedures described in Step 3 to ensure adequate degassing and curing. Set aside for the recommended curing time.
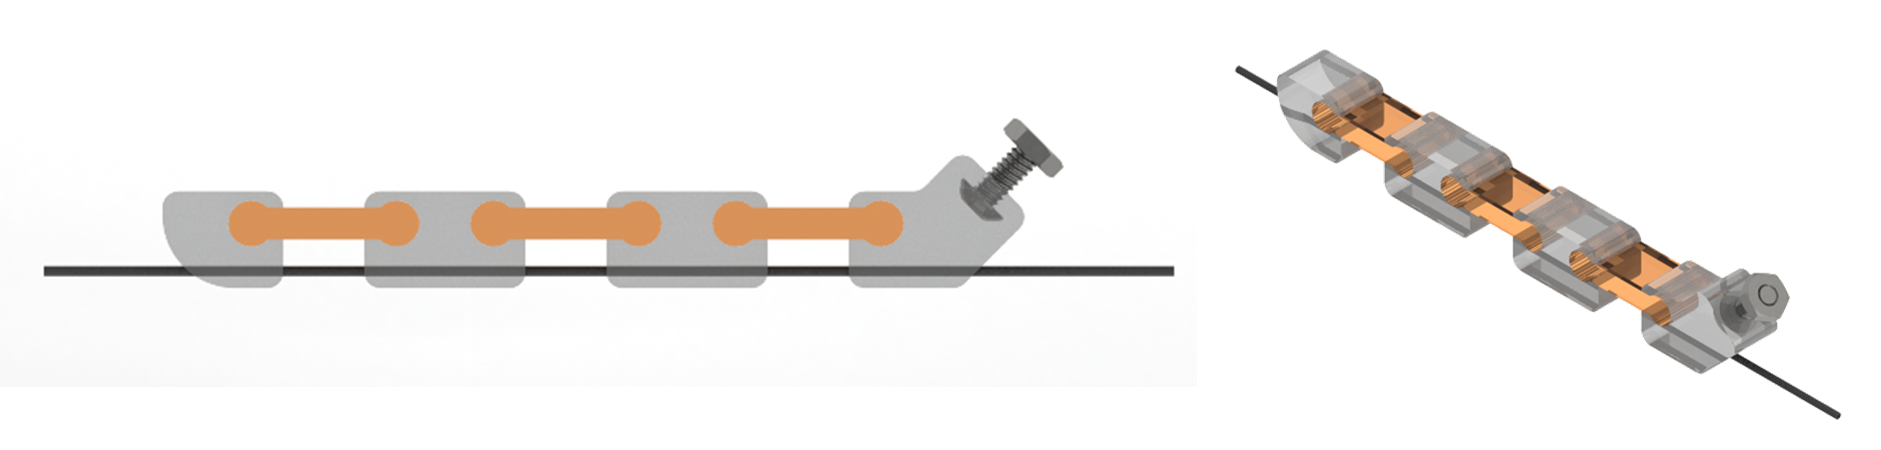
STEP 6: Release
Once fully cured, the assembly is ready to be released. The wax blank used in this lab is 1.5" thick, with the finger only occupying 0.5" of the thickness. Use a bandsaw to take down the wax blank thickness to 0.75" or so and cut out some wedges in the wax around the finger to act as stress concentrators. Use a vice to (carefully) compress the wax mold and break it off around the finger, ensuring that you minimize the amount of torsion being placed on the flexible joints as they can tear. Once the finger is released, trim the excess non-embedded portions of the cable sheath (from the ends and from in between the stiff segments). Feed the cable through each joint and tie off at the end. The finger is complete!
Bibliography
Odhner et al. (in press) “A compliant, underactuated hand for robust manipulation”
Gafford et al. (2014) “Shape Deposition Manufacturing of a Soft, Atraumatic, Deployable Surgical Grasper”
Dollar and Howe (2010) “The highly adaptive SDM hand: Design and performance evaluation”
Dollar and Howe (2006) “A robust compliant grasper via shape deposition manufacturing”
Binnard and Cutkosky (2000) “Design by Composition for Layered Manufacturing”
Contributors
Joshua Gafford