Step 4 - Fitting in the Box
Step 1

1. Use the STL files we provide to 3D print the three main components of the module box.
2. Depending on the resolution of your 3D printer, you might need to file the sides of the motor holder piece if it does not slide easily through its section on the container box wall.
Step 2

1. Connect the LiPo battery to the molex connector in your circuit.
2. Switch on the power switch to make sure the circuit is working.
Note: If you see a smoke or a smell burning, take the battery out immediately and check if your circuit is correctly done.
Step 3

1. Slide the motor through the motor holder component. Make sure the motor cannot move freely within its hole. If necessary stick pieces of paper to hold the motor in place.
2. Use a 1mm Allen Key to screw the pulley on to the motor shaft.
Step 4

1. Place the battery into the container box.
2. Slide the power switch through its dedicated hole on the back side of the container box.
Step 5

1. Place the tendon wire through the hole on the side of the container box. Avoid tangling.
2. Make sure the wires connecting to the battery are flat on the battery surface to make space.
Step 6

1. Place the motor holder on the designated slides on the container box.
2. Make sure the tendon wire, circuitry and the wires can be pushed into the box without any tangling.
Step 7

1. Push the whole circuit along with the motor holder into the container box. The container box is large enough to contain all of these components without them poking out from the top of the box.
Step 8

1. Place the lid on the container box making sure that the extensions on the lower surface of the lid are facing the inlets on the front wall of the container box.
2. Slide the lid forward and then and push it downwards to shut the container box.
Final
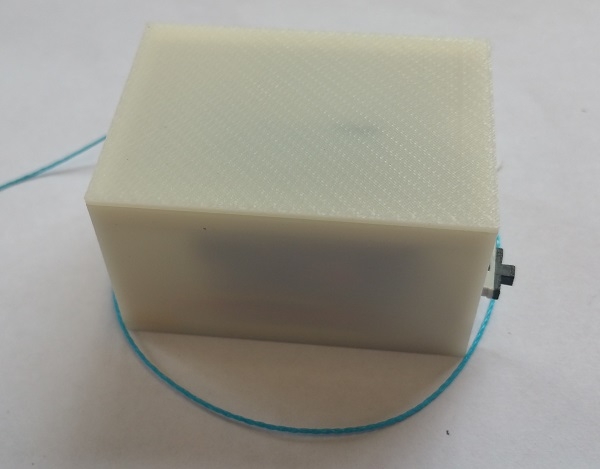
Your actuation module should look like this at the end of this tutorial !
Bibliography
Wang et al. (2012) Physical Connection and Disconnection Based on Hot Melt Adhesives
Wang et al. (2013) Large-Payload Climbing in Complex Vertical Environments Using Thermoplastic Adhesive Bonds
Nurzaman et al. (2013) Active Sensing System with In Situ Adjustable Sensor Morphology
Yu et al. (2014) Soft Robotics Education
Wang et al. (2014) Mechanics and energetics in tool manufacture and use: a synthetic approach
Contributors
Utku Çulha
Fabio Giardina