Fabrication
The Bill of Materials for this project can be found here.
Note: For both processes, either polystyrene (PS) or polyvinyl alcohol (PVA) inserts can be used. Here are links to the CAD files for the Original King Actuator and the Continuous-Pour Actuator. To view short time-lapses of the 3D-printing process, click this link.
Additionally, CAD files can be located both through the hyperlinks throughout the fabrication instructions, as well as attached at the end of the page.
King Actuator (Original)
Step (1) - 3D Print the Mold and Insert
3D-Print out the Base Mold provided using PLA. If you choose to use a dissolvable Insert, 3D-Print the provided Insert using PVA. Alternatively, you can use a craft knife to cut the shape of the insert out of polystyrene foam.

Figure 21: A 3D printed mold and a hand-cut polystyrene insert
Step (2) - Mix your Silicone
Use your scale to measure equal masses of your two-part silicone mixture in separate cups. Combine the two parts in another cup and mix for several minutes to help remove some of the air bubbles. On its own, the silicone will start to harden in about 10 minutes, so only mix as much as you will use.


Figures 22, 23, 24, and 25: Pouring out the two parts, adding part A, adding part B, and mixing the two together
Step (3) - Cut out the Fabric Inextensible Layers
Using a craft knife, cut out two rectangular sheets of fabric to the size of the outer mold. Set these aside until all of the silicone has been poured.

Figure 26: A craft knife, a mold, and two sheets of fabric cut to size
Step (4) - Pour the First Layer of Silicone
Pour out a thin layer of silicone into the bottom of the Base Mold. Stop once it reaches a depth of about ½ cm.

Figure 27: Pouring a thing layer of the silicone mixture into the mold
Step (5) - Place the Insert
Place the Insert (either PVA or polystyrene) on top of the layer of silicone. Make sure that it is not touching the walls of the Base Mold and that it does not sit higher than the mold walls.

Figure 28: Carefully laying the insert into the layer of silicone
Step (6) - Fill the Base Mold
Once the Insert is properly positioned, continue pouring the silicone until it reaches just under the rim of the Base Mold. Be careful not to overpour, as things get messy pretty quickly!


Figures 29 and 30: Filling the the mold up with silicone and slowly topping the mold off
Step (7) - Place the Fabric Inextensible Layers
Place the two layers of fabric on top of the filled silicone mold. Be sure that the fabric is centered on the mold and completely saturated with silicone. Placing the fabric down improperly could lead to inconsistencies in performance once the actuator has set.


Figures 31 and 32: Placing a layer of fabric on top of the silicone and adding a second layer to the top
Step (8) - Pour the Final Layer of Silicone and Wait
Pour a final layer of silicone on top of the fabric to ensure that it is embedded into the actuator. Failing to do this will cause the fabric, and eventually the actuator, to tear.
Wait for about two (2) hours for the silicone to set.


Figures 33, 34, and 35: The mold with all its components, smoothing out and saturating the fabric, and waiting for the silicone to set
Step (9) - Actuator Removal
Once the silicone has completely set, remove the actuator from the mold by pulling on its sides. This may require some force. Do not worry if you snap the Insert inside the actuator, as it will be dissolved momentarily. Poke a hole reaching to the depth of the Insert into the end of the actuator. This hole will act as the passage through which the Insert will be dissolved and the valve into which the pneumatic tubing will be inserted.


Figures 36 and 37: A solidified actuator in a mold and the actuator removed from the mold
Step (10) - Dissolution
If you made your actuator using a PS insert, heat up a beaker of water on a hot plate to about 200 degrees Celsius. Place your actuator inside the water and wait for it to heat up. Use a pipette to help funnel hot water into the actuator and dissolve the PS.
If you made your actuator using a polystyrene insert, use a pipette to inject small amounts of acetone at a time into the actuator. Periodically rinse the actuator with water to prevent a build-up of liquified polystyrene.


Figures 38 and 39: Preparing the insert for dissolution, the acetone dissolving the polystyrene, and the liquified polystyrene being flushed out of the actuator
Step (11) - Cleaning and Completion
Rinse out the inside of the actuator with water to remove any excess material that may have been left behind. Once your actuator is dry and clean, it is ready for testing!
King Actuator (Continuous-Pour)
Repeat the Preparatory Steps (1) - (3) of the Original King Actuator, but instead using the Continuous-Pour Base Mold and Insert.
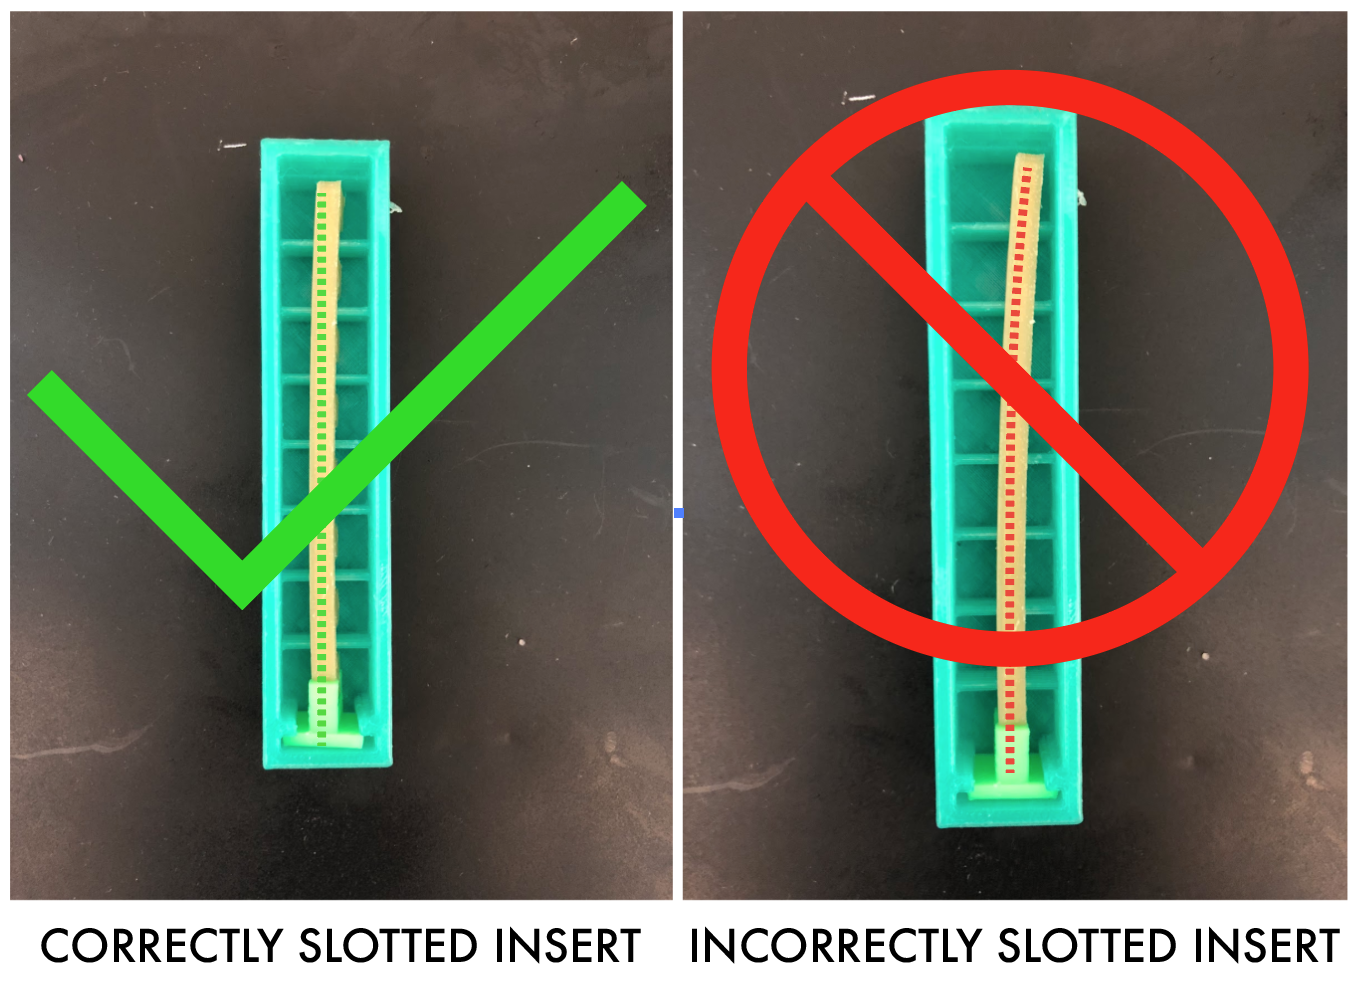
Step (4) - Prepare your Insert
Put the Insert into the claw and slot it into the Base Mold. Be sure that the Insert is straight and parallel to the walls of the Base.
Step (5) - Pour the Silicone and place the Inextensible Layer
Pour the silicone up to the brim of the Base Mold. Then place the fabric inextensible layers, and pour another thin layer of silicone. Wait about two (2) hours for the silicone to set.


Figures 40, 41, and 42: Filling a mold with silicone, layering sheets fabric on top of the mold, and allowing the silicone to set
Step (6) - Remove the Actuator
Once the silicone has set completely, pull the actuator out of the base mold. The claw should become separated from the actuator, leaving behind a rectangular valve.


Figures 43 and 44: Two cured actuators and the actuators removed from their molds
Step (7) - Dissolution
Heat up a beaker of water on a hot plate to approximately 200 degrees Celsius. Place the actuator into the beaker into the water and wait for it to heat up. The valve on the end of the actuator provides an easy passage through which hot water can travel. You can use a pipette to expedite the dissolution process by carefully injecting small amounts of hot water into the actuator.

Figure 45: Dissolving the PVA insert with hot water
Step (8) - Cleaning and Completion
Rinse out any remaining dissolved PVA and let your actuator dry. It is now ready for use!
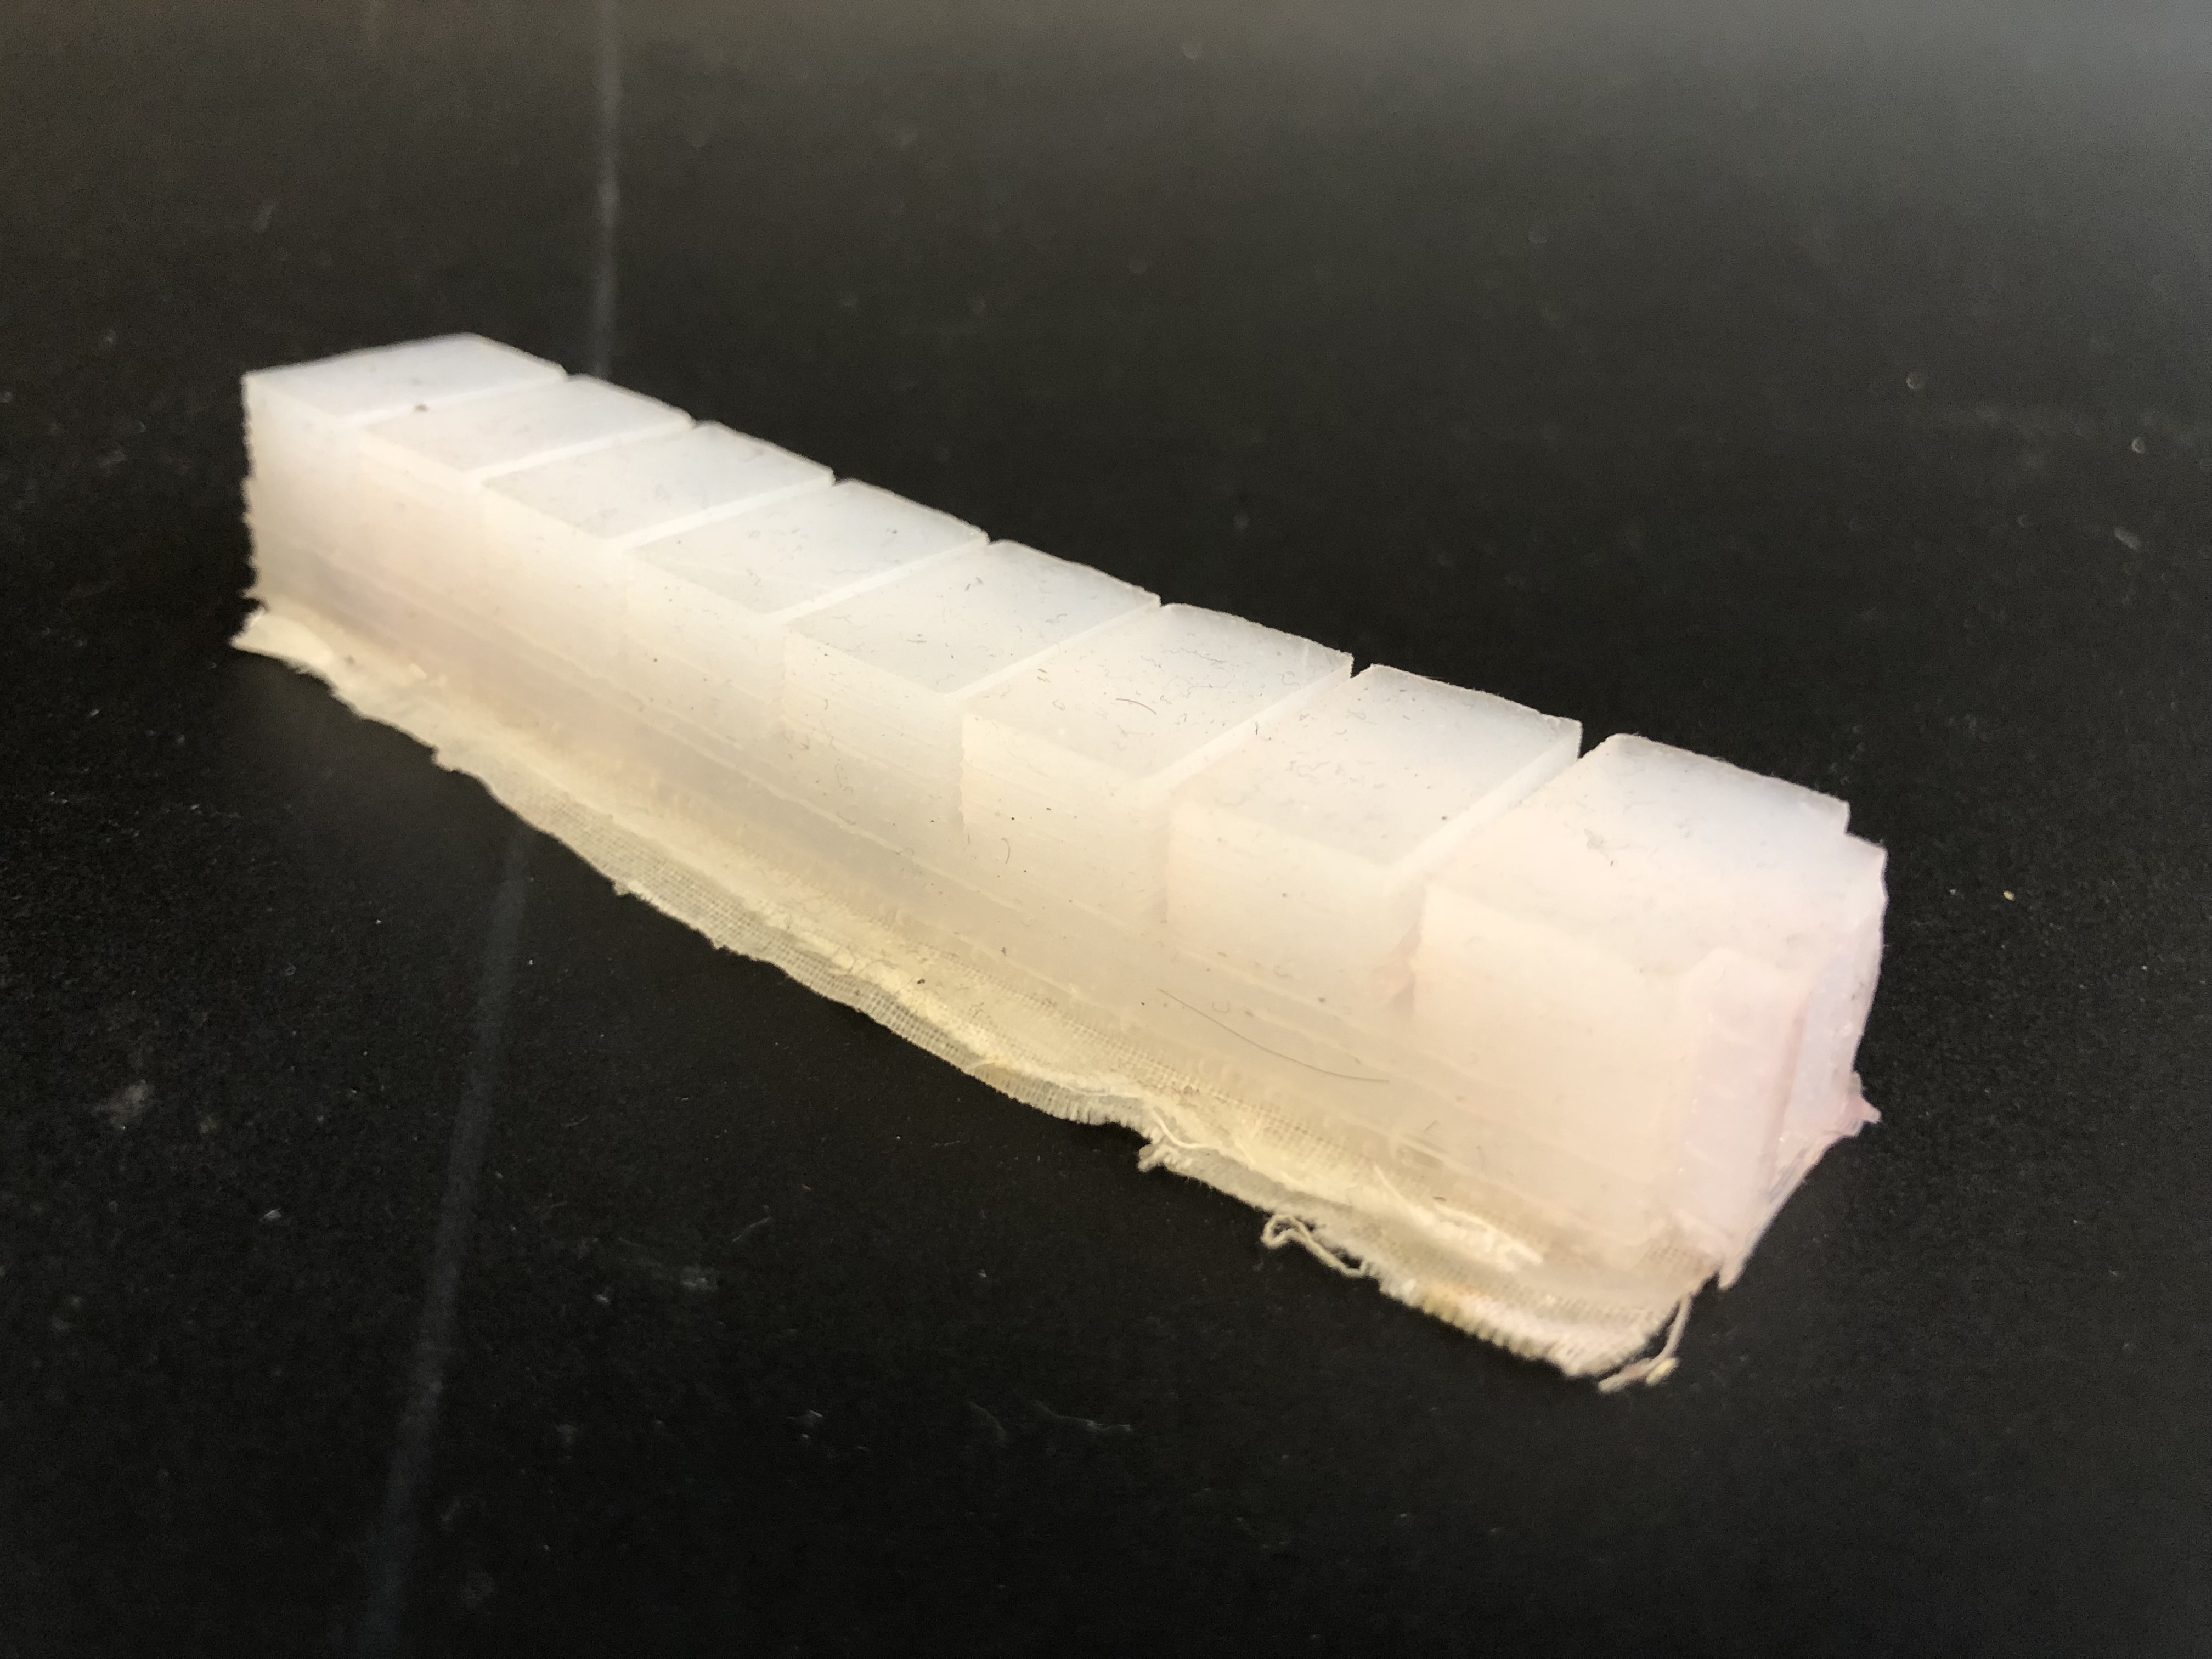
Figure 46: A completed actuator ready for use
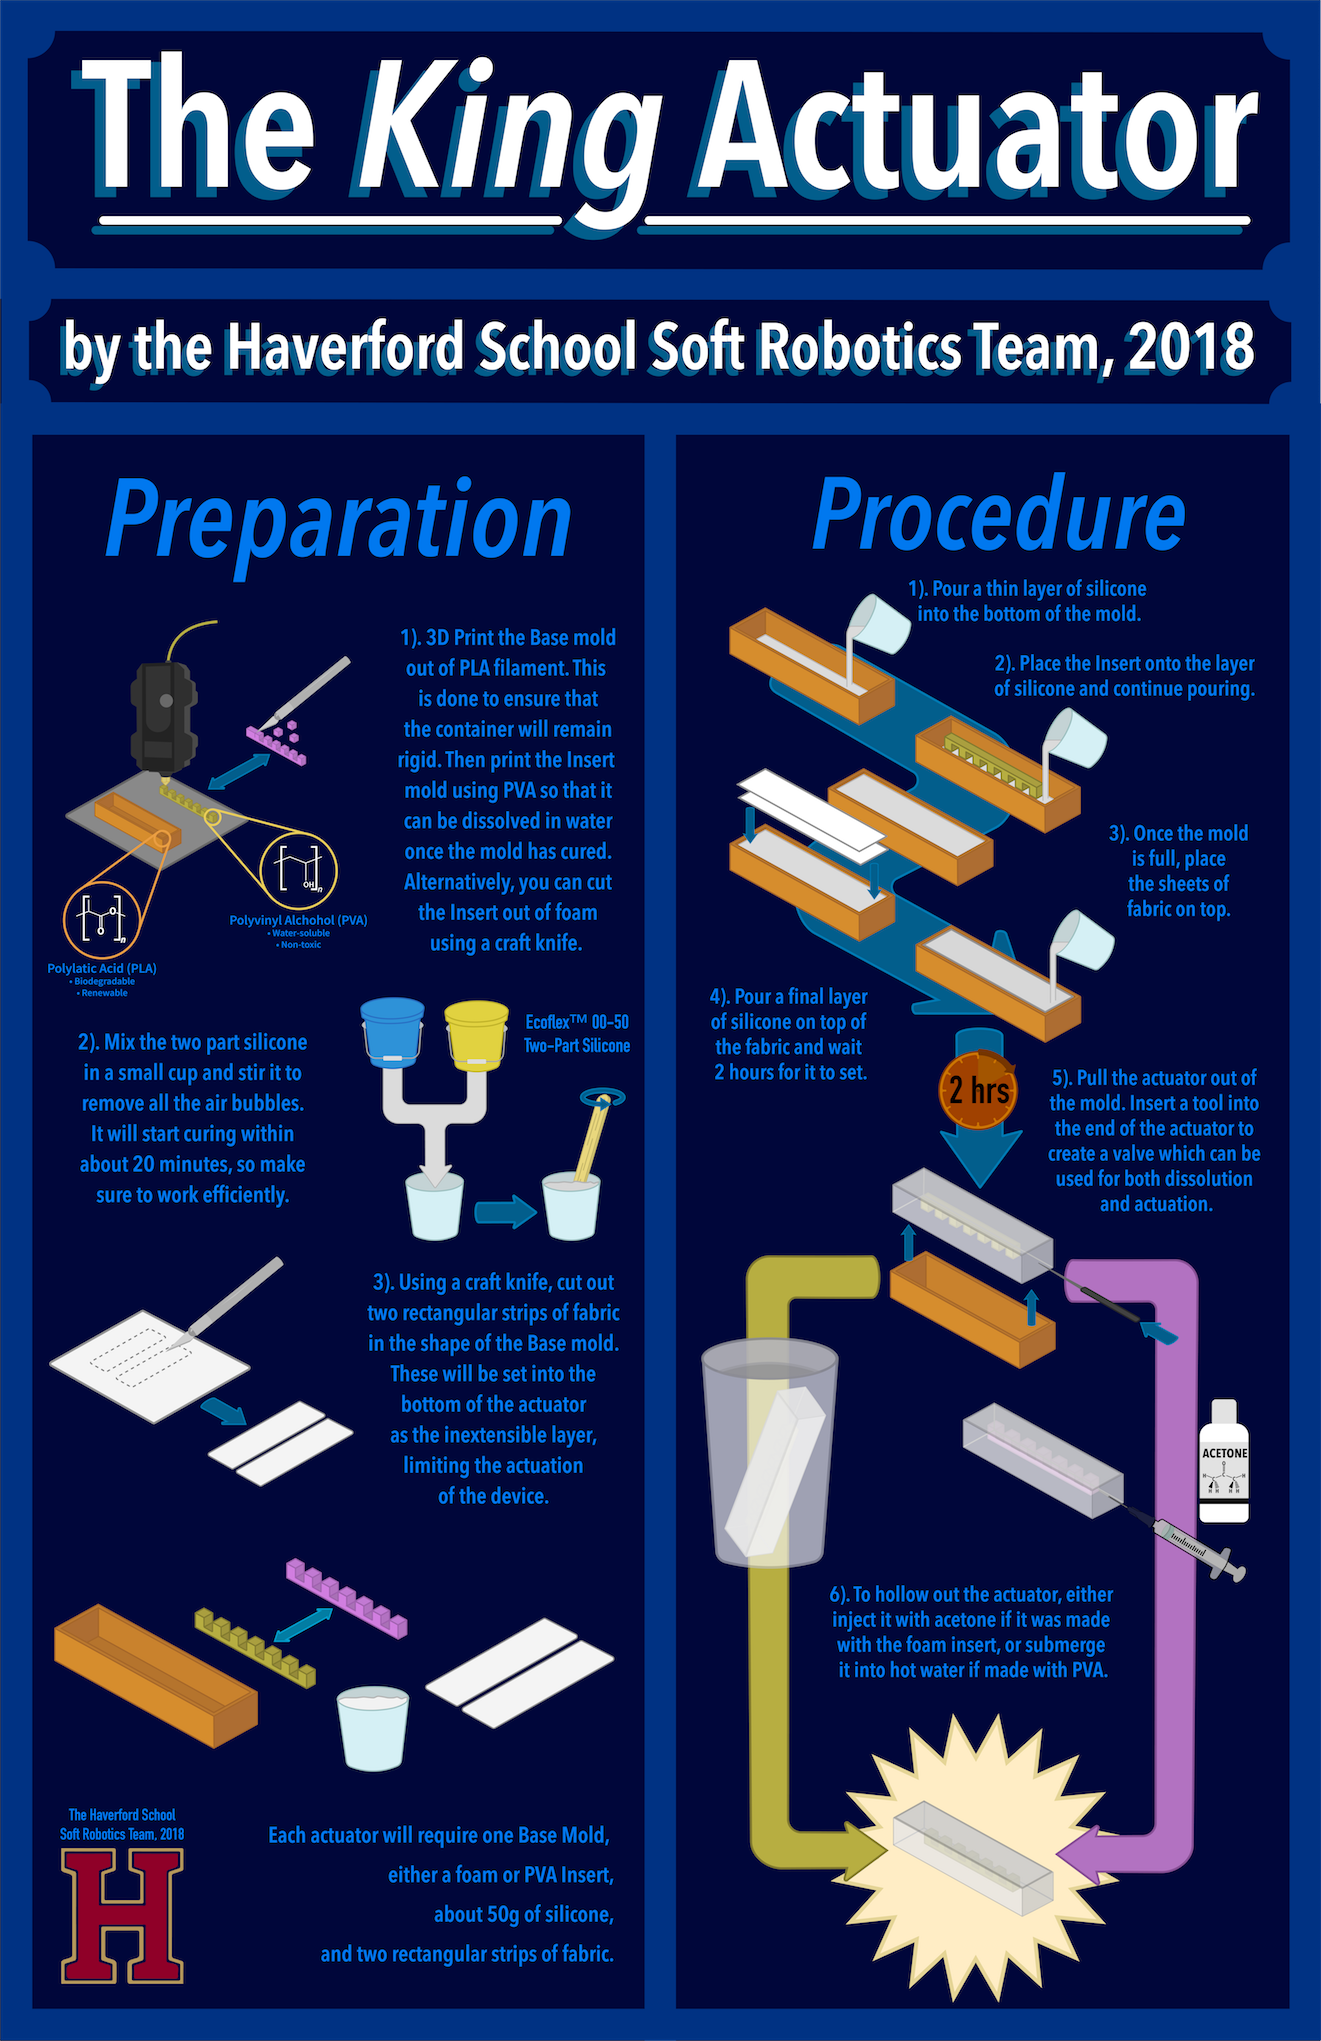
Use the following instructional inforgraphic to aid in the fabrication process: