Make thread grooves
Draw helix path
The thread grooves will be made using the Swept Cut feature. First, we have to make the path for the cut to follow, which is a helix. To create this helix, go to Curves > Helix and Spiral.

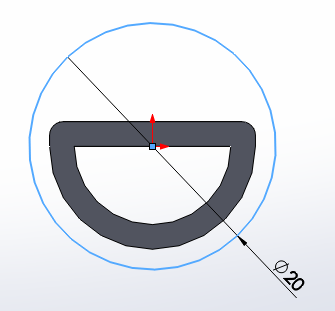
Select the bottom face of the actuator, and draw the base circle for the helix, which is 20mm in diameter and also centered at the origin.


Exit the sketch and set the helix parameters.
- Defined By: Height and Pitch
- Constant pitch
- Height: 168mm (2mm shorter than actuator length to leave room for cap)
- Pitch: 3.6mm
- Start angle: 90degrees
- Counterclockwise
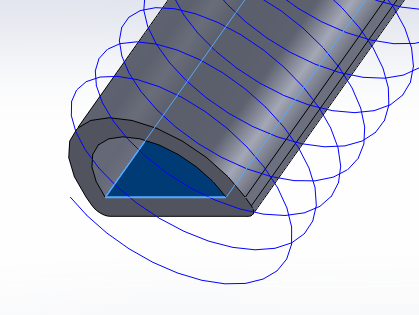
If the helix is going in the wrong direction (not surrounding the actuator), then check “Reverse Direction.” The result should look like the image on the right.


| 
|
Swept cut
[Video: Swept cut for thread grooves]

Now that we have the helix path, we can draw the profile for the swept cut. In the plane corresponding to the flat face of the actuator’s inner cavity, make a new sketch.
Draw a 0.4mm diameter circle, with its center aligned with the outer bottom edge of the actuator.


Using Swept Cut, use the sketches you just made and define them as the sweep profile and path. This will cut a series of grooves spiraling up the front of the actuator.


Mirror
[Video: Mirror for symmetrical thread wrapping]
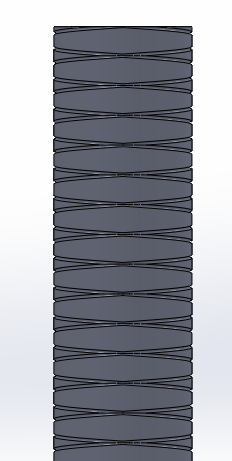
To get the other set of grooves, we can simply Mirror the swept cut we just made over the mid plane of the actuator, which corresponds to the Right Plane in this tutorial.


The result should look like this:

Bibliography
Galloway et al. (2013) Mechanically programmable bend radius for fiber-reinforced soft actuators.
Maeder-York et al. (2014) Biologically Inspired Soft Robot for Thumb Rehabilitation.
Connolly et al. (2015) Mechanical Programming of Soft Actuators by Varying Fiber Angle
Connolly et al. (2016) Automatic Design of Fiber-Reinforced Soft Actuators for Trajectory Matching
Contributors
Panagiotis Polygerinos
Kevin Galloway
Zheng Wang
Fionnuala Connolly
Johannes T B Overvelde
Harrison Young