Coiling of Artificial Muscles
Fabrication of the nylon thread-based artificial muscles requires a special apparatus, shown below. This includes a metal clamp stand, a DC power supply with alligator clip leads, a 12-volt DC motor, an oven capable of 150°C, brass weights, binder clips, Teflon nonstick spray, and thin cylindrical carbon fiber rods (no larger than 1 mm in diameter), in addition to conductive (we used silver-coated) nylon thread. Thread size can vary, with thicker thread producing muscles with greater strength; we used thread about 0.5 mm thick.
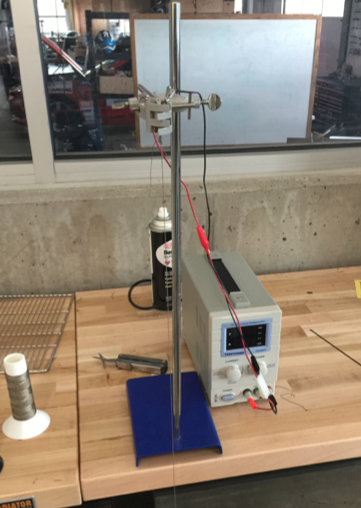
Muscle coiling apparatus
The motor, clamped at the top of the metal stand, should have a hole drilled through the side of its shaft, such that two threads can be run through and tied to secure them (see below), and a second hole drilled to a depth of about 5 mm into the end of the shaft, with sufficient diameter to insert a carbon fiber rod. At this stage, the motor’s shaft should be vertical, pointing downward, with two lengths of thread (each approximately 0.4 meters) strung through the shaft and tied twice at the end. Tie a weight (or group of weights, depending on the thread gauge; we used 135 grams) to the bottom of the lengths of thread, and let the system hang free. Using your hands or some other means, you must ensure that the weight at the bottom does not rotate during the next several steps; to accomplish this, we used wire to link the weight to one of the legs of the table without fully restraining vertical motion.
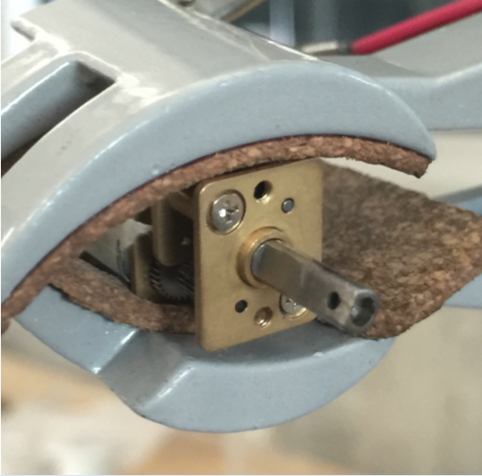
Motor for coiling apparatus clamped into stand. Holes have been drilled in the end and side.
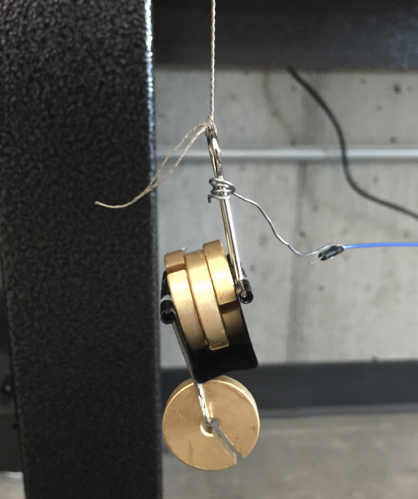
Weights tied to end of thread for coiling
Preheat the oven to 150°C and carefully coat two 15 cm lengths of carbon fiber rod with Teflon spray (important for facilitation of muscle removal later). Ensure that the power supply is set to provide 7 V, direct current. With the power supply off, attach the leads to the motor and then turn the power supply on, causing the motor to spin. To permit twist in the thread, ensure that the weight at the bottom does not rotate. Keep the motor running until coils just begin to form at the top or bottom of the thread, and then stop the motor, still making sure that the weight is not allowed to spin.
Now, rotate the clamp of the stand so that the motor's shaft is pointed just a few degrees above horizontal with the thread still hanging off the end and with the weight’s rotation prevented. Insert one of the carbon fiber rods that was Teflon coated into the end of the shaft, such that its long axis and the axis of rotation of the motor coincide. Reverse the leads to the motor and set the power supply to 1.5 V, which will cause the motor to rotate in the opposite direction. Taking care to support the carbon fiber rod with your hands, and still restraining rotation of the weight, turn the power supply on.
The rotation of the motor will cause the thread to wrap around the rod. As the rod is thin and not very strong, you must provide steady support at a point very close to where the thread hangs off of the rod to prevent a fatal bending load from the weight. In supporting the rod this way, you additionally ensure that successive wraps around the rod are very close together; however, you must make sure that the thread never wraps around itself. The image below shows this process near completion.
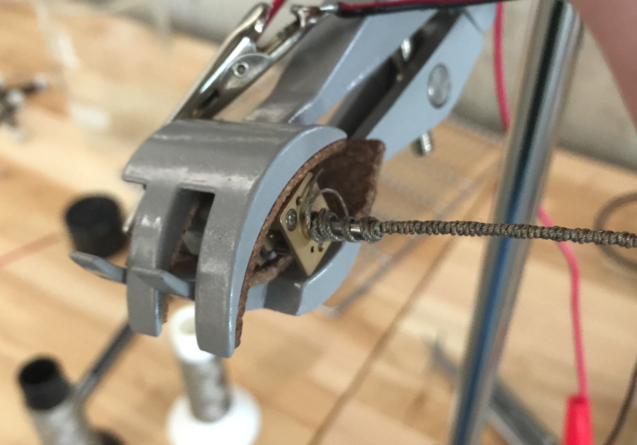
Thread wrapped several centimeters onto rod
Once wraps of thread cover a length of rod at least 1 cm greater than the length you designed for the manipulator, turn off the motor (still supporting the rod and preventing rotation of the weight). Use binder clips to pinch the thread at each end of the rod, and then cut the thread off from each end, freeing the weights and removing the rod from the motor. Repeat all of the above steps to produce a second muscle, and then place both rods with binder clips and thread still on in the oven for annealing.
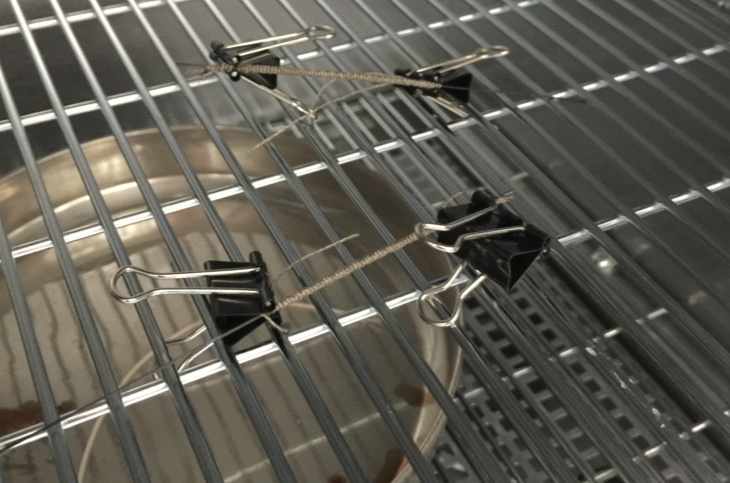
Two muscles annealing in oven
After one hour in the oven, carefully remove the rods. Allow them to cool completely, about 10 minutes, and then remove the binder clips and thread from the rod, making sure not to stretch out the coils. This may require using a pair of pliers to push the muscle off from one end. The final product of this stage is the coiled and annealed thread, which will be embedded in silicone (in the next section).
Contributors
David Trinko
Ali Abbas
Dr. Jianguo Zhao
Bibliography
F. Ilievski et al. (2011) Soft Robotics for Chemists
R. H. Baughman et al. (2014) Artificial Muscles from Fishing Line and Sewing Thread