Mold Design and Printing
Before fabrication can begin, a mold must be created. The easiest way is by designing a mold using CAD software and 3D printing it.
Due to the relative weakness of the artificial muscles that are used, the scale of this actuator must be small. For example, the final mold we designed produces a rectangular manipulator that is 35 mm in length, 8 mm in width, and 6 mm in depth. This permits the manipulator to execute noticeable bending when a voltage is applied.
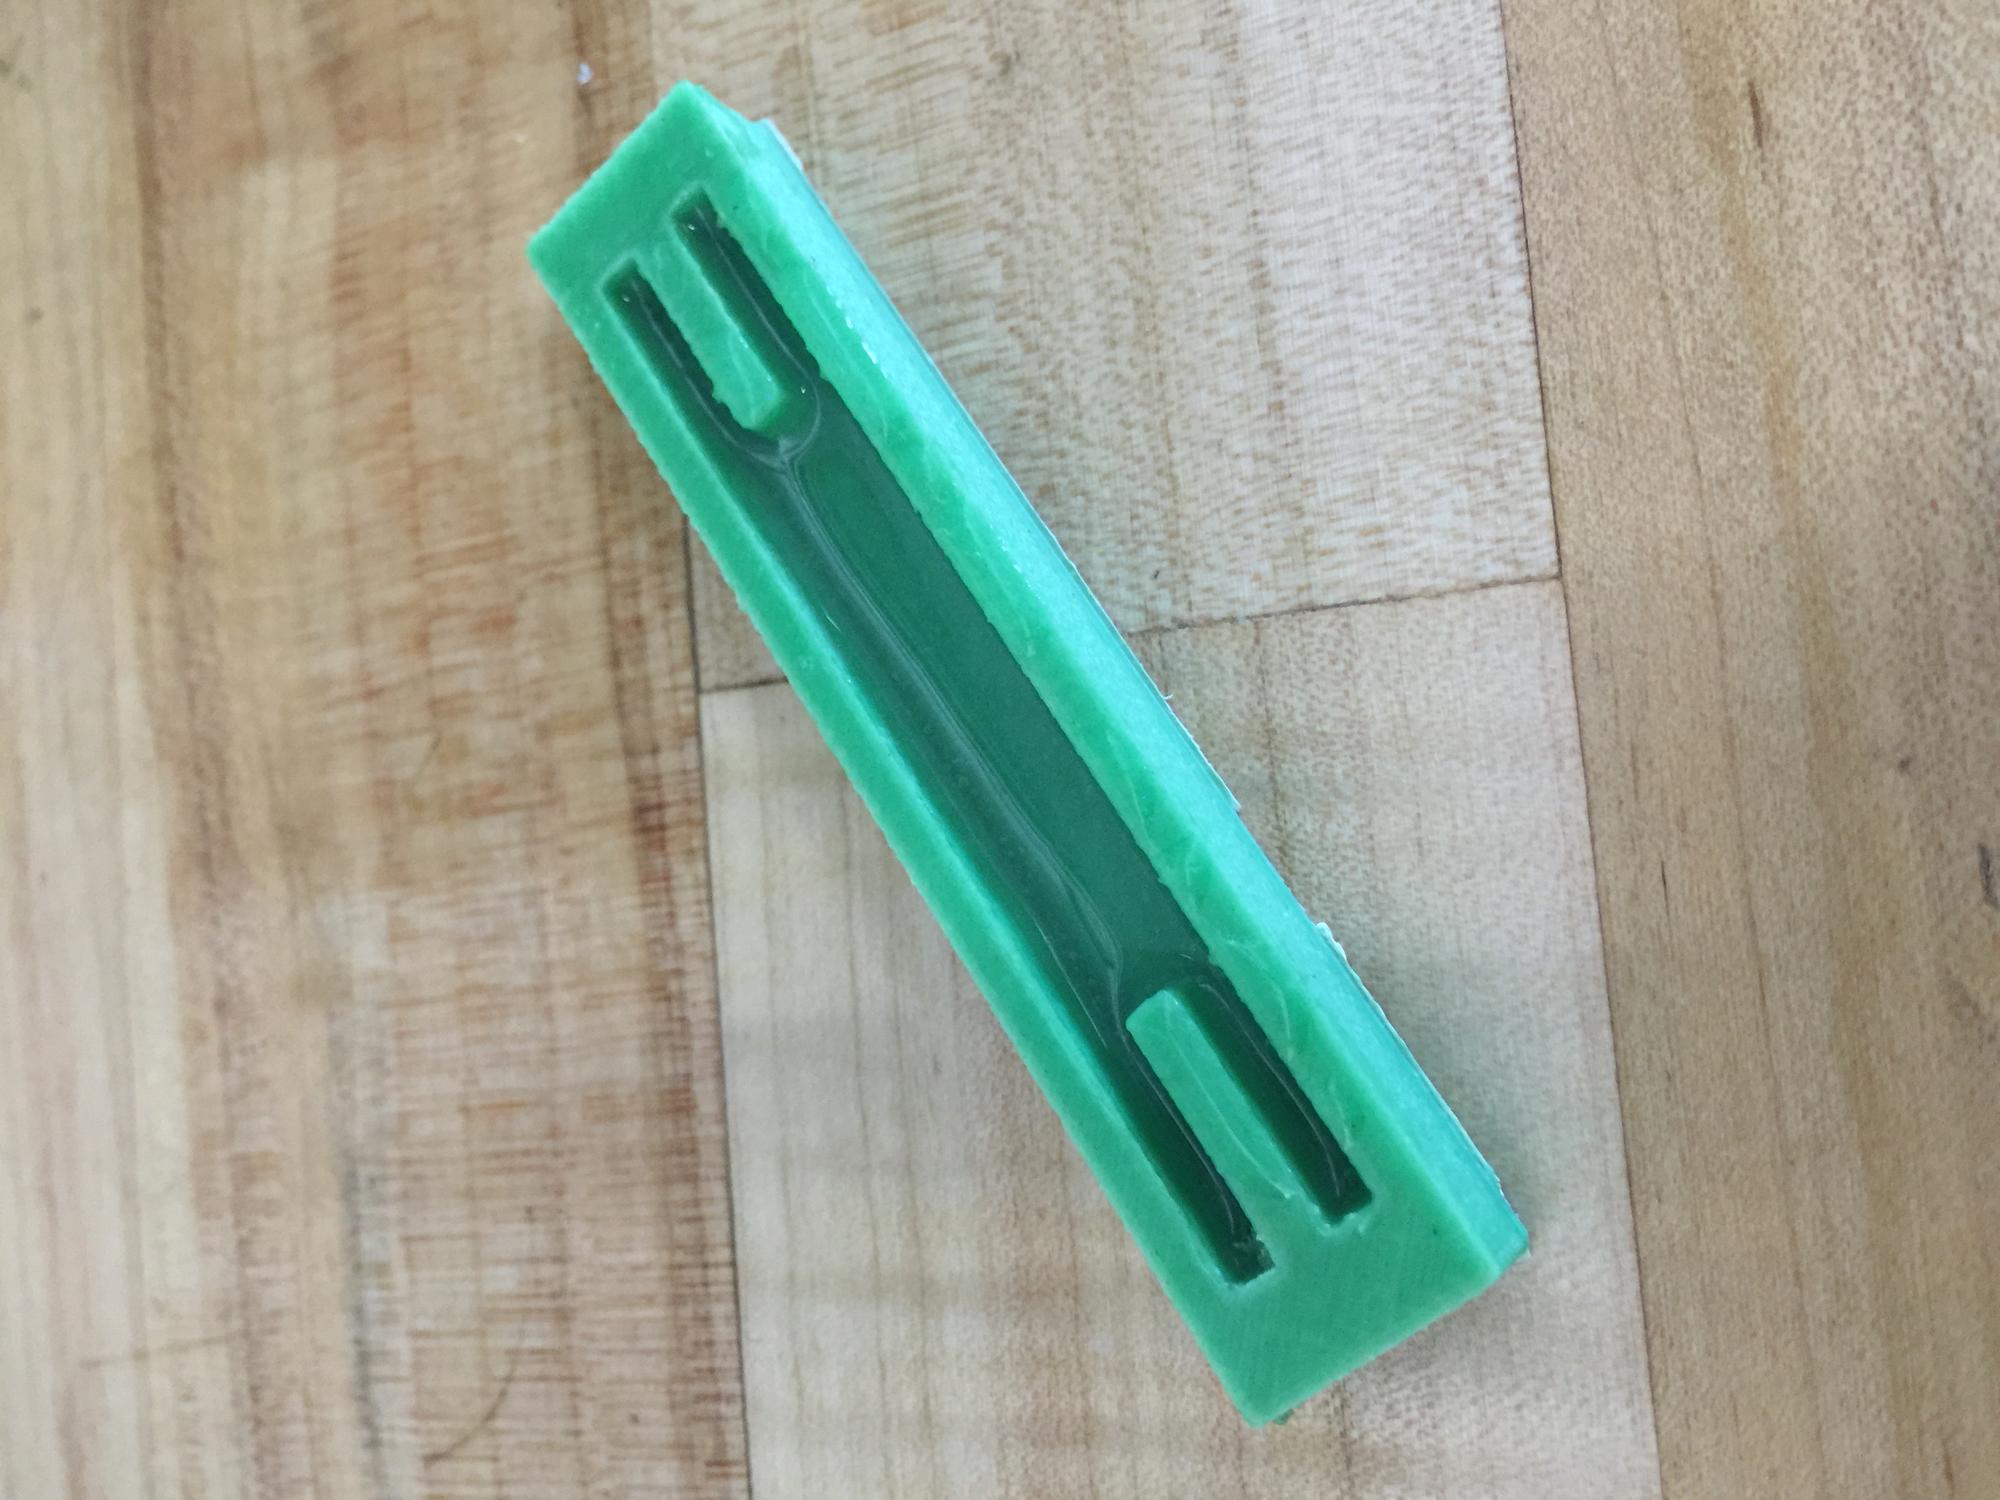
At its simplest, the mold should consist of a rectangular block with a rectangular cavity in one face that is the intended size of the manipulator (this is where the silicone is poured). One dimension of the manipulator should greatly exceed the other two, as in our design, where the length is almost four times the width.
Two narrow channels should be designed into each end of the mold, allowing the two artificial muscles to extend out of the mold during silicone pouring. The channel width should be at least 2 mm, and the channels should be symmetric about the centerline of the manipulator. To prevent leakage of silicone out the ends, the channels should be enclosed, as in the above image.
Since 3D printers and printing methods vary, we cannot give step-by-step instructions. It is important to use a printer capable of a resolution finer than the most detailed aspects of the design, and to avoid unnecessary features that will be difficult for the printer to replicate. We used ABS plastic filament and found its balance between rigidity and toughness suitable for this project.
Contributors
David Trinko
Ali Abbas
Dr. Jianguo Zhao
Bibliography
F. Ilievski et al. (2011) Soft Robotics for Chemists
R. H. Baughman et al. (2014) Artificial Muscles from Fishing Line and Sewing Thread