De-mold
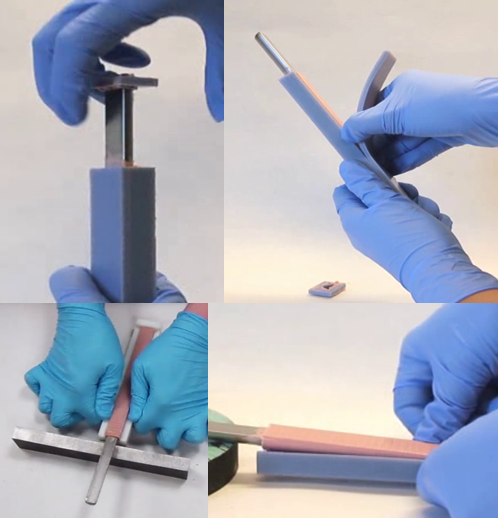
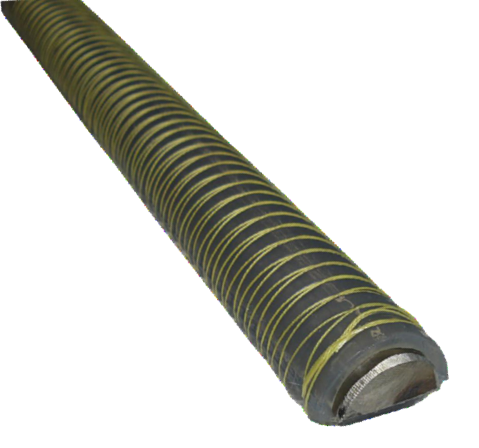
In this step we will first remove the rod, with the actuator main body attached, from the mold. Then we will attach the strain limiting layer, which causes the actuator to bend. Finally, we will wrap the actuator with Kevlar thread to limit its radial expansion.
If using the slow curing approach, remove the clamps and place the mold in the oven for about 15 minutes, until it is warm and pliable. This will make opening the mold easier, and prevent the mold from snapping.
If using the fast curing approach, remove the mold from the oven.
|
Remove the mold cap, then peel away the thin flat mold piece. You can use a screwdriver or other tool to initially lever off the parts. Prop the inner rod on an solid, elevated surface, flat side facing up. Near the top of the mold, press down on either side of the actuator until the mold pops off. Continue down the actuator until it is almost completely separated, then gently remove the actuator, taking care not to break the bottom of the mold. |

Attach strain-limiting layer
|
Cut a strip of fiberglass slightly larger than your actuator (as the fiberglass will fray). Wearing lab gloves, use your finger to spread a thin layer of silicone glue along the flat side of the actuator. |
 |
Place the strip of fiberglass on top of the layer of silicone glue and press until all parts are glued down. Trim any excess fiberglass. Variation: if you want your actuator to expand axially at some points along its length, do not attach a strain limiting layer at those points. See this page for more details. |
Wrapping
|
Place the free end of the rod in a vise and tighten to secure. At the end of the actuator closest to the vise, wrap the Kevlar thread a couple of times and tie a knot. |
|
Following the grooves, wrap in one direction until you reach the opposite end. Wrap the actuator just tight enough to stay in the groove; if it is too tight it will deform when the rod is removed. |
|
When you reach the other end of the actuator, wrap a few times, then switch into the other set of grooves and wrap back to the start. Variation: To make a twisting actuator, the thread should be wrapped in only one direction for the length of the section you want to twist. See this page for more details. |
 |
When you reach the start, wrap a couple of times and knot again (use a one-ended knot like a constrictor knot). Rub silicone glue on the two knot areas to reinforce them. Allow the silicone glue to cure – if you used SilPoxy, this should only take 15 minutes. |
