Add Bonding Features
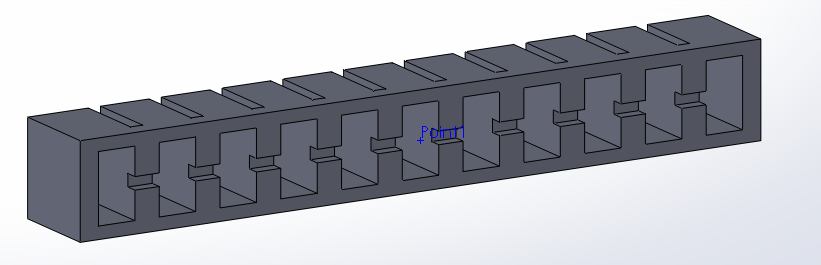
We now have the main body of our actuator. We can add some extra features to aid fabrication: when we are gluing the main body to the base layer, ridges and bumps will improve bonding between the parts by providing more surface area for the glue to adhere to. Adding some extra height to the main body also helps to prevent the glue from blocking the central air channel.
First we add a ridge around the perimeter of the bottom, using Extruded Boss/Base. On the bottom face of the actuator, draw a rectangle that encompasses all the of chambers.

Next, while this rectangle is still highlighted, use the Offset Entities tool to create another rectangle that is offset 1mm outwards. You may have to check the “Reverse” option for the offset to go the right way.

Exit the sketch and extrude the ridge 2mm.
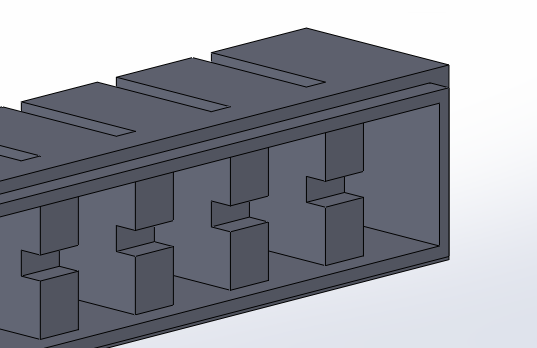
Next, we add bumps on each strut. [Video: Make bonding bumps] First we make bumps on one strut using Extrude, then we use Linear Pattern so that every strut has bumps.
On the bottom face of the actuator, select the bottom of the strut (2 separate faces because the air channel cutting through the middle), then click on Convert Entities.
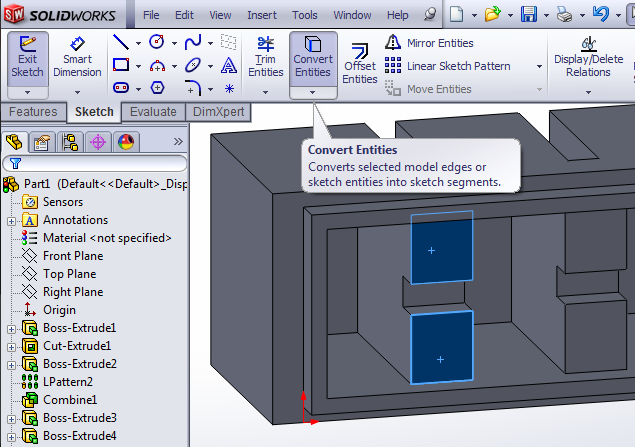
This will turn the edges of those faces into rectangles in your current sketch. Select both rectangles and mark them for construction.
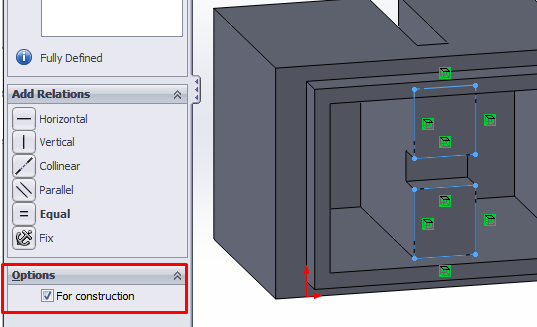
While the rectangles are highlighted, select Offset Entities again, making new rectangles that are offset 1mm inwards from the construction rectangles (you may have to select “Reverse”).
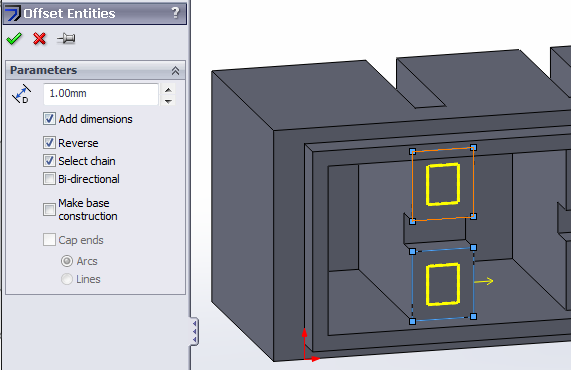
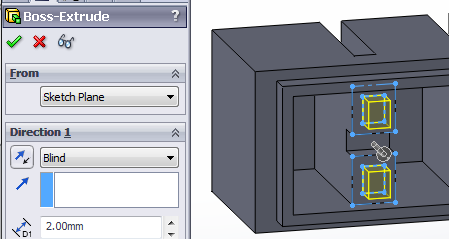
Click the checkmark to create the offset rectangles, exit the sketch, then extrude the rectangles 2mm.
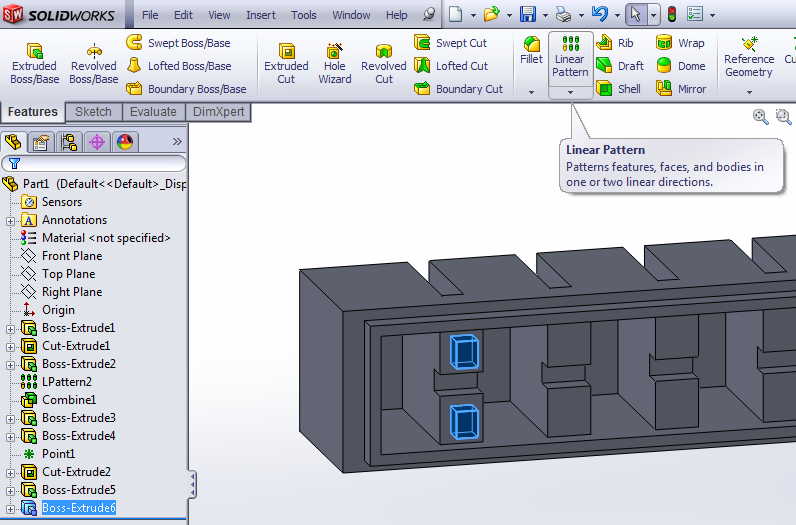
In the sidebar, select the extruded feature you just made, then click on the Linear Pattern tool.
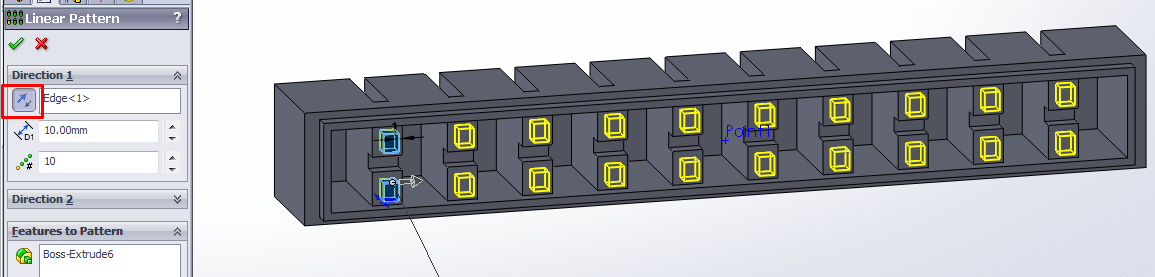
Once again, select an edge parallel to the actuator’s long axis (you may have to reverse the direction – the button highlighted in red below), and use 10mm for the pattern spacing. However, reduce the pattern number to 10, since there is 1 less strut than the total number of chambers.
Now the main body of our actuator is finished. In the next step, we will use this main body model to create our molds
Bibliography
Ilievski et al. (2011) Soft robotics for chemists.
Mosadegh et al. (2013) Pneumatic Networks for Soft Robotics that Actuate Rapidly.
Ogura et al. (2009) Micro pneumatic curling actuator: Nematode actuator.
Polygerinos et al. (2013) Towards a soft pneumatic glove for hand rehabilitation.
Shepherd et al. (2011) Multigait soft robot.
Sun et al. (2013) Characterization of silicone rubber based soft pneumatic actuators.
Contributors
Panagiotis Polygerinos
Bobak Mosadegh
Alexandre Campo