Create parts and assign materials
Import parts
[Video: Import parts and make paper surface]

The generic design of these actuators consists of two different materials; the elastomer parts and an elastomer embedded inextensible part (layer of paper) at the bottom of the actuator. This layer causes the actuator to bend as it minimizes axial expansion.
In order to make the simulation less computationally expensive, the actuator geometry is simplified by omitting certain features – i.e. the bonding ridges/bumps at the bottom the main body.
The .STEP files of the actuator geometry used in this tutorial can be downloaded here. If you would like to modify/customize the geometry, the SolidWorks part files of the simplified actuator can be downloaded here.

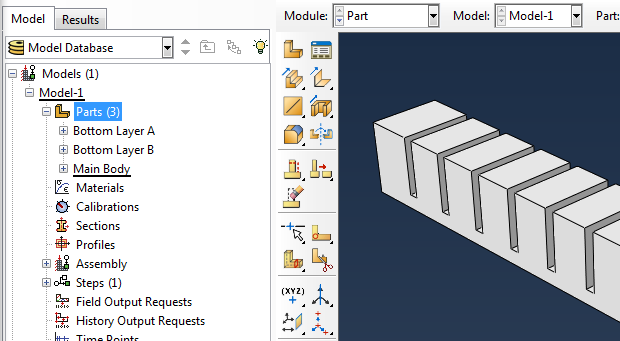
Import your CAD parts (as .STEP files) – here we have 3 parts, the Main Body plus Bottom Layers A & B. To do this, go to the model tree in the left sidebar, right-click on "Parts" and select Import. Browse to the .STEP file.

Name the part, and make sure to import it as a Solid.
Repeat with the remaining 2 parts. All the parts should now appear in the model tree.
Create a placeholder for the inextensible layer
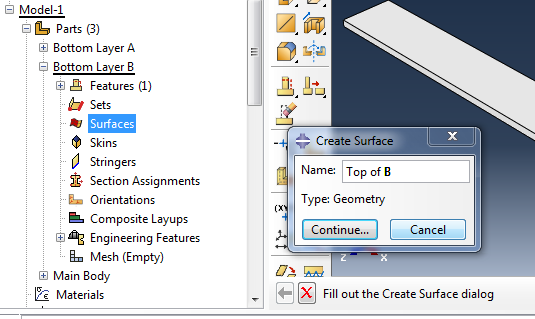
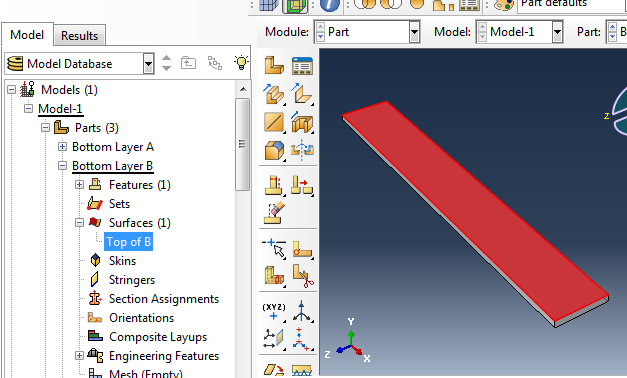
To model the piece of paper, return to the part list in the model tree and expand 'Bottom Layer B.' Double click on Surfaces and select the upper face of the part to create a surface there.

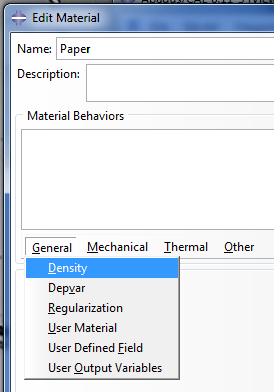
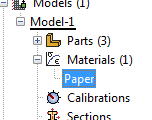
Create material: paper

Before assigning material properties, we first create the necessary materials. We need two materials: paper, and the elastomer (Elastosil). In the model tree, double click on Materials to create a new material, and name it ‘Paper.’
Set the following properties:
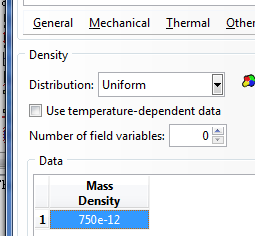
- General > Density:
- Density = 750 Kg/m³ → 750e-12 (Mg/mm³)
- Mechanical > Elasticity> Elastic:
- Young’s Modulus = 6.5 GPa → 6500 (MPa)
- Poisson’s ratio = 0.2

Paper should now appear under Materials in the model tree.
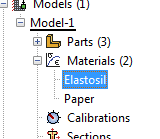
Create material: Elastosil
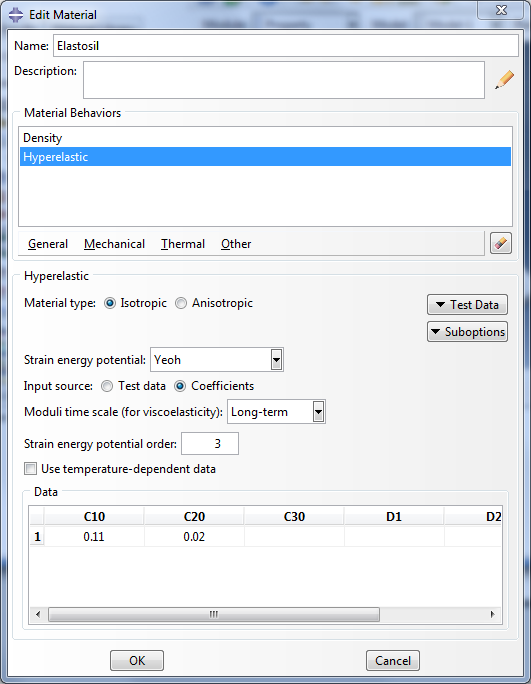
For the Elastosil, set:
- General > Density:
- Density = 1130 Kg/m³ → 1130e-12 (Mg/mm³)
- Mechanical > Elasticity > Hyperelastic:
- Strain energy potential = Yeoh
- Input source = Coefficients
- C10 = 0.11, C20 = 0.02
- Assume isotropic material type
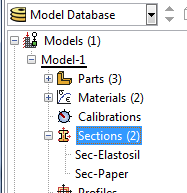
Create sections
[Video: Create and assign sections]
Double click on Sections in the model tree to create a new section. Set it to be a homogeneous solid and assign Elastosil as the material.


Create another section, a homogeneous shell with paper assigned as the material. Set the shell thickness to 0.1
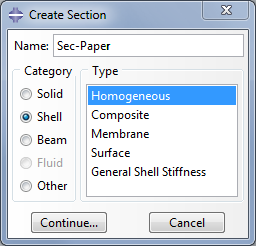

You should now have 2 sections in your model tree.
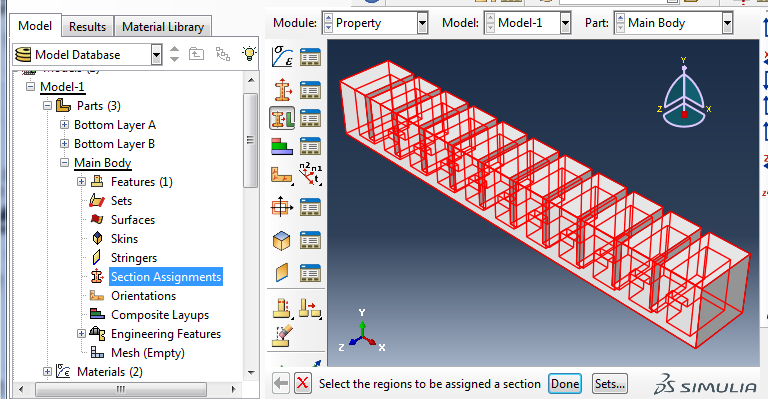
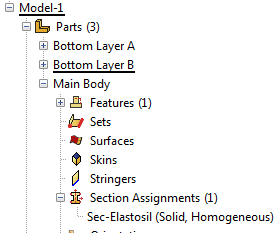
Assign sections to parts
Go back to the parts you imported and assign a section to each one. To do this, look under each part in the model tree and double click on Section Assignments. Select the entire part geometry, then assign the Elastosil section.

Bibliography
Ilievski et al. (2011) Soft robotics for chemists.
Mosadegh et al. (2013) Pneumatic Networks for Soft Robotics that Actuate Rapidly.
Ogura et al. (2009) Micro pneumatic curling actuator: Nematode actuator.
Polygerinos et al. (2013) Towards a soft pneumatic glove for hand rehabilitation.
Shepherd et al. (2011) Multigait soft robot.
Sun et al. (2013) Characterization of silicone rubber based soft pneumatic actuators.
Contributors
Panagiotis Polygerinos
Bobak Mosadegh
Alexandre Campo