Create loads
Select the inner cavity surface

[Video: Select inner cavity surface]
Before we start adding loads, we need to define the surface that the pressure load will act upon. This surface is made up of all the faces of the inner cavity of the actuator. To create this surface, expand the Merged part in the model tree and double-click on Surfaces. Name it something like “Surf-Inner Cavity.”
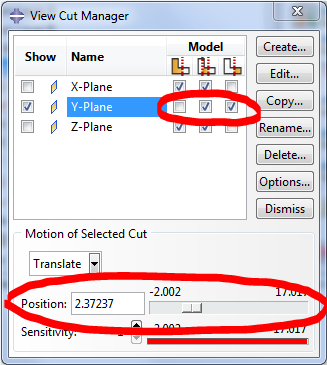
Now we have to select the faces that make up this surface. However, since the cavity is not accessible, use the Cross Section views provided from Tools > View Cut > Manager. Section using the Y-plane to expose it.


Reposition the cut until both the inner chambers and the central channel are exposed, and flip the cut so that the ceilings of the chambers are visible.


Holding down SHIFT, click to select all the available faces of the inner cavity. This includes 4 sidewalls + ceiling for each chamber and 3 faces of each channel. You will have to rotate your view at least twice to be able to select everything.

Finally, reverse the view cut and select the floor of the inner cavity. This completes the surface.

Create gravity step

In the model tree, double-click on Steps to create the first step that accounts for the gravity acting on the actuator. Select a ‘Static, General’ procedure type and in the next window turn ON the ‘Nlgeom’ option.

Set gravity load
Under the gravity step, double-click Loads and activate Gravity as the selected type for the step.
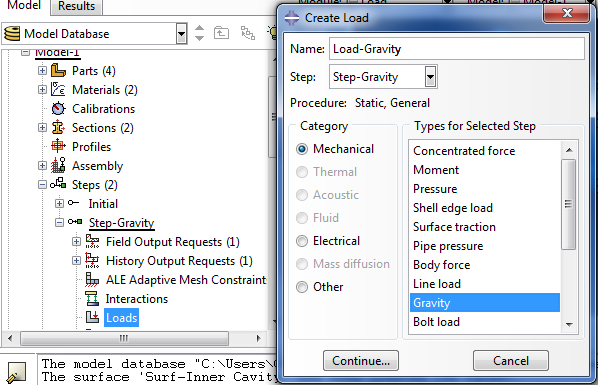

Set the gravity value, as -9810 on the Y axis/Component 2.
Set gravity load boundary conditions
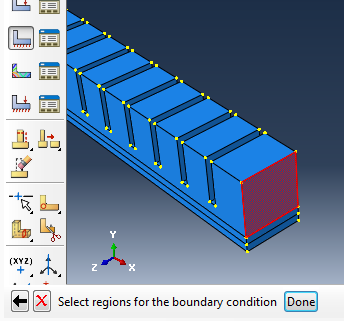
Click on BCs (boundary conditions), and select Symmetry/Antisymmetry/Encastre.

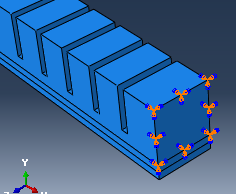
Continue and click on the face of the part that is going to be fixed. Select ‘Encastre’ to fix the surface.

Create pressure step
Create a second step by double-clicking on Step again, making it ‘Static, general’ again.
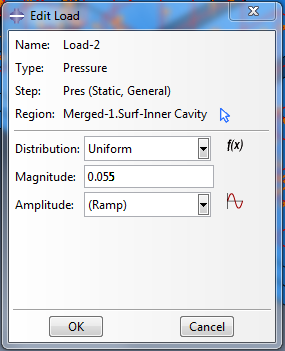
This step will have all the attributes of the previous step propagated to it and the pressure inside the cavity of the actuator will be enabled here. Within the second step, create a Pressure load.

To pick the internal cavity click the ‘Surfaces’ button at the bottom right corner. In the Region Selection window that appears, select the surface "Surf-Inner Cavity" which we created earlier.


At the next window provide the pressure value to be applied in the cavity. This PneuNet design curls fully with 8 psi, which is approximately 55 kPa. Since our units should be in MPa, we use 0.055 MPa.
Bibliography
Ilievski et al. (2011) Soft robotics for chemists.
Mosadegh et al. (2013) Pneumatic Networks for Soft Robotics that Actuate Rapidly.
Ogura et al. (2009) Micro pneumatic curling actuator: Nematode actuator.
Polygerinos et al. (2013) Towards a soft pneumatic glove for hand rehabilitation.
Shepherd et al. (2011) Multigait soft robot.
Sun et al. (2013) Characterization of silicone rubber based soft pneumatic actuators.
Contributors
Panagiotis Polygerinos
Bobak Mosadegh
Alexandre Campo